28 January 2014

wicked series - elphaba, the wicked witch of the west

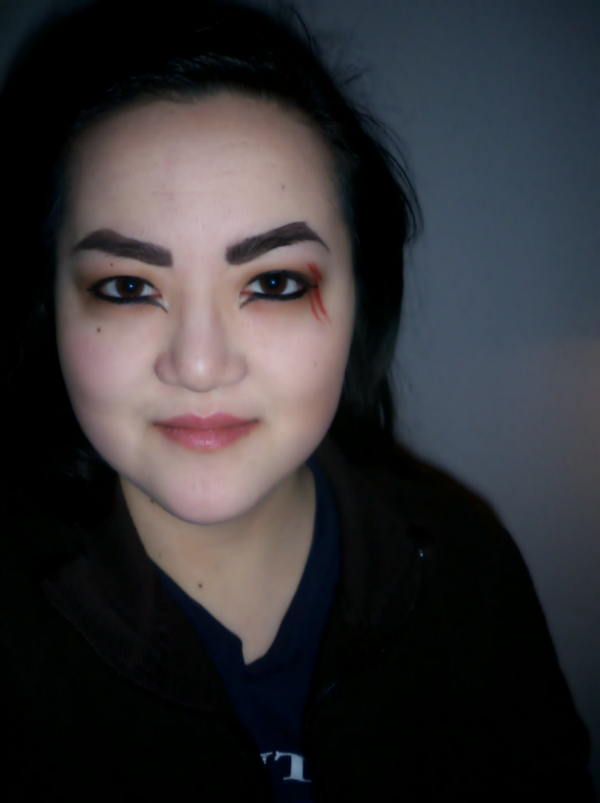
Still too cold to function... I got up earlier than usual (and by earlier, I mean I woke up at 9:30AM. I think I'm possibly turning into a bum) and still managed to get nothing done today except this makeup look and some cleaning. WELL OVERDUE CLEANING, BY THE WAY. I moved back home from university last May and I tried to clean when I was fully moved out of my apartment in August, but by then my allergies started kicking in and now it's the end of January and I totally had it coming. Chinese New Year is in two days and I'm supposed to have my room cleaned by then, but something tells me it'll only look clean from the surface just to reveal the same old mess underneath.

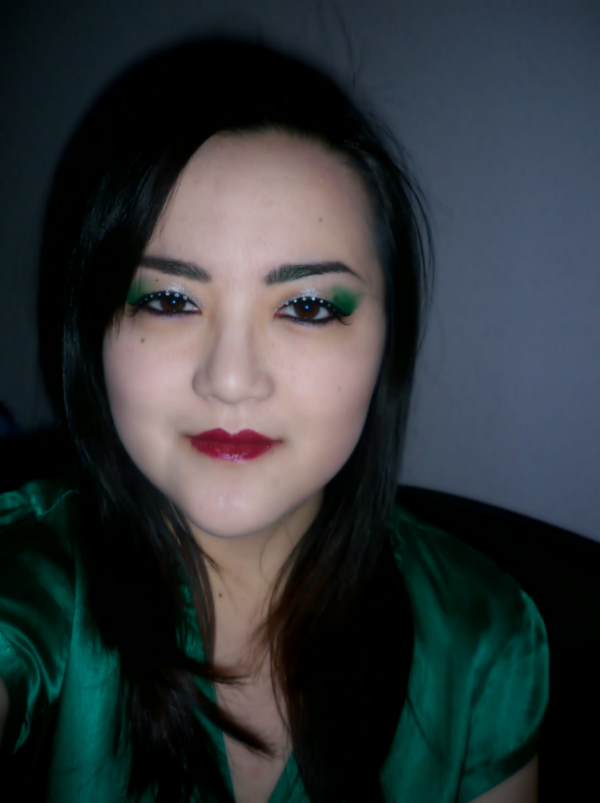
Anyway, back on-topic. Elphaba is obviously known for her verdigris, but I wasn't about to paint my face green. Not that I wouldn't do it--come on, I walk around with multi-coloured eyebrows on a regular basis--but the only face paint I have is probably close to 8 years old and I should probably throw it out. Cream makeup is really the only way to go if you want to paint your whole face (and maybe your body, too) but as I had none, I chose to do something that pays more subtle homage to the misunderstood witch.


Green eyeshadow? You betcha. The colour and placement of colour is pretty self-explanatory: a lighter green on the inner half of the lid and a darker green on the outer half and blended into the crease. But the key here is to start with your eye makeup before you do anything else because once you're done placing colour on your upper lid, you want to take a Q-tip dipped in makeup remover and create a blunt edge on the outer corner. Most people go for a pointed wing shape, but I wanted to give this look a little more originality by making the outer edge squared off.

Line the lower lash line with a green eyeshadow, take black eyeliner to the waterlines and your upper lash line, and that's all you need to do with your eyes. Mascara is optional, but if you feel naked without it, you can definitely add it here. I don't usually bother and honestly tend to forget mascara because my lashes are short and straight and the way my eyes are shaped tends to leave mascara all over my bottom lid.

I filled in my eyebrows with a slightly darker shade of brow powder and used concealer above and below my brows to highlight them and give them a clean, crisp look.

Idina Menzel has some killer cheekbones, but a lot of the other actresses who played Elphaba don't, and I decided to put a very minimal amount of contouring and highlighting around my cheekbones and temples.

I outlined my lips with lip liner and actually slightly rounded out my naturally pointed Cupid's bow. Then I filled in my lips with the Bite Beauty lip cream and I thought it was a little light, so I topped off the colour with a lip tar that leaned more toward the brown side and it darkened it just enough to my taste. If you prefer a lighter lip, stick with your usual red lipstick.

BROWS
Anastasia Beverly Hills Beauty Express brow kit in Brunette
Anastasia Beverly Hills Tinted Brow Gel in Granite

EYES
theBalm Put a Lid On It! eyeshadow primer
Inner lid - Wet n' Wild Fantasy Makers glitter palette from the Hauntingly Hip Stencil Kit - Enchanted Angel (green shade) + Sugarpill Chromalust pigment in Absinthe (lime green shimmer)
Outer lid - Saucebox Cosmetics Midnight Blossoms palette (lighter green shade)
Lower lash line - Saucebox Cosmetics Midnight Blossoms palette (darker green shade)
Waterlines + upper lash line - Urban Decay 24/7 Glide-On Eye Pencil in Zero (black)

FACE
Embryolisse Lait-Crème Concentrè
MAKE UP FOR EVER HD Microperfecting Primer
Urban Decay Naked Skin liquid foundation in 1.0
Urban Decay 24/7 Concealer Pencil in CIA
Under eyes - It Cosmetics Bye Bye Under Eye concealer in Light
Highlight - Benefit high beam
Contour - Too Faced Milk Chocolate Soleil Bronzer
L'Oréal Paris Magic Smooth Soufflé Blush in Celestial (muted rosy pink)

LIPS
NYX Slim Lip Liner in Deep Red
Bite Beauty Cashmere Lip Cream in Port (deep wine)
Obsessive Compulsive Cosmetics Lip Tar in Anita (browned burgundy)


27 January 2014

wicked series - glinda the good

Chicago, seriously, can we tone it down with the weather? I love snow far more than the average person (judging off of the Facebook posts I've seen filled with complaints) but this is a little much. And then there's the cold.

Today is colder than the polar vortex days that came through the area two weeks ago, and it's supposed to continue tomorrow. Hopefully, it'll warm up soon because I think I'm going crazy being cooped up in my house, but at least that means I have no excuse to not clean, right? Ahem.

This look was also requested by Meg, who asked for looks based off of the two main characters in Wicked. I happen to have a long standing love for this musical since the 8th grade. I listened to the soundtrack continuously for over a year with almost no variation. It was just always on repeat, and when my then 48-year-old Chinese father started dancing around behind me singing the words to Popular, I knew I had gone too far. I went to see the musical on Broadway with my high school music department and if I hadn't been bone tired from the 3 hours of sleep a night we were averaging, I would have been the most irritating human being that entire day. Trust me.


I slept with my hair in 11 (!!!) little French braids last night and not only did it take forever, but my arms were so sore and I kept missing pieces of hair. So frustrating! But it was worth the trouble because I woke up, took them out minus the one I did around my hairline, and I was left with something akin to crimped hair without the frizz. Well, sort of--you can see the left side of my hair being hilarious.

Anyway! Not that you can entirely see it in the above photo, but the eyeshadow was really fun. Because Glinda's colour scheme in the musical is so varied but always bright and mostly pastel, I focused on her sparkling blue dress when she's travelling by bubble and her pink dress during Popular. (Sidenote: how many of you knew that her dress from the dance into the Popular scene was originally blue?) The original Glinda was also known for her famous pale pink dress.

I started with a light blue matte shadow into the inner third of my lid. Next, I took a pale pink shimmery eyeshadow over the rest of the lid, and then blended the two colours together with a lavender shadow. I blended a deep pink eyeshadow into the crease and tapped on a shimmery, iridescent white eyeshadow up toward the browbone. Taking a shimmery blue-toned iridescent eyeshadow, I traced the colour along my lower lash line.

For eyeliner, I took a white liner to my lower waterline, and a black liner to my upper waterline and lash line. The black eyeliner was mostly to anchor the false lashes so there wasn't a gap between them and my natural lashes.

With a pale pink blush on my cheeks and a slightly shimmery pink gloss on my lips, the look is complete! I mixed a NYX lip cream with a shimmery lip gloss for this because I didn't think a single product would produce the effect I wanted, and I used a bit more of the lip cream along the insides of my lips to give it a bit of a gradient effect.

Glinda is a very whimsical character, so that's the overall effect for which I aimed here. She's cheery and colourful, and you can definitely switch out the blues and pinks for other colours. Maybe the yellow she wore to the Emerald City?

BROWS
Anastasia Beverly Hills Beauty Express brow kit in Brunette
Anastasia Beverly Hills Tinted Brow Gel in Granite

EYES
theBalm Put a Lid On It! eyeshadow primer
Inner lid - Sigma Beauty Crème de Couture eyeshadow in Blue Chocolat (light aqua matte) and Blueberry Cream (milky blue velvet matte)
Center lid - Sugarpill Chromalust pigment in Paperdoll (lavender shimmer)
Outer lid - Sugarpill Chromalust pigment in Birthday Girl (princess pink with fuchsia sparkles)
Crease - Urban Decay eyeshadow in Woodstock (saturated deep pink shimmer) + Shiro Cosmetics loose eyeshadow in Moon Prism Power (pale pink-cream shimmer with opalescent green shift and golden sparkle)
Inner corner + lower lash line - Sugarpill Chromalust pigment in Lumi (snow white with turquoise sheen)
Lower waterline - Urban Decay 24/7 Glide-On Eye Pencil in Yeyo (metallic white)
Upper lash line - Urban Decay 24/7 Glide-On Eye Pencil in Zero (black)
False lashes - Ardell Double Up Lashes in 201 Black

FACE
Urban Decay Naked Skin liquid foundation in 1.0
Urban Decay 24/7 Concealer Pencil in DEA
Under eyes - Benefit Fake Up Concealer in 01 Light
Sigma Beauty Crème de Couture Blush in Strawberry Ambrosia

LIPS
NYX Xtreme Lip Cream in Strawberry Jam (geranium pink) + Shiro Cosmetics lip gloss in Moon Prism Power


24 January 2014

disney villains series - scar

OKAY, so I said I wasn't going to do any makeup looks for a while, but I lied. Just this one until the scratch heals because I just noticed that it's starting to scab. (TMI, maybe?) Katina told me that I should do something with my look for my blog, so here it is! I took to Twitter last night and joked that I looked like Scar from the Lion King.


Lo and behold, a terrible photo of my eye taken in the car earlier today. (No sunlight, just super winds and cloud cover because it's fucking cold in Chicago.) Zero makeup on, whoo!

My younger sister spent at least a good year of her life watching the Lion King three times a day, every single day, and of course I was always there to watch it, too. There's something to be said about how the two of us prefer the anthropomorphic animal Disney films to the princess ones, but they always had the greatest music, okay? And Jeremy Irons is just all around insanely talented.


I asked for opinions on Tumblr on what I should do with my lips, and after taking multiple photos in both nude and black lipstick, I came to the conclusion that no lipstick at all seemed to work best. My natural lip colour is quite pink, but the truer nude lipsticks that I tried on just washed me out and the black lipstick looked hilarious.

Obviously, I emphasised my scratch a lot more and the red gel eyeliner that I have was perfect. I decided to go with red as though the scratch was new because trying to get a pale, slightly puckered scar-like mark would be too difficult given the tools I have. (There's multiple marks because I have spatial issues and couldn't figure out where to draw one connected line. Whoops!) The eyeshadow itself was simple--two different matte browns, the darker one over the lid and the lighter one into the crease and pulled upward toward the brow. I tightlined my upper and lower lashes with a black pencil liner and lined both my upper and lower lash lines with a liquid liner, creating wings in both corners.

My brows look HILARIOUS, but since I have naturally dark brows that are absolute torture to cover up with the gluestick trick, I had to cover all of my brow hair with a dark matte brown-black eyeshadow. Exaggerating the arch of your brow really makes the look seem more villainous.

Scar has a very thin, angular face, which is a common physical attribute of villainous characters, so I tried to make my face a little more angular, too, using contouring beneath my cheekbones, under my jawline, around my forehead and temples, and down the sides of my nose. I'm so pale that the flash tends to wash me out, though, so it's not really as noticeable as I had hoped.


Dat scar.

BROWS
Urban Decay eyeshadow in Crave (deepest, darkest brown/black matte)

EYES
theBalm Put a Lid On It! eyeshadow primer
Lid - theBalm Nude 'Tude eyeshadow in Sleek (dark black-brown matte)
Crease - Urban Decay eyeshadow in Faint (warm, dusty brown matte)
Lower lid - theBalm Nude 'Tude eyeshadow in Sultry (warm medium brown matte/satin)
Waterlines - Urban Decay 24/7 Glide-On Eye Pencil in Perversion (matte blackest black)
Upper lash line + inner corner wing - Sephora Collection Long-Lasting 12HR Wear Eye Liner in 01 Black (matte black)
Inner corner - Urban Decay 24/7 Glide-On Eye Pencil in Yeyo (metallic white)
Scar - Makeup Geek Gel Liner in Poison (matte rusty red)

FACE
Urban Decay Naked Skin liquid foundation in 1.0
Contour - Maybelline Fit Me foundation stick in 235 + Too Faced Milk Chocolate Soleil bronzer
Contour (nose) - Urban Decay eyeshadow in Faint (warm, dusty brown matte)

LIPS
fresh Sugar Lip Treatment SPF 15


Just a close-up of the eyes for you, since nothing else really matters in this look. :]

23 January 2014

look of the day - 70s inspiration/lily evans potter

Another request from my friend Meg! She made a whole bunch, so you'll be seeing her name on a lot of posts. She requested a look for Lily Potter. You know, Harry Potter's mum? She was a teenager in the 70s, so of course I had to draw some inspiration from photos from the 70s.

There was a strong push toward natural looking skin with foundation that matched your skin tone, and everyone wanted to be tan. Obviously, that's not going to happen for me, seeing as I'm naturally ghostly pale. Lips were kept in natural tones, if not frosty shades, and there was light blush on the cheeks. The focus was on the eyes--frosty shadows in shades of blue and green were popular, but so were shades of pink and brown. I used this and this as reference sites.


My hair is looking sloppy, but I had just shaken it up to try to give it some Farrah Fawcett-esque volume. Aside from super flipped-out hair, stick straight hair was also a popular look, so luck was on my side!

Unfortunately you can't really see the light blue eyeshadow that I put on since I didn't bring it up past the crease! Brows were more natural and thin, but mine are full so I just used a brow pencil and brushed that through. I used two different lip glosses to get a nude pink shade that was lighter than my natural lip colour, and I used a gel blush for my cheeks, as well as some liquid highlighter above my cheekbones.

For my eyes, I mixed a medium-dark blue with a very pale blue shade to get a colour that seemed to match more of the reference photos and packed the pigment onto my lids. Using a matte brown eyeshadow, I blended the colour into the creases of my eye sockets. Some liquid eyeliner winged out on top, a white pencil on the lower waterline, and a dark blue eyeliner along my lower lash line rounded off the look!

Obviously this look may not have suited Lily exactly, as she had ginger hair and green eyes, which obviously doesn't match my colouring in the slightest. But I think she would have stuck to natural lip colours and flawless skin with a pop of colour on the lids. Since she had green eyes, maybe she would have worn matching green shadow, or more neutrals since her colouring was so striking, but I think blue eyeshadow, when done right, looks good on everyone.

BROWS
Benefit Instant Brow Pencil in Deep
Anastasia Beverly Hills Tinted Brow Gel in Granite

EYES
theBalm Put a Lid On It! eyeshadow primer
Lid - Fyrinnae loose eyeshadow in Arcane Magic: Mermaid Masquerade (royal blue shimmer with purple/pink shift) + Fyrinnae loose eyeshadow in Otherworld (pale aqua shimmer with turquoise and blue sparkle)
Crease - theBalm Nude 'Tude eyeshadow in Sultry (warm medium brown matte/satin)
Upper lash line - Sephora Collection Long-Lasting 12HR Wear Eye Liner in 01 Black (matte black)
Lower waterline - Urban Decay 24/7 Glide-On Eye Pencil in Yeyo (metallic white)
Lower lash line - Urban Decay 24/7 Glide-On Eye Pencil in Binge (pearly navy blue, discontinued)

FACE
Urban Decay Naked Skin liquid foundation in 1.0
Benefit boi-ing concealer in 01
Under eyes - Benefit Fake Up Concealer in 01 Light
Too Faced Milk Chocolate Soleil Bronzer
Josie Maran Coconut Watercolor Cheek Gelée in Poppy Paradise
Highlight - Benefit high beam (cheekbones) + Benefit moon beam (cupid's bow + bridge of nose)

LIPS
Buxom Full-On Lip Cream in White Russian (nude pink)
Buxom Full-On Lip Polish in Dolly (shimmering muted plum)


I'm going to take a few days off from putting on makeup, at least near my eyes. Luckily, it's not hugely noticeable in these pictures, but I scratched the corner of my left eye this morning. Thankfully, I didn't break skin, but it's red and raw and stings quite a bit, so it's time for me to ease up!

22 January 2014

look of the day - 40s inspiration/minerva mcgonagall

Okay, I know the title of this post says 40s inspiration, which this look really is, but the original request came from my dear friend Meg, who said:

i politely request a young, hot mcgonagall look. for science.

SO. I had to comply because let's face it, McGonagall's history is fantastic. If any of you are on Pottermore, you've probably read what J.K. Rowling posted about her family and background. She was born in 1935, which means that she was leaving Hogwarts sometime in the 50s. I've done a few retro/50s inspired looks already, but I think McGonagall, if she even bothered with makeup, would have been a little outdated with her look, though it would still be classic. So I chose to go with the 40s, using this site as inspiration.

The 40s had a very clean look, with natural, groomed brows, a clean face, and minimal eye makeup. The focus was entirely on the lips. The 40s were all about lipstick, especially red lips. I'm of the impression that McGonagall probably didn't care too much for lipstick, but hey, a girl can dream!


I don't have a close-up for you all today, unfortunately, but that's because the eye makeup is very, very minimal. I used all matte eyeshadows--a skin-toned shade all over the lid, and a slightly deeper shade in the outer corner and crease just for a bit of definition. I tightlined my lashes with a black eyeliner and lined my upper lid with a brown pencil liner, and then I curled my lashes and put on a few coats of mascara.

Put on some foundation or anything with light to medium coverage and conceal what needs to be concealed. Use a pink-y blush on the cheeks and bring the colour up along the cheekbones. Contouring is totally optional, but I always think it adds something nice to the overall look, especially since I'm so used to having a super round face. (Which is changing seeing as I've lost over 20 pounds since August...)

THE LIPS! Okay, so all I did was put on some red lipstick and blot it a few times with a tissue to take off the shine and some of the colour. Even though the 40s were all about strong red shades, I think McGonagall wouldn't have wanted something that was too dramatic. I've also read that women were changing their lip shape with their lipstick to make their mouths appear fuller, but I always feel a little clownish doing it. But if you're comfortable with it, then go for it. Never let anyone else dictate how you do your makeup! Makeup should make you feel good about yourself, so don't listen to haters.

Also, maybe one day I'll dress up for pictures, but today is not that day. And it will likely not be that day until I can overhaul my closet for clothing that both physically fits me and matches my personal style. We'll see!

BROWS
Benefit Instant Brow Pencil in Deep
Anastasia Beverly Hills Tinted Brow Gel in Granite

EYES
theBalm Put a Lid On It! eyeshadow primer
Lid - Urban Decay eyeshadow in Foxy (very light yellow/white matte)
Outer corner + crease - Urban Decay eyeshadow in Faint (warm, dusty brown matte)
Brow bone - Saucebox Cosmetics Creme de la Creme palette (lightest off-white shimmer shade)
Upper lash line - Sephora Nano Eyeliner in 05 Chocolate
Waterline - Urban Decay 24/7 Glide-On Eye Pencil in Zero (black)
Mascara - Maybelline Volum' Express the Mega Plush mascara in Blackest Black

FACE
Urban Decay Naked Skin liquid foundation in 1.0
Benefit boi-ing concealer in 01
Under eyes - It Cosmetics Bye Bye Under Eye concealer in Light
Contour (cheeks) - NYX Powder Blush in Taupe (matte taupe)
Contour (nose) - Urban Decay eyeshadow in Naked2 (taupe matte)
bareMinerals blush in t.t.y.l. (sheer poppy pink)

LIPS
Maybelline Color Sensational lipstick in 645 Red Revival

20 January 2014

look of the day - inspired by elsa from disney's frozen

I barely slept last night and I really wanted to take a nap, but before I knew it, it was past 3PM and I figured I would do my makeup instead!

For those of you living in a cave, Frozen is Disney's latest animated feature. There are a lot of issues that should be addressed, but since this is a makeup blog, let's focus on the makeup... Elsa's, to be exact, during Let It Go. I've only seen the movie once at my sister's insistence, but the makeup stuck with me. (Big surprise, no?) Now, I distinctly remember the lip colour in the film being more cranberry than neutral pink, but this picture says otherwise. To compromise, I did both.


HAIR, STOP DOING WHAT YOU'RE DOING. I really did want to do a braid, but my hair really hates staying in braids and I didn't want to bother putting any product in. Elsa's got some awesome eyelashes, so I had to make do with falsies that seem to cover up my entire lid when my eyes are open. I had to change the look a little, as I don't have round Disney eyes, so the shape of her eyeshadow wouldn't have worked on me. I always apply eyeshadow with my fingers because my brushes tend to muddle colours together, but that might just mean I should use the better quality brushes I have. Whoops!

Start with a silver cream eyeshadow in the inner corner of your eye and then pat a loose silver shadow over that. Next, press a lavender shadow into the center of your lid. Brush a darker purple shadow into the outer corner. I used three different purple eyeshadows to get the gradient effect, but you should be able to get away with two. I just like making things more complicated than they need to be! Aim for purples that don't lean too blue or too red, but somewhere in between.

Take a deep pinkish purple and brush that into the crease. Blend all of the colours together well--use a brush for this! Using a deep purple shade, line your lower lash line. Take a black eyeliner and line your upper and lower waterlines and your upper lash line.

Falsie time! Obviously you can skip this step. I always have a lot of trouble with false eyelashes, but I suffer through them for performances and photos. I forgot to curl/put on mascara on my natural lashes, but they're so insubstantial compared to the falsies that it wouldn't have made a difference!

Using a light pink blush (or loose eyeshadow, in my case), swirl colour into your cheeks and along your cheekbones. I tapped and blended a pale liquid highlighter just above the cheekbones, too. Elsa doesn't have a contoured face, as that's more typical of Disney villains and not the princesses, so there's no need for adding shadows to your face.

Here's a close-up of the look with the pink gloss.


That blue scarf is the only accessory/item of clothing that I have that's remotely close to the colour of Elsa's dress. That will hopefully change, as I love pretty much any shade of blue, but my closet is currently in need of a serious overhaul.

The cranberry lip was more difficult to achieve. I started off with a lip cream form NYX, but I thought the colour appeared too light, so I added a layer of a lipstick from Rimmel. That seemed to make the colour more opaque, but after adding Clinique's cult classic Black Honey, I thought the colour was perfect.


BROWS
Anastasia Beverly Hills Beauty Express brow kit in Brunette
Anastasia Beverly Hills Tinted Brow Gel in Granite

EYES
theBalm Put a Lid On It! eyeshadow primer
Inner corner - Maybelline Color Tattoo Metal 24HR Cream Gel Shadow in 60 Silver Strike + Fyrinnae loose eyeshadow in Dinosaur Plushie (pale metallic silver with multi-colored sparkle)
Center of lid - Sugarpill Chromalust pigment in Paperdoll (lavender shimmer)
Outer 2/3 of lid - Sugarpill Chromalust pigment in Hysteric (metallic purple with turquoise shimmer)
Outer corner - Fyrinnae loose eyeshadow in Arcane Magic: Mystical Hedgehog (purple shimmer with turquoise-green highlight and pink shift)
Crease - L'oreal Infallible 24 HR Eye Shadow in 557 Glistening Garnet + Fyrinnae loose eyeshadow in Meerkat (pink-purple with gold shimmer)
Liner - Urban Decay 24/7 Glide-On Eye Pencil in Perversion (matte blackest black)
Lower lash line - Saucebox Cosmetics Forbidden Fruits palette (matte deep purple shade)
False lashes - Sephora False Eye Lashes in Mink

FACE
Urban Decay Naked Skin liquid foundation in 1.0
Amazing Cosmetics Amazing Concealer in Light Golden
It Cosmetics Bye Bye Under Eye concealer in Light
Blush - Sugarpill Chromalust pigment in Birthday Girl (princess pink with fuchsia sparkles)
Highlight - Benefit high beam

LIPS
NARS Velvet Gloss Lip Pencil in New Lover
OR
NYX Soft Matte Lip Cream in Monte Carlo + Rimmel London Lasting Finish Matte by Kate Moss lipstick in 107 + Clinique Almost Lipstick in Black Honey


15 January 2014

hogwarts series - slytherin (everyday)

Today was pretty damn cold, so I think my fingers nearly froze off whilst driving around town. I'm currently rocking third-day hair and all I want to do is sleep for days, but alas, I forced myself to finish this final house look. I spent about an hour total coming up with this look, although I didn't know how to incorporate the green at first. I was lying in bed re-reading A Great and Terrible Beauty and it hit me--it need to go in the crease.


And again, forgive me for the laziness of my hair! It's kind of all over the place, but I did pin it back behind my ears to give it a semblance of effort. For some reason, you can't even see the bottom part of my hair in this picture... Womp. Anyway, this look was focused on the green eyeshadow in the crease blended up toward the eyebrows and the silver eyeliner on both the upper and lower lids. I used a shimmery white eyeshadow on the entire lid as a transition between the eyeliner and the green. The white doesn't translate well in photographs, though, possibly because I'm so pale that the flash just made it look like the rest of my skin. It does show in person, though!

The rest of the face was simple--foundation and concealer for coverage, a bit of highlighter on the cheekbones for a subtle glow, and a deep berry lip/cheek stain applied lightly for blush. The same stain is patted onto the lips several times to build the colour.

BROWS
Anastasia Beverly Hills Beauty Express brow kit in Brunette
Anastasia Beverly Hills Tinted Brow Gel in Granite

EYES
Lid - Beauty From the Earth Cosmetics loose eyeshadow in Glistening (creamy white with multi-coloured sparkles)
Crease - Sephora eyeshadow in N° 7 Picnic in the Park (grass green shimmer)
Liner - NYX Slide On Liner in Platinum (silver)
Waterlines - Urban Decay 24/7 Glide-On Eye Pencil in Perversion (matte blackest black)
Lashes - Maybelline Volum' Express the Mega Plush mascara in Blackest Black

FACE
Urban Decay Naked Skin liquid foundation in 1.0
Benefit boi-ing concealer in 01
Under eyes - Benefit Fake Up Concealer in 01 Light
Highlight - rms beauty living luminizer
rms beauty lip2cheek in diabolique (dark burgundy)

LIPS
rms beauty lip2cheek in diabolique (dark burgundy)


14 January 2014

hogwarts series - slytherin (dramatic)

Today has been kind of a strange day and we'll leave it at that? I did buy a second bookshelf, though, as it was much needed for my room to be more organised.

I had the idea for today's look brewing in my head since last night. Glitter and false lashes were a must, and I imagined the dramatic Slytherin look to be a bit old glamour but more colourful. Green and silver figure heavily into the eyes (and brows!) but it's grounded with black eyeliner. Contouring was a must, as well, though I didn't spend as much time on it as I thought I would. Anything too sculpted would compete too much with the eyes. (Plus, I started this look kind of late and was rushing toward the end...)


Excuse the hair, please. I wanted to straighten it until it was poker-straight, but I had to take pictures and scrub my face before heading down to dinner. I did consider doing finger waves, but I definitely didn't have the ability to focus on that today. Also, working with glitter is tough--I didn't have precision using my fingers to press on the glitter, so the green is a little sloppy. But hey, glitter is glitter and it looked pretty good regardless!

After applying eyeshadow primer, take a loose silver eyeshadow and press it on the inner 2/3s of your eyelids, and take a loose green eyeshadow to the outer 1/3. (I had to use a pressed eyeshadow beneath a loose one to get the colour and intensity I wanted.) Thoroughly blend where the colours meet!

The trick to getting the perfect, clean line/wing is to use tape. Follow the line of your lower lid for the best angle.

Over the eyeshadow, take a tacky glitter base and press it over your lid, letting it dry slightly, and then lightly press glitter to the lid. Line both your upper and lower lids--I used a liquid liner on the upper lid and a pencil on the lower lid. Create a wing, if you'd like. Curl your lashes, apply some mascara, and if you'd like to go full out, put on some falsies! I have this lovely pair that has crystals on the base and I thought they would be perfect. My brows are also filled with dark green eyeshadow, but if you aren't a crazy brow person, you should consider using an eyeshadow or brow powder that is slightly darker than your hair colour for dramatic effect.

For the face, start with a medium-coverage foundation all over and use a concealer to cover up any redness. Take a foundation about two shades darker than your skintone and blend it into the hollows of your cheeks, your temples, just below your jawline, and around your hairline. I skipped blush, but you can use that here, too! Take a shimmery liquid highlighter and dab it on top of your cheekbones.

You'll see that I did my foundation after the eyes. This makes it easier to deal with fallout from the glitter, and that way the tape that you used for the wing doesn't take off any base you've put on already.

I don't know if you've noticed, but I've had a lip colour for each house, too: red for Gryffindor, nude for Hufflepuff, pink for Ravenclaw, and plum for Slytherin. The dark lips will appear again in the everyday look, though they'll probably be a little more subdued!

BROWS
Sugarpill Chromalust pigment in Junebug (forest green shimmer)

EYES
theBalm Put a Lid On It! eyeshadow primer, LA Splash Cosmetics eyeshadow sealer/base
Inner lid - Sugarpill Chromalust pigment in Tiara (metallic silver)
Outer corner - Sugarpill pressed eyeshadow in Midori (vibrant green with pearl sheen) + Sugarpill Chromalust pigment in Tipsy (grass green shimmer)
Glitter - Lit Cosmetics glitter in Hulk S2 (vivid emerald glitter) + Oslo Loose Diamond Glitter in Spark: Krystal (holographic silver glitter)
Waterlines - Urban Decay 24/7 Glide-On Eye Pencil in Perversion (matte blackest black)
Upper lash line - Maybelline Line Stiletto Ultimate Precision Liquid Eyeliner in Blackest Black
Lashes - Maybelline Volum' Express the Mega Plush mascara in Blackest Black
False lashes - Sugarpill False Eyelashes in Spark

FACE
Urban Decay Naked Skin liquid foundation in 1.0
Benefit boi-ing concealer in 01
Under eyes - Benefit Fake Up Concealer in 01 Light
Contour - Maybelline Fit Me foundation stick in 235 + NYX Powder Blush in Taupe (matte taupe)
Highlight - Benefit high beam

LIPS
Maybelline Color Sensational lipstick in Deepest Cherry (blackened cherry red)


13 January 2014

hogwarts series - ravenclaw (everyday)

My hair is back to its natural state of stick straightness, and I've never been more glad for it, honestly. Forgive me, hair, for I have hated you for so long... The last week has just been so weird for me and right now I'm still thawing from going out for a walk with my family, so excuse me for the strange voicing of these blog posts.

Today's look is a simplified Ravenclaw look, and I realise that in the full face photo, you can't even see the eyeshadow on my lid, which is really unfortunate. I didn't want to bring up the colour over the lid, though! In the close-up photo, you'll see that it's bronze eyeshadow with a bit of glitter cream as the base.


Behold, me with very little coverage on my natural skin! I only have concealer on here where my redness is the worst, and yet look at my cheeks. (Stupid rosacea.) This look is pretty simple--use concealer only where you need the coverage and swipe on a pink gloss. You can use some blush if you'd like, too.

I wore a blue clip-in extension and of course, you can't see it. Ah, well, it's the thought that counts!

For the eyes, after I put on eyeshadow primer, I used two glitter creams from a Wet n' Wild palette that I bought for Halloween makeup in 2012 (eep, should probably have thrown it out but I've always been bad about makeup expiration dates) and combined the two, bringing it up just slightly past the crease. It made a good base for the shadow as it was slightly tacky, but also, glitter. I took a golden brown eyeshadow and put it all over the lid. A blue eyeshadow (named TARDIS... Combining fandoms here!) was used to lightly line the lower lashline. I didn't use mascara or any eyeliner because I think both can be forgone, but feel free to add them if you feel naked without either.

BROWS
Anastasia Beverly Hills Beauty Express brow kit in Brunette
Anastasia Beverly Hills Tinted Brow Gel in Granite

EYES
Lid - Wet n' Wild Fantasy Makers glitter palette from the Hauntingly Hip Stencil Kit - Enchanted Angel (center right and lower right shades combined) + Urban Decay eyeshadow in Smog (deep coppery bronze)
Lower waterline - Shiro Cosmetics loose eyeshadow in TARDIS (royal blue with bright purple and green sparkles)

FACE
Benefit boi-ing concealer in 01
It Cosmetics Bye Bye Under Eye concealer in Light

LIPS
Buxom Full-On Lip Polish in Candi (juicy strawberry luster)


12 January 2014

hogwarts series - ravenclaw (dramatic)

So, tonight is the Golden Globes and I only watched part of the show... But I'm pretty sure the only part that mattered was Emma Thompson showing up to present with her heels in one hand and a martini in the other. She was just a presenter and I think she won the entire ceremony. That's it, she won the Golden Globes.

Anyway, today was a long day of me doing nothing except freaking out about my life, so as usual, I turn to makeup! This isn't all that dramatic in my eyes, but I know a lot of you will disagree.


BLUE EYEBROWS! I have absolutely zero issue with crazy coloured eyebrows, as you can tell from so many different posts on this blog, but I'm sure a lot of people are balking at this. Obviously, you don't need to do this! I just wanted something boldly blue to go with the whole Ravenclaw theme. (Also, holy fresh hell, why do I look so sickly in this picture? And this isn't even the foundation's fault, but my neck is at least two shades darker than the rest of my face. Boo.)

Also, let me talk about my hairstyle for a moment. This turned out SO MUCH WORSE than I had intended. I wanted to braid my hair in some way because I think braids suit the Ravenclaw life, but for some bloody moronic reason, I decided to sleep with foam curlers in my hair last night. I keep reading that having texture in your hair will make braids stay, and I completely agree because my naturally stick-straight hair usually won't stay in a braid without some serious coercion, and this time there wasn't any slip from random ends sticking out from the braid itself.

The thing about curly hair... When I was six, my mom and I thought that washing our hair with shampoo meant for curly hair would give us curly hair. (It was a language barrier on my mom's part and childish bandwagon jumping on mine.) I've always really wanted naturally wavy or curly hair because my hair is boring and won't hold anything without a shit ton of product and two hours of work.

Well, I finally concede that I LOVE MY HAIR. I do not want curly hair. Braiding curly hair was the equivalent of drinking arsenic. I'm sorry, hair. I really am.

Anyway, so the makeup is actually rather simple, as I don't think Ravenclaws would necessarily be all that bothered with their makeup. They've got so many other topics on their minds, but this look is simply created with a few products, yet it makes for a big impact. Bright blue eyeshadow goes all over the lid and bronze eyeshadow is blended into the crease and under the eye. Take a black eyeliner and line your upper and lower waterline, put on a few coats of mascara, and you're done! The cheeks just require some simple blush, and all I did for my lips was put on a matte mauve-y pink lipstick.

BROWS
Sugarpill pressed eyeshadow in Velocity (vibrant matte royal blue)

EYES
Lid - Sugarpill Chromalust pigment in Royal Sugar (metallic royal blue)
Crease + lower lash line - Shiro Cosmetics loose eyeshadow in Nic Cage Raking Leaves on a Brisk October Afternoon (coffee brown-black with gold and red sparkles)
Upper lash line - Urban Decay 24/7 Glide-On Eye Pencil in Binge (pearly navy blue, discontinued) + Sugarpill loose eyeshadow in Magpie (black with metallic blue sheen and turquoise sparkles)
Waterlines - Urban Decay 24/7 Glide-On Eye Pencil in Zero (black)
Lashes - Maybelline Volum' Express the Mega Plush mascara in Blackest Black

FACE
Marc Jacobs Gel Genius Foundation in 10 Ivory Light
Benefit boi-ing concealer in 01
L'Oréal Paris Magic Smooth Soufflé Blush in Celestial (muted rosy pink)

LIPS
NYX Matte Lipstick in Tea Rose (mauve-pink)


10 January 2014

sneak peek - beautylish lucky bags 2014

Two posts in one day, phew! So, as I was having a really shit time at the end of the 2013, I thought a little retail therapy was in order, so I bought two of Beautylish's Lucky Bags. This was inspired by fukubukuro, a "Japanese New Year’s Day custom in which merchants make grab-bags filled with mystery contents and sell them for much less than the contents are worth". Each bag was $75 and there were two options available: bold and natural. I ordered one of each and this is what each one held!

First up: the natural lucky bag.


CONTENTS:
Billy B Beauty Eyelash Curler
Wayne Goss Brush 01
BeautySoClean Gingerbread Scented Conditioning Brush Cleaner
Dita Von Teese Rouge Eau de Parfum - 20 mL
Too Faced Eye Love Drama Kit
- Matte Eye Collection
- 3 Way Lash Lining Tool
- Mini Lash Injection
- Mini Shadow Insurance
Cult Nails Nail Lacquer in Enticing
Cult Nails Wicked Fast
Indie Lee Squalane Facial Oil
Inglot Lipstick - 403 Matte
Z•Palette Small Palette - Black
Armour Beauty Lip Gloss - Marilyn
TOTAL VALUE: $256

I'm actually quite happy with the contents of this bag. I'm not a big perfume wearer, so I'm not entirely sure if that will ever be used, but I was definitely considering getting something from Indie Lee or Armour Beauty but I wasn't sure where to start.

The only complaint I have is that the Indie Lee oil had spilled some upon arrival, although that was probably due to transportation issues. The package was seriously delayed because of the weather and when it arrived via FedEx today, the box itself looked like it had fallen into some dirty slush.

Next, the bold bag!


CONTENTS:
Billy B Beauty Eyelash Curler
Wayne Goss Brush 08
Cult Nails Nail Lacquer in Ay Poppy!
Cult Nails Wicked Fast
Sugarpill Cosmetics Elektrocute Neon Pigment - Sparkage
BeautySoClean Candy Cane Scented Conditioning Brush Cleaner
Anna Sui Minnie Mouse Makeup Kit - 01 Rock Song
GlamGlow YouthMud Tinglexfoliate Treatment - Little Sexy Mud Mask
Lit Cosmetics Lit Kit - Champagne Wishes S2
Inglot AMC Pure Pigment Eye Shadow - 40
Inglot Liquid Eyeliner - 32
Z•Palette Large Palette - Leopard

Anastasia Beverly Hills Hypercolor Brow and Hair Powder - In The Pink
TOTAL VALUE: ~$231.50

The total value is estimated because one of the items isn't listed on the shop site anymore and I used a value taken from the Sephora website for something similar instead. I'm super pumped that I got one of the Anastasia brow/hair powders because I'm all about crazy hair colours even though I'm not entirely willing to subject myself to bleach again.

The Anna Sui packaging is absolutely adorable. I definitely wouldn't have bought this on its own because I don't think it's worth $50 for the amount of product you're getting, but it's so cute that I can't be mad.

My only complaints about this bag were that I got a second eyelash curler and a Sugarpill pigment that I already owned, but that was something that the lovely, lovely people at Beautylish couldn't have known because they packed everything blind.


I make no promises, but I'll try to do reviews of some of these products. I don't think I'll ever get around to reviewing them all, though. Since I have a few products that will probably sit around unused in my house or that I just don't need, they'll make great gifts to my beauty-obsessed friends. Overall, I quite enjoyed this and will likely order these again if they're available at the end of this year!

hogwarts series - hufflepuff (everyday)

It's been an interesting couple of days here, what with the weather being so drastically different today than even Monday's weather. It went from subzero temperatures to snow to 40 degrees F and rain. It's still raining, in fact, and has been doing so for hours. It ruined my plans for the afternoon, but that's why I have something to post for my wonderful readers.

I recently watched this video by Kat Von D and I absolutely fell in love with the idea of it. Now, I got lazy and didn't want to use a makeup wipe to get the little triangle cut-outs in my eyeliner, so the result is that it looks quite sloppy, but for the first time trying it, I thought it went surprisingly well! I'm not one for a thick wing, but I think it's edgy without being overwhelming, especially since this doesn't need any eyeshadow to accompany it.


I'm really hating that my glasses are naturally crooked on my ears and nose, ugh. But yes, you can almost see the eyeliner in this picture, but the salient point is that this look is very natural in every other aspect of the face. Focus on the eyeliner, but make sure to even out your skin with something simple like a BB cream or a tinted moisturiser. I used a stick foundation, but it was quick and easy. Make sure to use some blush! Rosy cheeks are very Hufflepuff in my mind.

It's not painfully obvious in these photos that there's any yellow in this look, but I did use some bright yellow eyeshadow right next to the eyeliner wing. It's subtle, but that way it doesn't compete with anything.

For some reason, I've been very into braiding my bangs into a headband around my face when I'm rocking second-day hair. Part of it is because I hate dealing with greasy bangs, but I also really hate pinning them back because bobby pins and I don't get along.

BROWS
Anastasia Beverly Hills Tinted Brow Gel in Granite

EYES
Liner - Sephora Collection Long-Lasting 12HR Wear Eye Liner in 01 Black (matte black)
Waterlines - Urban Decay 24/7 Glide-On Eye Pencil in Perversion (matte blackest black)
Decoration - Saucebox Cosmetics Temptation palette (yellow shade next to eyeliner wing)

FACE
Maybelline Fit Me foundation stick in 110
Benefit boi-ing concealer in 01
Under eyes - Benefit Fake Up Concealer in 01 Light
L'Oréal Paris Magic Smooth Soufflé Blush in Celestial (muted rosy pink)

LIPS
Smashbox O-Gloss Gold


06 January 2014

hogwarts series - hufflepuff (dramatic)

I live in the Midwest, so today we got hit by that polar vortex and the high for today was -10°F with a wind chill 25 degrees below that. Our furnace stopped working for a solid hour and I couldn't feel my fingers and toes indoors, but my dad found the issue and all was well! Since I knew today was going to be super cold, I decided today I needed to do the Hufflepuff look because I had plans to curl my hair.

Curling my hair is a full on production. Because I have very thick hair and it's a bit longer than I've had it in four years, it usually takes upwards of two hours for me to get all of my hair. I have to make the sections for each curl smaller since my hair is so thick--luckily, I was using a larger barrel. I think it was a 1 1/4" barrel, but I have cheap curling irons so I don't really know. I burnt my ear once and my fingers three or four times and had to enlist my sister's help for the very back of my head, but I managed to finish my whole head in 1.5 hours! I had everything pinned for too long so my hair was massive, but now it's finally settling down.


This photo is a little blurry, but the look itself is actually quite simple. I used some foundation and a bit of highlighting/contouring to make it seem like I have cheekbones to some degree. Concealer was an absolute must, as the redness would have been very obvious given the way I did my makeup.

I nearly forgot to fill in my brows for these photos. Originally, I wanted to use a matte charcoal eyeshadow for them, but I thought it might be too severe and too in competition with the eyes.


The key here is the eyeliner. I put on a white base for the yellow eyeshadow so the colour seemed more vibrant. All you need to do is pat colour on the lid up past the crease. I used a pencil eyeliner to line my upper and lower waterline in order to thicken the appearance of my lashes. Finally, I used a liquid eyeliner to create a basic cat-eye shape before I took the brush across the lid and under the eye, too. Go crazy with the shape! Don't get too artistic on one eye before you start on the second one--you want to keep it even, so trace a little on the left eye, then the right eye, and switch back and forth.

To round off the look, use a bit of blush and a nude lip colour.


BROWS
Benefit Instant Brow Pencil in Deep
Anastasia Beverly Hills Tinted Brow Gel in Granite

EYES
theBalm Put a Lid On It! eyeshadow primer
Lid - NYX Jumbo Eye Pencil in Milk (white) + Sugarpill pressed eyeshadow in Buttercupcake (bright matte yellow)
Liner - Sephora Collection Long-Lasting 12HR Wear Eye Liner in 01 Black (matte black)
Waterlines - Urban Decay 24/7 Glide-On Eye Pencil in Perversion (matte blackest black)
Lashes - Maybelline Volum' Express the Mega Plush mascara in Blackest Black

FACE
Urban Decay Naked Skin liquid foundation in 1.0
Benefit boi-ing concealer in 01
Contour - Maybelline Fit Me foundation stick in 235
Highlight - Benefit high beam
Under eyes - Benefit Fake Up Concealer in 01 Light
L'Oréal Paris Magic Smooth Soufflé Blush in Celestial (muted rosy pink)

LIPS
Obsessive Compulsive Cosmetics Lip Tar in Interlace (palest crème peach)


03 January 2014

hogwarts series - gryffindor (everyday)

So the snow has given us a one-day respite today, but unfortunately there are some absolutely ridiculous winds and so my idea of staying in to do makeup seemed like such a good plan... Until my mother and sister had me drive to the Arboretum so we could take some photos. The wind kind of ruined that for us, as all the snow on the trees was blown off but I got my first experience driving on really terrible streets and parking in a mall lot where no one could see the lines.

This look is super, super simple and doesn't need to have a Gryffindor label attached to it. It's effortless but looks really put together even if it only takes a few swipes of product.


Excuse the haphazard hair happening since I spent most of the car ride wearing a beanie-esque hat to keep it from blowing in my face! There were really only 6 main products used here, and most of them can be left out if you're in a rush. Four products were my BB cream for the face, concealer, brow pencil, and tinted brow gel, and all four of those are optional. What matters most is the gold cream eyeshadow and the red tinted lip product.

No eyeliner is necessary for this look! I picture most Gryffindors to be a little more haphazard and eyeliner can be too finicky. This look is definitely more carefree. You can definitely pile on mascara if you feel weird with no eyeliner--I almost remembered to put some on, but usually I can't be bothered, so I just completely forgot.

You don't have to be precise with the cream eyeshadow. Just a swipe over each lid with your fingers is fine! I used rms beauty's eyeshadow in solar, which is this lovely golden bronze shade, but you could just as easily use something like a Maybelline Color Tattoo. If your lids are oily, you might want to use a primer and set the cream with a powder, but I actually didn't wear the eyeshadow out. It did crease, though, as my lids are insanely oily, ugh. As for the lips, you might need a bit of a steady hand to keep the lines neat, but otherwise it's straightforward.

BROWS
Benefit Instant Brow Pencil in Deep
Anastasia Beverly Hills Tinted Brow Gel in Granite

EYES
rms beauty cream eyeshadow in solar (warm, golden bronze)

FACE
Embryolisse Lait-Crème Concentrè + Dr. Jart+ V7 Beauty Balm
Under eyes - Benefit Fake Up concealer in 01 Light

LIPS
Clinique Chubby Stick Intense Moisturising Lip Colour Balm in 03 Mightiest Maraschino (classic red)


02 January 2014

hogwarts series - gryffindor (dramatic)

It's no secret that I'm a huge Harry Potter fan. I've been obsessed since the third grade when my parents gave me a check for Sorcerer's Stone at the book fair even though I wanted another book. (... Do they even have book fairs anymore? I'm feeling so old even though I'm only 22.) I'm a fan of doing series of looks, and I think one based on Hogwarts houses was only natural. Each house is getting a dramatic look and a look that you can wear out of the house. First up, Gryffindor!


From this picture, it looks rather tame, but the close-up will show the dramatic part of it. I mimicked the Gryffindor house crest (the book version, as the movie versions of the crests make me angry) and divided my eyelid into four quarters, colouring two quadrants red and two quadrants gold. Because there was so much colour involved, I didn't bother with eyeliner as it would have made the look a little too much. Instead, I used two coats of mascara and blended out the crease with a deeper gold shadow to even the look out.

I originally considered making my brows bright red like I did last month at some point, but I thought it would detract too much from the eyes so I went with a deeper red instead. Top it all off with a red lip and the look is complete! No need for blush as you've already got so much red going on, but then again, I've never been a blush sort of person. If you think a look of this level might wash you out, definitely consider using a red-toned blush and a light hand in application to give your face some life.

I slept with my hair in four French braids to give it that wild look as I think it suits the Gryffindor spirit. (I personally hate it because it means I have to bother with product in my hair.)

BROWS
Saucebox Midnight Blossoms eyeshadow palette (top right deep red shimmer shade)

EYES
Lid - Sugarpill Chromalust pigment in Asylum (red shimmer) + Goldilux (highly-reflective metallic gold)
Crease- Shiro Cosmetics loose eyeshadow in Butts (smooth golden yellow-khaki with soft velvety shimmer)
Lashes - Maybelline Volum' Express the Mega Plush mascara in Blackest Black

FACE
Embryolisse Lait-Crème Concentrè
Dr. Jart+ V7 Beauty Balm
Benefit boi-ing concealer in 01
Under eyes - Benefit Fake Up concealer in 01 Light

LIPS
Bite Beauty Cashmere Lip Cream in Port (deep wine)


LOOK AT THAT LID SPACE. I had to apply the eyeshadow with a thin detailer brush. Since they were loose eyeshadows, I used a mix of 50/50 water/glycerin as a homemade mixing medium because I really don't want to spend an excess amount of money for something that works just the same but has a brand name slapped on. The mixing medium definitely helped to keep the lines between the quadrants neat and it gave the loose eyeshadows a beautiful foiled effect.

Tomorrow, I'll be posting the everyday Gryffindor look!