18 February 2014

(belated) look of the day - red lips and blue liner

Pretend this was posted yesterday because someone was a little caught up in trying to figure out what she needs to do for her new job. WHOOPS.

Anyway, yesterday I was just playing around with my makeup because I was bored but didn't feel like doing something else. Typical, right? Well, I had to sharpen up my eyeliners because they were getting dull and scratching the hell out of my eyelids, so I dug out my Urban Decay Grindhouse sharpener. I swear, this is the best sharpener I've ever used because it doesn't just leave the points of my pencils dull--it actually sharpens instead of just whittling away at the wood!


Per usual, the way my glasses sit on my face is irritating and covers up my eyeliner, but I wanted to show you all that my usual expression is really not smiling. I make weird faces in 97% of all pictures I take that aren't for this blog, so it's so weird that I've been making myself smile for pictures. This is even relatively tame! Usually I'd be pursing my lips to one side and raising my eyebrows, if nothing more extreme. Anyway, all I did was fill in my brows, take a dark blue eyeliner and draw on a super thick line that ended in a squared-off edge toward the outer corner, topped off the rest of my lid with a copper cream shadow, and put on some red lipstick.

The liner doesn't have to be perfect, but I was also being excessively haphazard since I knew I wasn't going out and no one was even going to see me in this unless I posted it to my blog. Lo and behold! Don't be afraid to make mistakes or not have your makeup be perfectly symmetrical. Often times, your eyeliner might need adjustment because your eyes are most likely not complete mirror images of each other. This is the one thing I see people fretting about the most when it comes to makeup. Just own it!

Maybe I've been drawn to red this month because Wear Red Day was almost two weeks ago or (less likely) because of Valentine's day, but red lips are seriously a very fun way to perk up any look or if you're not wearing any other makeup at all.

BROWS
Benefit Instant Brow Pencil in Deep
Anastasia Beverly Hills Tinted Brow Gel in Granite

EYES
LUSH Cream Eyeshadow in Happiness (sunset copper shimmer)
Liner - Urban Decay 24/7 Glide-On Eye Pencil in Binge (pearly navy blue, discontinued)

FACE
NOTHING!

LIPS
Bite Beauty Cashmere Lip Cream in Port (deep wine)


16 February 2014

look of the day - another haircut!

Okay, so this morning was spent roaming Chinatown as it was lightly snowing. Not exactly ideal, but hey, it could have been worse. My main reason for going was to get a trim because though I'm trying to grow my hair out, the ends were look a bit like straw.


The main differences between this haircut and the last one are that there are less fluffy layers in the front and the bangs aren't as styled. There are two pictures because I was testing out two new NYX Soft Matte lip creams: Transylvania on the left, and Copenhagen with Transylvania in the corners of my mouth on the right.  (Potential review coming up!) The only other makeup I'm wearing is Anastasia Beverly Hills tinted brow gel in Granite and Maybelline Color Tattoo 24HR Cream Gel Shadow in Just Beige.

Apparently my go-to look for new haircut photos is groomed brows and dark lips. Hey, it works!

14 February 2014

look of the day - happy valentine's day!

EDITED TO ADD 02/15/2014: The mini-tutorial has been added!

Okay, let's face it: I really don't care for Valentine's day. I loved it as a kid because you gave valentines to everyone and got them in return. As I got older, I hated the holiday for a while because I didn't like the commercialisation of holidays. (Yes, I was that teenager.) And now I just don't care for it, mostly because I don't see why we need one designated day where you're supposed to appreciate your loved ones. Aren't you supposed to do that every day?

Regardless of my feelings on the subject, there is something overly cute about doing a look based on red and pink, and since I spent most of my day trying to get bread dough to rise, I thought I'd give in.


It wouldn't be a makeup look from me if I didn't try something a little different, so there's the heart on my lip. It seems that smiling makes it a little strange, plus I probably drew it in sloppily. This isn't the most practical of looks, as if you're anything like me and smack your lips together constantly, that heart will be ruined really quickly.


Whoo, crazy hair! Here's the look with the heart blended out because I was getting sick of trying to keep my lips from being normal.

For the eyes, start with a peach-gold shade and pat that into the inner third of your lids. Blend a rosy-gold shade in the center third of your lid, and take a hot pink eyeshadow to the outer third of your lid and blend that into the crease. Finding peach-gold and rose-gold shades is probably relatively easy on both the drugstore and high-end levels--I used X and Scratch, respectively, both from Urban Decay, but drugstore brands should have similar colours. As for the hot pink eyeshadow, it can be a little more difficult to find, especially at the drugstore level. Wet n Wild and Hard Candy are good places to start! If you're not opposed to online shopping, Fyrinnae's eyeshadow in Superstar and Sugarpill's Chromalust pigment in Decora are good alternatives to the Sugarpill Smitten pigment I've used. If you want to hit up a Sephora, try Urban Decay's eyeshadow in Woodstock, Obsessive Compulsive Cosmetics' loose colour concentrate in Cherry Bomb, or Make Up For Ever's eyeshadow in Neon Pink 75.

Also, don't forget to consider cream formulas or even blush if you can't find a hot pink eyeshadow! You're very likely to find vibrant pink blush that can double as eyeshadow, whether it's powder or cream.

To anchor this look, line your upper waterline with a black eyeliner, curl your lashes, and add a few coats of mascara. (I hate mascara, so this was relatively monumental for me.) I also put some copper cream eyeshadow along my lower lash line, but this is optional.

The hearts were done with red and neon pink eyeshadows on a small detailer brush. All you really need to do is to create a thick v-shape for them, but if you want to get more detailed, try applying the shadows wet or with a mixing medium (i.e.: e.l.f.'s Mist & Set, MAC Fix+, Illamasqua Sealing Drops, or make your own with a ratio of 3:1 water to glycerin) and they'll not only apply more cleanly but they'll probably not fade as easily. I've also cut a little heart shape out of the sticky part of a post-it note and used that as a guide, first applying a thin layer of eyeshadow primer and then dusting eyeshadow over that. Do whatever works for you!

I took a light pink eyeshadow with a touch of glitter in it and used that as blush, but you can use any light pink blush that you have. For the lips, use a pink lipstick over your entire mouth, then take a red lipstick and a lip brush and paint in a heart on your lips. (xoVain posted an article yesterday about this and they have great pictures to follow!) If you're not into the whole high-maintenance lip thing--which, let's face it, I'm on board with you--you can just apply a pink, berry, or red lipstick and call it a day.

BROWS
Anastasia Beverly Hills Beauty Express brow kit in Brunette
Anastasia Beverly Hills Tinted Brow Gel in Granite

EYES
theBalm Put a Lid On It! eyeshadow primer
Inner corner - Urban Decay eyeshadow in X (peach shimmer with gold shift)
Center of lid - Urban Decay eyeshadow in Scratch (rose gold shimmer)
Outer lid + crease - Sugarpill Chromalust pigment in Smitten (hot magenta shimmer with reflective sparkles)
Upper lash line - Urban Decay 24/7 Glide-On Eye Pencil in Perversion (matte blackest black)
Lower lash line - LUSH Cream Eyeshadow in Happiness (sunset copper shimmer)
Lashes - Maybelline Volum' Express the Mega Plush mascara in Blackest Black
Decoration - Sugarpill Chromalust pigment in Asylum (red shimmer) + Sugarpill ElektroCute neon pigment in Love Buzz (neon hot pink with yellow/orange/red sparkles)

FACE
Benefit boi-ing concealer in 01
Blush - Sugarpill Chromalust pigment in Birthday Girl (princess pink with fuchsia sparkles)

LIPS
NYX Matte Lipstick in Tea Rose (mauve-pink)
Heart - NYX Slim Lip Liner in Plush Red (cool red) + Obsessive Compulsive Cosmetics Lip Tar in Stalker (true blue-based red)

13 February 2014

back to the basics!

WARNING: This is a super long post in which I discuss my very minimal look from today and the basics for a makeup stash. I am super long-winded in everything that I write for this blog and this is the most long-winded post I have written to date. You have been warned!

We actually have sunlight here today in the Chicago suburbs! It's insanely bright and I sort of hate it, but that's because I'm basically a vampire. The sunlight is reflecting off of the mountains of snow heaped everywhere which makes my head hurt, alas.

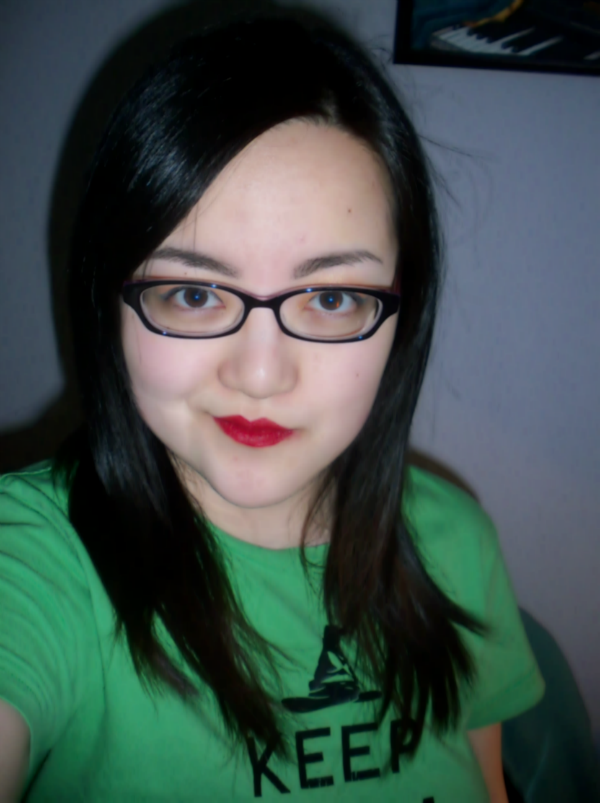
I had a few errands to run today, so I put on very minimal makeup. I filled in my brows and put on a little lipstick and that was it, nothing else on my skin except my morning moisturiser with SPF.


I had my blinds open so there was actually sunlight in my room, but my flash likes to wreak havoc on my skin anyway. You can't actually see the red blotches on my cheeks close to the jawline, but those require a metric shit ton of concealer to cover. I still look a little peaky, but that's to be expected, and damn those under-eye circles... They're awful.

If I'm not feeling exceptionally lazy and therefore leave the house with zero makeup on, I like to at least fill in my eyebrows because I think they make me look somewhat put together and less like I just rolled out of bed. The lipstick was a haphazard choice because I bought a bunch from NYX last week and they came in and they're fantastic.

(Wearing: Anastasia Beverly Hills Beauty Express brow kit in Brunette + NYX Cosmetics Butter Lipstick in Little Susie, a deep pink with a yellow undertone.)

I somehow managed to wrangle my hair into a side braid without it falling apart!


My hair is so straight that even when I haven't washed my hair for a day, it doesn't have much grip. Generally, when I braid my hair, little pieces stick out everywhere because the ends are stick straight and don't like to be bent at all. This is also why this braid looks really polished--I tried to mess it up by massaging it and pulling at it, but it refused to do anything cool.

I also pinned my bangs back which sort of worked against my favour because in addition to the sunlight, it's hella windy outside and pieces kept flying out of the bobby pins.

At the request of Livy, I've compiled a list of what I consider to be the basics. This will of course vary from person to person! I'm a makeup fiend so I have loads of products, but these would be a great place to start. I will be listing the products in the picture but I know that a lot of the products are pricey, so I will try to provide good alternatives.


Sometimes foundation seems like too much work, so for face products, I'd suggest a BB cream and a concealer. BB creams originated in Korea and often only came in one shade with a sort of ashy undertone. American BB creams tend to come in more shades, though the extremes of the skintone spectrum often have difficulty finding a good match. (If you have very dark skin, AJ Crimson has a really great selection! If you're really fair like I am, the Dr. Jart+ V7 Beauty Balm, pictured above in the top left, is a little thick but has good coverage, and Tarte and Too Faced make some very pale ones, too.) BB creams were originally formulated to give a great deal of coverage, but when the US came out with new formulations, most of them were a bit more sheer. There are several drugstore versions now, including but not limited to Garnier, Ponds, Maybelline, and Flower Beauty.

A good concealer will cover anything that your BB cream doesn't cover quite so well. I've found that I need a concealer for my redness and a second concealer for my under-eye circles, as thicker, creamier concealers provide more coverage but crease under the eyes, while liquid concealers have less coverage but are better at staying put under the eyes. The concealer in the picture is Benefit's boi-ing concealer (the round container to the right of the BB cream) and you can see that I use it a lot--quite a bit of pan is showing! I generally use Benefit's Fake-Up or Maybelline's Fit Me concealer under my eyes. If you're looking for a full-coverage drugstore concealer, Hard Candy's Glamoflauge is well-known and well-loved in the beauty blogosphere, though the colour range is limited.

Onto lips! It's always good to have a solid lip balm because so many things can damage your lips: weather, constant licking, dehydration, etc. The dark red tube in the top right corner is fresh's Sugar Lip Treatment SPF 15. Always look for a lip balm with SPF because the skin on your lips is very thin and very prone to sunburn regardless of the season. Smith's Rosebud Salve is a popular one, too, but it's really up to you as there are so many balms on the market. I would also suggest a thicker, more moisturising one for the evening to slather on before bed. I have a lip butter from The Body Shop for this purpose, and I know Bite Beauty has an agave lip mask that is relatively new which has gotten great reviews.

You don't need more than two lip products if you're low maintenance. One shade should make your lips look just a bit more pigmented--your 'my lips but better' (MLBB) shade. Mine is Revlon's Just Bitten Kissable Balm Stain in Honey, a medium rosy mauve. Chubby lip pencils are generally easier to wield, in my opinion! An MLBB can double as a cream blush. Just put a dot of it on each cheek and blend with your fingers. Your second shade should be a red. Everyone looks good in red lipstick and if you think you don't, you just haven't found the right red. I'll be making a post about red lipstick some time in the future! The one pictured is OCC's Vintage lip tar, which is called a deep burgundy, but I tend to find that a thin layer across the lips just looks like a superb red, but a second coat makes it more of a deep, brown-toned red. This lip tar was sent to me by my darling friend Charlotte!

There are so many products for your eyes that sometimes it's difficult to know where to begin. I would suggest an eyeshadow primer (pictured is theBalm's Put a Lid On It! eyeshadow primer), a neutral eyeshadow palette (mine is Urban Decay's Naked Basics palette), a black eyeliner (I have a love/hate relationship with Urban Decay's 24/7 Glide-On Eye Pencil in Perversion), and a mascara (Maybelline Volum' Express the Mega Plush mascara in Blackest Black). Eyeshadow primers help your eyeshadow to last for hours and prevent creasing, that annoying thing that happens when your eyeshadow starts to clump together and separate on your eyelids. I have very oily eyelids so this is a huge problem, and primer helps so much. There are a lot of drugstore primers that I just can't remember off of the top of my head, but I mostly use high-end ones.

A neutral eyeshadow palette is great because you can pull off simple looks that don't require a huge amount of effort or blending. The Naked Basics palette is all matte shadows with one semi-satin highlight shade, but any neutral palette will do. (To all of you other makeup mavens out there... Is it just me, or do you own a whole bunch of neutral palettes even though you know you really only need one? Seriously, guilty as charged.) Additionally, if you have a matte neutral eyeshadow, you can use it to fill in your brows if you were so inclined.

As for the eyeliner and mascara, feel free to experiment with this. If you think black is too intense, go for brown liner and mascara! I have naturally black hair, so I've always just bought black mascara because you wouldn't be able to tell I had brown mascara on if I tried. I always buy Maybelline mascaras because they're a great drugstore price that doesn't break the bank and their formulas are usually pretty great. You're supposed to replace your mascara every 3 months, so I can't even justify spending more than $8 on one, but I'm a cheat and don't replace mine that often because I don't even use mascara that often. I just forget! Urban Decay eyeliners are great in that they come in a huge variety of shades, but I often don't wear makeup for more than an hour at a time when I'm coming up with looks for the blog, so trying to get Perversion off of my face is nearly impossible. Their eyeliners are kind of price-y, though, so look to the drugstore. There are so many good varieties to look into these days!


The above picture is of items that I think aren't completely necessary but are great to have. First, an eyebrow powder + wax. That's the Anastasia Beverly Hills Beauty Express brow kit in Brunette in the top left. It comes with wax on the left, a brow powder duo in the center, and eyeshadow on the right. I've barely touched the eyeshadow, but everything else gets a lot of use. There's a tinted brow gel in the bottom row, between the foundation and the NYX lipstick--also from Anastasia Beverly Hills--I use both to fill in my brows.


For eyes, I always think it's fun to have a colourful palette, and pictured is Saucebox Cosmetics' Temptation palette. As you might have guessed, I loooove colourful eye makeup and I think it's always a good idea to have a few brights to play with from time to time, even if you're more of a neutral makeup type of person. The pink eyeshadow underneath the brow kit is Sugarpill loose Chromalust pigment in Decora--I have all of Sugarpill's eyeshadows that have been thus released, so I'm a bit of a glutton that way. Next to the NYX lipstick on the bottom row, there's a conical black shape and that would be my liquid liner. Liquid liner is a step up from pencil liner and it is a little more difficult to manage, but it's a great way to create a winged shape. I prefer gel liner, but it takes so much time!

For the face, I have a bottle of Urban Decay's Naked Skin liquid foundation in 1.0. This is a great foundation that photographs really well because it doesn't have any SPF in it and it has buildable coverage. I can add more foundation to red areas on my face to cover them up with no problem. In the center of the picture, I have a highlighter (rms beauty's living luminizer). Highlighters help to give your face a glow, and rms beauty's is especially good at making the glow really natural. Another suggestion would be Benefit's high beam. To the right of the luminizer is a powder blush--Too Faced's Sweetheart Perfect Flush Blush in Candy Glow. To bump up the staying power of your blush, apply a cream blush first and then a powder over it. In the bottom right corner is Urban Decay's All Nighter Long-Lasting Makeup Setting Spray. Setting sprays help to keep your makeup from fading.

For lips, there are so many options out there. I have a ton of colours--nudes, pinks, corals, shocking oranges, plums, black? I am really partial to darker lips so I've included NYX Butter Lipstick in Licorice, a deep plum colour. Don't feel limited because I've chosen a dark colour here. Go with what you think suits you best! If you're not much of a lipstick person, there are glosses, stains, and a real plethora of other products to explore, too.

In the lower left corner is Embryolisse's Lait-Crème Concentrè. I need to emphasise how crucial skin care is because I'm actually pretty awful at it. If you don't take care of your skin, nothing you put on it will do what you want it to do. My current morning routine consists of splashing my face with water and applying a little of Indie Lee's squalane facial oil followed by Everyday Coconut's daily face lotion with SPF 15. SPF is super important, regardless of your skin tone, skin type, everything. My only regret is that I don't have a morning lotion with SPF 30, which is recommended, but my skin is sensitive to most chemical sunscreens, especially octinoxate which seems to be in so many lotions. When you shop for anything with SPF, please make sure it's marked Broad Spectrum, as that means it will protect you from UVA I, UVA II, and UVB rays. (Check this site for more information.)

My current nighttime routine varies depending on how my skin is feeling. Generally, I use Everyday Coconut's cleansing face wash followed by the Indie Lee facial oil. If I'm removing makeup, I'll use wipes, remover, or an oil-based cleanser first. If I need to exfoliate, I use Yes to Grapefruit's daily facial scrub. At night, sometimes my skin gets very dry and I'll put on a layer of the Embryolisse cream. It can function as a lotion, a primer underneath your makeup, or a makeup remover. I generally use it for the first two uses.

Listen to your skin! I have combination skin, which means my cheeks are dry and my T-zone is oily, but my skin is currently very prone to flakes all over. My skin also happens to be sensitive, unfortunately, so I don't want to adjust my routine too drastically and cause it to freak out. My routine may not work for you!

That last statement, by the way? It applies to everything I've listed here. If you don't like wearing makeup, that's fine! Don't let anyone cramp your style. If you prefer more dramatic looks, then stock up on some more variety. If you want to wear blue lips, go for it, and might I suggest Obsessive Compulsive Cosmetics , Limnit Lipsticks, or Melt Cosmetics for places to start? Makeup can change your features, mask something you'd rather not show the public, or be used as a form of self-expression. Ultimately, you should do whatever you feel the most comfortable doing.


IF YOU HAVE READ ALL OF THIS, bless your little heart and I'm sorry.

12 February 2014

look of the day - cream + gold + green

This morning, I went to get a physical because I have a big girl job (!!!) and my arms are currently quite sore because I had to get a vaccine in each arm. I'm also piloting the Crimson Typhoon so no matter how much I try with my makeup, all of my photos make me look exceptionally ill. How is it possible for me to look any more pale?!

Now that I've given you too much information about my life, onto the look for today! My darling friend Livy requested a look with gold, green, and cream eyeshadow. I'll admit that I skipped the cream eyeshadow because every colour I had close to that was invisible on my skin, but I'll let you all know how to incorporate it into the look.


I was experimenting with overdrawing my lips here, too, so that's why my mouth looks different. (Note to self: don't try overdrawing with lip tar again.) Obviously, red lipstick is not a requirement for this look! I'm just sort of obsessed with the colour, plus Valentine's Day is coming up and even though I personally have no interest for the holiday, a red lip is suitable for any day.

Time for a mini-tutorial! After priming the lid, take a gold eyeshadow from the inner corner to about 1/3 to 1/2 across the lid. You can use a brush/sponge applicator to do this, or use your fingers like I did. I have a particular distrust of brushes for some reason, but I'm working on it. Take a medium green eyeshadow and pack it next to your gold eyeshadow, keeping the colour a bit further back from the outer corner of your eyelid. I used an olive green colour (aptly named Up All Night to Get Loki, as Livy is obsessed with Tom Hiddleston) but any green will do.

Take a black eyeliner or eye crayon and colour in the outer corner of your lid. Blend this like crazy--you're not getting a close-up of the look because I forgot to do this and it looks terrible. Whoops! After you blend this really well, take your green eyeshadow and pat it lightly onto the black base to give the shadow some depth. I happened to use a darker green eyeshadow than the Loki one, but I happened to have one on hand.

Go wild with black eyeliner. I chose to do winged liner with a liquid liner that has somehow yet to die, but you can just use a simple pencil and smudge that around your eyes. The sky is the limit! I also took a green liquid liner to my lower lash line, but that was me being ~fancy~.

You should use blush with this look so you're not washed out, especially if you do red lipstick! Somehow, even with blush I still look like Casper's ghost friend who learned how to paint her face, so um... Yeah, watch how you balance your look. I think a nude pink lipstick would look great, or if your lips are naturally quite pigmented like mine are, you can get away with some lip balm and call it a day.

If you have a cream eyeshadow and you're not a ghost like I am, you can place some in the inner corner of your eyelid to open up the eye, or blend it into the crease of your eye up to your browbone for a sick highlight.

Other possible combinations of cream + gold + green:
  • Cream over the lid, gold on the outer corner + crease, green along your lash lines
  • Green all over the lid with gold patted smack dab in the center of your upper lid
  • Cream into the inner corner, green all over your lid, gold along the lower lash line
  • Smokey eye! Green along the lash line brought up halfway on the lid, gold from there to the crease, and cream from the crease to your browbone


Since these colours are rather different from each other, make sure to blend like crazy, whatever you choose to do.

BROWS
Benefit Instant Brow Pencil in Deep
Anastasia Beverly Hills Tinted Brow Gel in Granite

EYES
theBalm Put a Lid On It! eyeshadow primer
Inner lid - Urban Decay eyeshadow in Half Baked (golden bronze)
Outer lid - Shiro Cosmetics loose eyeshadow in Up All Night to Get Loki (olive green with gunmetal shimmer)
Outer corner - Ulta Eye Crayon in Black Tie + Sugarpill Chromalust pigment in Junebug (forest green shimmer)
Upper lash line - Maybelline Line Stiletto Ultimate Precision Liquid Eyeliner in Blackest Black
Lower lash line - Stila Stay All Day® Waterproof Liquid Eye Liner in Moss (forest green)

FACE
Urban Decay Naked Skin liquid foundation in 1.0
Benefit boi-ing concealer in 01
rms beauty lip2cheek in diabolique (dark burgundy)
LUSH Cream Eyeshadow in Happiness (sunset copper shimmer)

LIPS
Obsessive Compulsive Cosmetics Lip Tar in Vintage (deep burgundy)

06 February 2014

look of the day - tumblr inspiration (disney's frozen, sort of?)

This is a WHOLE WEEK LATE. I really wanted to post a makeup look on Lunar New Year (31 January) and I failed. I tried something but I didn't like it and then I spent the weekend visiting my sister and friends at my alma mater, and then it's been cold and snowy and I've had no motivation. I finally sucked it up even though I almost crashed the car today after skidding on ice on the road trying to drop off a third of my closet at Goodwill.

(That was terrifying, by the way. 0/10, would not recommend.)

There have been a bunch of wonderfully talented folks on Tumblr editing pictures from Frozen to make characters with different powers, and I saw this one and knew I had to try it. It was perfect for Lunar New Year, too, so why not?


This was done quite similarly to the Elsa look I posted last month, except I used red and gold instead of purple. Gold eyeshadow went into the inner half of my lid and red on the outer half. I used my beloved Sugarpill Goldilux pigment and a red loose eyeshadow with golden sparkle to blend the two colours together.

To finish off the look, I filled in my brows, used a touch of blush, and took a deep red lip tar and brushed it across my lips. Straightforward but bold!

BROWS
Anastasia Beverly Hills Beauty Express brow kit in Brunette
Anastasia Beverly Hills Tinted Brow Gel in Granite

EYES
theBalm Put a Lid On It! eyeshadow primer
Inner corner - Maybelline Color Tattoo Metal 24HR Cream Gel Shadow in 65 Gold Rush
Inner third of lid - BFTE Cosmetics loose eyeshadow in Snake Oil (yellow-based metallic gold)
Center of lid - Sugarpill Chromalust pigment in Goldilux (highly-reflective metallic gold)
Outer lid - BFTE Cosmetics loose eyeshadow in Ruby Slippers (orange-based glittery red)
Outer corner + crease - Sugarpill Chromalust pigment in Asylum (red shimmer)
Liner - Urban Decay 24/7 Glide-On Eye Pencil in Perversion (matte blackest black)
Lower lash line - NYX Slide On Liner in Glitzy Gold (pure gold)
False lashes - Sugarpill False Eyelashes in Hush

FACE
Urban Decay Naked Skin liquid foundation in 1.0
Urban Decay 24/7 Concealer Pencil in CIA
Josie Maran Coconut Watercolor Cheek Gelée in Poppy Paradise

LIPS
Obsessive Compulsive Cosmetics Lip Tar in Vintage (deep burgundy)


Since it's the new year, I'm pretty sure I want to chop off a good three inches of my hair and possibly dye it a dark purple. Who knows?