31 October 2013

halloween looks - wednesday addams

As Halloween comes to a close, I thought I'd share my Halloween costume! It was quick and easy and I ended up not even leaving the house after I put it on, but it was worth the fuss. I'm not actually a huge fan of most Halloween decorations because I'm really easily startled and I get nightmares from more or less everything, but this year I suddenly became fascinated with special effects makeup so I might end up taking makeup classes to work toward getting a professional license.


The best part of this costume? No need to cover any undereye circles. I seriously never realised how frustrating they were until this year. One benefit of wearing glasses for almost my entire life, I suppose! The clothing was just picked out of my closet: an old dress shirt from what must have been middle school, a black long-sleeved shirt, a skirt from Forever 21 that I bought ages ago, and some black tights.


BROWS
Sephora Brow Sculpting Pencil in Dark
Anastasia Beverly Hills Tinted Brow Gel in Granite

EYES
Lid - Urban Decay 24/7 Glide-On Eye Pencil in Perversion (matte blackest black) + Urban Decay eyeshadow in Faint (warm, dusty brown matte)
Lash lines - Urban Decay 24/7 Glide-On Eye Pencil in Perversion (matte blackest black)
Under eyes - Too Faced eyeshadow in Like a Virgin (taupe-grey matte) + Sigma Crème de Couture blush in Blackberry Essence (amethyst berry mist) and Strawberry Ambrosia (cotton candy)
Lashes - Maybelline Volum' Express the Mega Plush mascara in Blackest Black

FACE
Urban Decay Naked Skin liquid foundation in 1.0
Benefit boi-ing concealer in 01 light
Benefit Fake Up concealer in 01 Light

LIPS
Maybelline Color Sensational lipstick in Deepest Cherry (deepened dark plum berry)


And with Halloween coming to a close, it's time for me to work on my NaNoWriMo novel! Of course, as usual, I have no idea what I'm doing and there's only a half hour left before November, so like last year I'll be winging it. This might mean less frequent posts to this blog, but let's face it... I'm a chronic procrastinator so I'll want to do this and not write at some point.

29 October 2013

halloween looks - inspiration from alice in wonderland

Halloween is so close! I don't have much of an occasion for an excuse to dress up, but I've decided that I'm going to be an older Wednesday Addams because that doesn't require me to buy a costume (so many old shirts and skirts in my closet!) and I don't have to cover up my undereye circles. In fact, I just have to exaggerate them, which is even better.

My friend Krystal on Tumblr asked if I could make a tutorial for this Alice in Wonderland inspired look and as soon as I saw the pictures, I knew I had to try it.


Of course, I haven't done anything with my hair because it's stubborn and I'm lazy, but if you're looking to copy something like the inspiration photos, I'd suggest curling your hair with a tighter iron, something close to 3/4" if possible, and brushing out some of the curls but not all of them. Mess up your hair with your fingers and pin it up haphazardly, or leave it down!

By the way, glasses are a huge hindrance when doing looks like this. I wasn't quite sure what I was doing with my glasses off trying to get the circle around my eye right, but it doesn't look that bad.


This photos is hilarious mostly because I look really unamused and trust me... I was. I think I might have stabbed my waterline with the wood of my black eyeliner and it still stings, so no heavy eye makeup for this girl for at least a few days until I make sure nothing serious happened. Take heed, darling readers: keep your pencils sharp so this doesn't happen to you!

This whole look is meant to look a little deconstructed and messy, so don't panic if you think you've made a huge mess. It's supposed to be haphazard and rushed!
  1. Apply your foundation of choice all over your face. Ideally, you want something that's lighter than your skintone, but any foundation will work!
  2. Conceal anything you need to--spots, acne, redness--but you don't need to cover any undereye circles, which is always a good thing.
  3. After putting on eyeshadow primer from your lid to your browbone and down beneath your eyes (which will help your eyeshadow last longer), take a shimmery golden brown eyeshadow and start patting that on with your fingers. Start by applying it beneath your brows and then bringing it down to the crease.
  4. Next, take an eyeshadow brush loaded with the same brown eyeshadow and map out the shape around your eyes. This look is not about being exact, but this is the only part that requires caution and a steady hand. The shape for which you're aiming is an oblong circle that extends up to your brows, into the bridge of your nose, and goes down toward your cheekbones. The shape will be different for every face, so don't worry if it doesn't look like any of the inspiration pictures or the ones of me!
  5. Fill in the shape with the brown eyeshadow. You do not need to place any of this colour on your lid because we will be placing black cream over it.
  6. Using a black cream pencil or eyeliner, fill in your lid and trace a thick line beneath your eye. This can be haphazard and messy.
  7. Smudge the black as much as possible. The shape should be inexact, so don't worry too much about where the colour is going.
  8. Set the pencil with a black eyeshadow.
  9. Rim your waterline and lash lines with a black eyeliner.
  10. Using your black pencil, sketch out a curve beneath the inside corner of your brow down the sides of your nose. Blend with your finger. (Alternately, you can use a black shadow but be sure to use the colour sparingly on a brush so it doesn't spread everywhere.)
  11. Take a black eyeshadow and fill in your brows. The brow shape is meant to be slightly thin with a curved arch, not a pointed one, and the brow should extend quite far down.
  12. Using a deep bronzer or the same brown eyeshadow as before and a big brush, contour beneath your cheekbones. The easiest way to do this is suck in your cheeks as though you're making a fish face and fill in the hollows. I did this quite a bit lighter than the inspiration photos because I was using my finger since the eyeshadow pan was tiny, but you can go wild with the colour as long as you blend it out.
  13. Blend a deep brown-pink or plum blush onto the cheekbones and bring it up toward the hairline at the temples. You can also load the colour one far more intensely than I've done here because I was using a sparkly eyeshadow in a palette with my finger.
  14. Fill in your lips with a deep burgundy lipstick. The inspiration photos have a burgundy that is far more brown than the colour I used because I unfortunately don't own any lip colours that are brown-toned.
  15. Mix a light coloured lip gloss with a white eyeshadow and pat that on top of your cheekbones. This will give that radiant finish as seen in the inspiration photos.

BROWS
Sugarpill pressed eyeshadow in Bulletproof (deep matte black)

EYES
Around eye socket - Urban Decay eyeshadow in Smog (deep coppery bronze)
Under eyes - Oslo Cosmetics eyeshadow in Voltanis (tapped over Smog)
Lid - Ulta Eye Crayon in Black Tie + Sugarpill pressed eyeshadow in Bulletproof (deep matte black)
Lash lines + waterline - Urban Decay 24/7 Glide-On Eye Pencil in Perversion (matte blackest black)

FACE
Urban Decay Naked Skin liquid foundation in 1.0
Benefit Fake Up concealer in 01 Light
Benefit boi-ing concealer in 01 Light
Contour - Urban Decay eyeshadow in Smog (deep coppery bronze)
Blush - Urban Decay eyeshadow in Last Call (metallic sugar plum)
Highlight - Smashbox O-Gloss Gold + Urban Decay eyeshadow in Polyester Bride (white snow shimmer with silver micro-glitter)

LIPS
Obsessive Compulsive Cosmetics Lip Tar in Black Dahlia (blackest blackened red)
Wet N' Wild Fantasy Makers lipstick in Black

27 October 2013

halloween looks - broken doll tutorial

Wow, it's been a week since my last post. I've been lacking in inspiration and focus as of late, but I just discovered a desire to try special effects makeup and I went full out with recreating my look from last Halloween.

Ta-da! This was my last-minute costume that I wore to my a cappella group's rehearsal. I had my hair in tight ringlets and only managed to curl about 2/3s of my hair before we had to go and I was already late... And it still took me two hours to do the hair alone. I wore a dress I bought at Hot Topic, ripped nylons, and round-toed black heels. I think it worked well for something I slapped together.

There are a few changes I made this time around: I filled in my eyebrows to mimic a more rounded shape, I didn't bother curling my hair with a 1/2" iron, and I chose a lighter lip colour.

Pre-broken doll...

My hair takes too long to curl regardless of what I do to it, but I think this was worth it. If you want to try this for Halloween, you don't even need to curl your hair! You can just put your hair into pigtails of your choice, but I was going for a very made up doll look. The tutorial follows the next picture and if anyone needs a detailed description and/or photo for a particular step, please don't hesitate to ask.


  1. Prime your face. I'm using Embryolisse Lait-Creme Concentre because it's wonderful and my skin needs the extra moisture, but you can use a normal foundation primer if you'd prefer. (If you want to go all out and use circle contacts, put those in now before you start your makeup!)
  2. Using a foundation brush, cover your face with a foundation that is one shade lighter than your skin tone. You can forgo the lighter foundation if you don't have it, of course, but they don't call them porcelain dolls for nothing.
  3. Conceal as needed. I have a lot of redness in my cheeks, so I focused on that and on the dark spots around my face. Dolls have completely flawless skin, so aim for that. You can also use a full-coverage foundation so you don't need to do as much concealing!
  4. After applying eye primer, use a matte shadow that is close to the colour of your skin on each eyelid. You don't need to be precise with this--it's mostly to help the rest of the eyeshadow blend more easily. (Here's the fun part: you don't need to stick to the eyeshadow look I've done here! As long as you keep it simple, anything goes. If you want to use a light blue eyeshadow, go for it. Use a green, if you'd prefer!)
  5. Using a matte shadow that is a few shades darker than your skintone, work the colour into the crease of your eye. Make sure to blend blend blend! When you're done with this, use the same shade and contour slightly around your nose. You want to connect the inner corner of your brow to your nose and then draw a straight line down, and then shade the tip of your nose to get the dainty doll look. Make sure to blend out all the harsh lines. (I forgot to do this here, but you can also brush the shadow below your bottom lip to make your lips appear fuller. Add a little white pencil on your cupid's bow, too!)
  6. Take a matte black shadow and work that into the crease over the nude shadow. This is mainly to provide definition that will emphasise the doll lashes you'll be putting on later.
  7. Fill in your eyebrows! Mine are naturally thick so I didn't want to work against that. Dolls tend to have thin eyebrows so if you have thin brows or your brows are light, try playing around with changing the shape of your brows! Aim for a soft, rounded shape with no discernible arch.
  8. Line the waterline and just under your eye with a white pencil. You're shooting for big eyes, and this will work in your favour.
  9. Line your upper lash line with a black pencil. This will give you a place to hide the false lashes.
  10. Draw a dashed line with your black pencil below where you've used the white pencil on your lower lash line.
  11. Curl your lashes and add a coat or two of mascara. Now for the fun part: glue on those falsies! Thickness is not what you're aiming for--you want a pair of long, fluttery lashes.
  12. Using a red blush or shadow, go wild with colour on your cheeks. I used an eyeshadow with a sightly heavy hand. Focus the colour on the apples of your cheek and don't be afraid to make the colour bold.
  13. Take a taupe or brown pencil and dot some fake freckles on over the cheeks and the bridge of your nose. You don't want these to look too perfectly spaced, but aim for clean dots.
  14. Take a pink lipstick (or lip product of your choice) and fill in your lips. Don't be afraid to exaggerate the look and work out of your lip line! Dolls have naturally pouty lips so you can focus on the bottom lip and not apply anything at the corners of your mouth. If you have very pigmented lips, you might want to put a little concealer into the corners with a concealer brush.
  15. Place a bit of a light pink gloss on the center of your bottom lip.
  16. Time to make yourself as creepy as possible! Take a sharp black pencil and lightly begin to trace where you want the cracks and chips to go. Don't make these lines too harsh at first and don't think too hard about what you're doing with the lines. Make them haphazard! You can outline large pieces that will be missing.
  17. Fill in the large broken pieces. Use the pencil with a heavy hand to fill in the outlines to make them appear more multi-dimensional.
  18. If you're going out, you can possibly set your face with a translucent powder. However, the black pencil might prove difficult. Test it before you go out, and if that doesn't work, a setting spray will help tremendously.
  19. Keep reminding yourself not to touch your face. If you look at the first photo in this post, you can see that the eyeliner kept smudging because I have that bad habit of touching my face constantly. I'd also advise not to put a big missing chunk on your nose because that's likely where you're smudge things first.


BROWS
Sephora Brow Sculpting Pencil in Dark
Anastasia Beverly Hills Tinted Brow Gel in Granite

EYES
Lid - Urban Decay eyeshadow in Foxy (very light yellow/white matte)
Crease - Urban Decay eyeshadow in Naked2 (taupe matte), Faint (warm, dusty brown matte) + Crave (deepest, darkest brown/black matte)
Upper lash line - Urban Decay 24/7 Glide-On Eye Pencil in Zero (black)
Lower lash line - Urban Decay 24/7 Glide-On Eye Pencil in Yeyo (metallic white) and Zero (black)
Lashes - Maybelline Volum' Express the Mega Plush mascara in Blackest Black
False lashes - Ardell lashes in #105 Black

FACE
Marc Jacobs Gel Genius Foundation in 10 Ivory Light
On cheeks - MAKE UP FOR EVER Full Cover Concealer in Pink Porcelain 1
Benefit Fake Up concealer in 01 Light
Under eyes - Maybelline Fit Me Concealer in 15 Fair
Blush - Sugarpill pressed eyeshadow in @#$%! (vampy pearl red with silver metallic sheen)
Fake freckles - Urban Decay 24/7 Glide-On Eye Pencil in Desperation (deep taupe to gray matte)
Broken patches - wet n wild coloricon eyeliner in black

LIPS
NYX Soft matte Lip Cream in Sao Paulo (plummy-pink)
NYX Butter Gloss in Merengue (pink lilac)


My mom told me that I'm creepy. I think that means this is a success.

19 October 2013

looks of the day - two looks inspired by lisa eldridge's videos!

So, after posting the last look inspired by one of Lisa Eldridge's looks, I saw her post about how she loved all of the photos that were being tagged #mylisalook and she set up a bit of a contest. (Look, my face is on her post!) It's been a few days but I just wasn't feeling like putting on makeup, especially with the cloudy weather over the past few days. But today, she posted a new video and I really wanted to try it! There's also a red eyeshadow video here that I just had to try because I'm all about the bright colours.


This look is very subtle but gorgeous for daily wear. I've been looking for every excuse to use the rms beauty lip2cheek in diabolique because I'm absolutely obsessed with it, and luckily it can be applied very sheerly for a nice berry tint to the lips. (Also, look at how I took this photo--I'm apparently in denial about my height despite the fact that I've been 5'3" for almost 8 years of my life...)

BROWS
Benefit Instant Brow Pencil in Deep
Anastasia Beverly Hills Tinted Brow Gel in Granite

EYES
Lid - Urban Decay eyeshadow in Half Baked (golden bronze)
Inner corner - thebalm eyeshadow in Snobby (yellow with gold shimmer)
Lash lines - Urban Decay 24/7 Glide-On Eye Pencil in Zero (black)
Lashes - Maybelline Volum' Express the Mega Plush mascara in Blackest Black

FACE
Embryolisse Lait-Crème Concentrè + Dr. Jart+ V7 Beauty Balm
Under eyes- Maybelline Fit Me concealer in 15 Fair
Benefit Fake Up concealer in 01 light
COVER FX Cream Concealer in N Extra Light
Contour - Maybelline Fit Me stick foundation in 235
Highlight - Benefit high beam
bareMinerals blush in t.t.y.l. (sheer poppy pink)

LIPS
rms beauty lip2cheek in diabolique (dark burgundy)

Since this was subtle, I was able to take it off with relative ease and put on the next look. Red eyeshadow is possibly one of my favourite things in the world but wearing it on a normal basis tends to earn you strange looks. Believe me, I've worn it a few times to class and people don't know what to say most of the time.


My glasses just make my eyes look even more misshapen. I've come to realise that I actually like a strong eye with a strong lip on me. I tend to think that with a nude lip, I actually look quite washed out because I'm so pale. So here's the look with some pink-red lips!

BROWS
Anastasia Beverly Hills Tinted Brow Gel in Granite

EYES
Sugarpill pressed eyeshadow in @#$%! (vampy pearl red with silver metallic sheen)
Liner - Urban Decay 24/7 Glide-On Eye Pencil in Perversion (matte blackest black), Maybelline Line Stiletto Ultimate Precision Liquid Eyeliner in Blackest Black
Lashes - Maybelline Volum' Express the Mega Plush mascara in Blackest Black

FACE
Urban Decay Naked Skin liquid foundation in 1.0
Benefit Fake Up concealer in 01 Light
NYX powder blush in Desert Rose (matte burgundy-pink)

LIPS
fresh Sugar Lip Treatment SPF 15
Sephora Rouge Cream Lipstick in The Red 04 (classic bright red)


I was going to do a third look, probably something for Halloween, but my eyeliner and my makeup remover wipe got into a catastrophic fight and I almost lost my eyeballs because of it. The skin around my eyes? Already a casualty. There was a great burning sensation as I was trying to take off all the black liner so I decided it was best to not do anything else!

17 October 2013

review - oslo cosmetics

As previously mentioned in this post, I ordered a blogger pack from Oslo Cosmetics, a new indie makeup brand. Joyce, the owner, is lovely and very prompt about sending everything out, and she's always welcome to customer feedback. I was dying to try their shadows because there are so many gorgeous colours.

Their loose eyeshadow is different from most brands. It's stickier than traditional loose eyeshadows. For those of you with sensitive noses, there is a bit of a scent to them--I don't know why, but I think they smell a little bit like stale cardboard. But it's a minor issue that doesn't affect my opinion on them.


They may look like they don't have much product in them due to the density of the formula, but trust me, a little goes a long way!


From left to right, we have Colossus: Carinae, Dark Days: Ara, Starlight: Grus, and Starlight: Serpens. Sidenote: can camera companies consider making lefthanded cameras? Because I am suffering over here. I made swatches on my right arm and then realised that I had to hold the camera with my right arm in order to actually see what I was doing. So I apologise that these swatches are out of focus... Holding the camera in my left hand was tedious! I wish someone took a picture of me during this process because it was absolutely bizarre. The following photos of the shadows themselves are also kind of haphazard in their size. I'm trying to get used to using my dad's 35mm camera, but it's a steep learning curve!

Let's start with the shadows!

Colossus: Carinae

Oslo Cosmetics' description:
Beautiful, shimmery/metallic peach-pink, with light green/gold shift.

As much as I love colour, I'll always gravitate toward peach-pinks that have hints of gold in them. They look amazing on everyone and this is no exception. It's perfect for everyday looks or to blend out warm shades. I didn't notice much of a green shift, but the gold was enough to sell it to me.

Dark Days: Ara

Oslo Cosmetics' description:
Dark, sultry shimmery brassy red.

For some reason, my photographs just aren't capturing the gorgeous red tones in this shadow and they always look brown. It's a deep red-brown and it would look wonderful in a smokey eye. (Sidenote: don't be afraid of reds in eyeshadows!)

Starlight: Grus

Oslo Cosmetics' description:
Bright, rich sapphire blue with duochrome blue glitter.

This is SUCH a gorgeous blue. The glitter can make it a little difficult to blend, but if you apply a thin layer of loose powder over your lid before you put on eyeshadow, it'll make everything much easier. I can't get over how wonderful this is for autumn because it's metallic and so bright.

Starlight: Serpens

Oslo Cosmetics' description:
Flashy, bright indigo-blue-violet, with mystic duochrome glitter.

This shade was much more on the dark blue/indigo side for me and I wish it had been a little more violet like the photo on the website. The glitter also made this one the hardest to apply evenly and it was the only shade that disappointed me.

Overall, I really liked how these applied. I tested Grus over primer on one eye and with no primer on the other, applied with my finger. The website suggests using a sticky primer like its eye primer wand or a velvet cream base, but since I didn't order one of those, I just used a silicone-based eyeshadow primer. Without primer, it only lasted three hours before it started to crease and after six hours, it was completely gone. The website doesn't make any claims about the shadows being long-lasting, so this was more for my own sake than anything else. With primer, it lasted about seven hours before there was any noticeable creasing.

I then tested the shades all together in a sloppy look that was slapped together before having to run errands, so no photos of that, unfortunately. This time, I applied the shadows with a brush and I think it made the application a lot smoother. I would definitely recommend using a brush because that way the oils in your fingers don't mess with the formula of the shadows and make them harder to blend out. With primer, they lasted 8 hours before creasing.

The shadows come in a variety of colours and there's even a Game of Thrones collection coming in November. If you're looking for an indie brand to try, Oslo Cosmetics may be for you!

14 October 2013

look of the day - autumn trends

I originally wanted to make another Halloween look today, specifically a monkey look, but I ended up helping my mom in the kitchen for over two hours and all the pictures I Googled for inspiration did nothing. The really good ones required prosthetics (or liquid latex, at the very least, and I don't have any of that lying around!) and the others just weren't cutting it. So instead, I did a look with some of the products I mentioned in this post about my favourites for fall.


When you've worn glasses for 17 of your 22 years of life and then start taking photos without them on, you realise the harsh truth: dark circles exist. My glasses have covered them for my entire life--either them or their shadow, and now I take photos and remain bewildered when I look like I haven't slept in weeks.


I had a lot of fun with this look regardless. I wanted to put a little sparkle in my brows and originally intended to use Sugarpill's Goldilux, but I found the Shiro shadow and thought that it would be slightly more subtle. Besides, I intend to attempt a gold brow look like Dior's during S/S 14 fashion week.

Also, go out and get RMS Beauty's lip2cheek in Diabolique right now. It's limited edition but it's so perfect for fall that I now own two in case they don't make it permanent like so many people are begging for them to do. I used the slightest bit on my cheeks and it made for such a pretty flush.

BROWS
Urban Decay eyeshadow in Hustle (mocha shimmer)
Anastasia Beverly Hills Tinted Brow Gel in Granite
Shiro Cosmetics loose eyeshadow in Nic Cage Raking Leaves on a Brisk October Afternoon (coffee brown-black with gold and red sparkles)

EYES
Inner lid - Urban Decay eyeshadow in Half Baked (golden bronze)
Outer lid -  Urban Decay eyeshadow in Smog (golden brown shimmer)
Crease + lower lash line - Makeup Geek pigment in Enchanted (light plum shimmer)
Upper waterline - Urban Decay 24/7 Glide-On Eye Pencil in Perversion (matte deepest black)
Inner corner - NYX Slide On Liner in Glitzy Gold (pure gold)

FACE
Urban Decay Naked Skin Weightless Ultra Definition Liquid Makeup in 1.0 (very fair bisque, soft warm undertones)
Benefit boi-ing concealer in 01
rms beauty lip2cheek in diabolique (dark burgundy)

LIPS
rms beauty lip2cheek in diabolique (dark burgundy)

13 October 2013

look of the day - more tumblr inspiration a day late!

Hi everyone! So this look was actually done yesterday, but I didn't get a chance until today to write up a post.

There are always so many beautiful pictures on Tumblr from which to draw inspiration and I saw this one and knew I had to try it.


The eyebrow was the most challenging part. I have a naturally high arch in my brow, but it's not noticeable when I don't fill in my brows because my brows are short. This made the whole covering the brow issue a lot harder so you'll see that my brow is much thicker than the one in the picture.


I also considered using more black eyeliner on the upper lid to finish up the look, but I usually remove my makeup right after taking photos because as much as I love dramatic makeup, sometimes walking around the house in it is something I don't want to do. I had a battle to the death with makeup remover, coconut oil, cotton swabs, and cotton pads against Urban Decay's Perversion eyeliner the day before, and I decided I wanted to go easy on my skin whilst doing this, so all I did was a quick swipe of the waterline.

Because this was quick and I only did it on one eye, no full face photo for this one, unfortunately! I used the brow erasing technique featured on Beautylish, which you can find here.

BROWS
Elmer's Washable Glue Stick
bareMinerals mineral veil
Sephora Nano Eyeliner in 01 Midnight Black + 03 Pure White

EYES
Lid - Sugarpill pressed eyeshadow in Tako (matte white)
Liner - Makeup Geek Gel Liner in Poison (matte rusty red) + Sugarpill Chromalust pigment in Asylum (red shimmer)
Upper lash line - Urban Decay 24/7 Glide-On Eye Pencil in Perversion (matte blackest black)
Lower lash line - Urban Decay 24/7 Glide-On Eyeliner in Yeyo (metallic white)
Lashes - Maybelline Volum' Express the Mega Plush mascara in Blackest Black

Finally, I wanted to give a shout-out to the lovely Laura, who interviewed me for her Girls Fighting Evil blog. Check out the post here!

11 October 2013

look of the day - inspired by lisa eldridge's cara delevingne video

I was going to take more inspiration from tumblr pictures today, but Lisa Eldridge, a very well-known makeup artist who has worked with countless celebrities, just posted a video today about the look she did for Cara Delevingne at the W Magazine party.


I tweaked the look only just a bit; Lisa used a smoky, green-tinted silver for the majority of the lid, but I used a shade that was similar for the outer corner and crease instead, opting for a vibrant silver for the lid. Plus, it gave me an excuse to use a Sugarpill shadow I don't often reach for. I also skipped the false lashes because I still haven't gotten a new lash glue since my old one separated and turned into a gross mess.


This look is definitely meant for a party and I love it! I obviously don't have anywhere to go tonight, so you're getting shots of me wearing my Next to Normal hoodie instead. I can't get over how perfect this is for fall--metallics are in. I don't usually wear silver eyeshadow, either, so that says volumes about this.

BROWS
Sephora Nano Eyeliner in 05 Chocolate
Anastasia Beverly Hills Tinted Brow Gel in Granite

EYES
Lid - Sugarpill Chromalust pigment in Tiara (metallic silver), applied wet
Outer corner + crease - Oslo Cosmetics loose eyeshadow in Rome: Crux (silver-green shimmery duochrome)
Upper and lower lashline - Urban Decay 24/7 Glide-On Eye Pencil in Perversion (matte blackest black), Maybelline Line Stiletto Ultimate Precision Liquid Eyeliner in Blackest Black
Inner corner - Urban Decay 24/7 Glide-On Eye Pencil in Yeyo (metallic white)
Lashes - Maybelline Volum' Express the Mega Plush mascara in Blackest Black

FACE
Urban Decay Naked Skin liquid foundation in 1.0
Under eyes - Maybelline Fit Me concealer in 15 Fair
Contour - Maybelline Fit Me stick foundation in 235
Highlight - Benefit Watt's Up

LIPS
Benefit boi-ing concealer in 01 and NYX Matte Lipstick in Tea Rose (mauve-pink)
Smashbox O-Gloss Gold


09 October 2013

look of the day - green wing + oslo cosmetics preview

It's been a few days and a lot of attempts at self-searching, and I'm finally up for the challenge that is finding a job. Today's task is to clean my room, though--it's been a disaster ever since I moved back home and I had to abandon my attempt after allergies started kicking in. (I have to empty out the foyer, too. That's included in my task!) I also went shopping at Trader Joe's to get as many pumpkin-flavoured things as I possibly could because it's fall and if I don't have pumpkin in my food, I might go crazy. (Macarons, bread pudding, butter, amongst others?)

Anyway, before I left to go grocery shopping, I stumbled across a picture on Tumblr that fueled the inspiration for today's look.


Isn't it gorgeous? I figured that the shape was made by a metallic green liner, probably a liquid or a cream. The colour reminds me of an eyeliner I received as a Secret Santa gift back in high school--Wet 'n' Wild mega liner in this crazy beautiful blue-emerald green. I used it all the freaking time and it was always on my lower lash line because everything smudged so badly on my eyelids.

Unfortunately, that liner is no longer with us, and all I had was several shades of green eyeshadow, so I used two different shades to imitate this look.


Since one shadow was loose and one was pressed, I couldn't quite mix them on a palette to get an even colour, so that's why there's a bit of a black streak in the middle. My eyelids do funny things to eyeshadow and even with primer, I had to touch up with some makeup remover. Unfortunately that meant that the line would smudge every time I opened my eyes fully, so every picture I took, I had my eyes closed! Don't mind my messy brows.

BROWS
Benefit Instant Brow Pencil in Deep
Anastasia Beverly Hills Tinted Brow Gel in Granite

EYES
Fyrinnae loose eyeshadow in Callipygian (vibrant kelly/emerald green shimmer on black)
Sephora eyeshadow in N° 7 Picnic in the Park (grass green shimmer)

FACE
Benefit boi-ing concealer in 01

LIPS
NYX Extra Creamy Round Lipstick in Summer Love (beige with soft pink undertones)

By the way, callipygian means having well-shaped buttocks, according to Google, and now every time I use that eyeshadow, I will not ever stop giggling because I'm very mature.


Gotta love messy hair and a sort-of matching t-shirt! In addition to this look, I received my package from Oslo Cosmetics in the mail today. For those of you who don't know, Oslo Cosmetics is an indie brand that is slowly gaining fans, and rightfully so. I obviously didn't get a chance to use their eyeshadows yet, but I wanted to post a preview of the blogger pack that I ordered.

Taken with flash.

From left to right, we have Starlight: Grus, a beautiful bright, royal blue with blue glitter; Colossus: Carinae, a metallic peach-pink with gold/green shift; Dark Days: Ara, a gorgeous shimmery brown-red (the picture doesn't do it justice!); and Starlight: Serpens, a deep indigo-violet with glitter.

Taken in natural light.

Right off the bat, I can tell you that these shadows are gorgeous. They're a little stickier than other loose shadows, which I think really works in their favour because it makes their pigment so bold without a primer and I can only imagine that with one, they'll be even more stunning, if that was possible. These were only quick swatches with my fingers and you can see how vibrant the colours are. I had a little trouble with Serpens, but I think that might have been mostly from how I was applying it.

I'll have a thorough review later this week, along with previews of the other products I ordered, so look for that soon! I absolutely cannot wait to use these shadows. Especially Grus--LOOK AT THAT BLUE--and Carinae, which happens to be one of my favourite shades of eyeshadow. Strange, right? I'm the one who loves bright colours, but give me a gold/peach/pink combo and I'll be in love.

06 October 2013

halloween looks - do, a deer, a female deer

The weekend is high time to experiment with Halloween makeup, and I found some inspiration whilst Googling around. Sometimes painting your face to resemble an animal is really entertaining and it's a great potential costume. All you need to add is some brown clothing if you don't want to go all out.


 Interestingly enough, I'm wearing a shirt with a stag on it. It's actually a Harry Potter shirt with Harry with his patronus in red on the front, and Voldemort with his snake patronus in green on the back. You may also notice that my hair looks different here--hello, massive forehead!--I always wear a headband to keep my hair back whilst doing makeup that requires more than a quick fill of the brow and some lip balm. My bangs happen to fall directly in front of my forehead and have started to cover my right eye.


This is a rare post where you'll get a photo I originally posted on Tumblr. I quite like this picture, actually! I didn't take any pictures with my awful camera where I was wearing my glasses because I wanted the makeup to be the focal point, but usually I take Tumblr pictures with my glasses because I'm basically blind.

I actually wrote up a step-by-step instruction guide to getting this look. Obviously this would have been better if I had pictures of each step, but I'm really hasty with my makeup application sometimes and I have no idea how to take photos of myself whilst I'm putting makeup on. It's something I'm trying to teach myself!


  1. Apply concealer to cover dark circles and redness. I forgot to cover my dark circles (whoops!) but I have very large red patches on my cheeks that I covered.
  2. Put on eyeshadow primer so the eyeshadow stays in place.
  3. Use a white pencil to colour the area around the eyes and blend. You can use a brush, but I just used my finger because I have more control over where I spread the product. Place a layer of matte white eyeshadow over this area. I used my NYX Milk pencil and Sugarpill eyeshadow in Tako.
  4. Apply matte brown eyeshadow on the lid. I used my finger to do this, but if you have better brushes/aren't as finnicky, go ahead and use a brush. The shadow I used was Urban Decay's Buck and I blended it out with UD's Naked, but you don't have to use a second shade to blend it out if you're using a brush--my fingers just skipped a little so I needed a little give.
  5. Line your waterline and lower lashline with a white pencil, and add a line under your lashes. I used UD's Yeyo liner.
  6. Line your upper lashline with a black pencil. You want to extend the eyeliner into your inner corner and downward, and to the outer edge of your eye. When you reach the outer edge, you want to make a straight line from the eyeliner that angles upward.
  7. Line under the white liner with the black liner. You want to make your eyes look bigger, so don't line the entire lower lashline. Also, bring the line that you extended past the inner corner back toward your lash line so it forms a point.
  8. Using bronzer or a matte brown eyeshadow/blush, begin to contour your face. Focus on the hollows of your cheeks and bring that up to just under where your white circles were drawn. Aim for a soft triangle that points downward.
  9. Bring bronzer up toward your temples and around your hairline. Put a little bronzer around your jawline, as well.
  10. Fill in your eyebrows. My usual brow shape is too arched for this softer look, so I used an old eyeliner and made my brows a little straighter and fuller. (You can probably add mascara somewhere around this point, but it's not necessary.)
  11. Brush bronzer down the sides of your nose. Use a white pencil to highlight just between your brows and down the bridge of your nose to contour it.
  12. Using a brown pencil, sketch a line that connects the inner end of your eyebrow to the tip of your nose, making sure that you draw a straight line. Blend this out with your finger and repeat on the other side.
  13. Use a brown matte shadow to blend out the line where it's closest to your eyebrow. This way it makes the line look a little more natural.
  14. Take a black pencil and start to colour in the base of your nose. Aim to have two peaks that reach toward the brown lines you drew earlier, and then slope those points down toward the edges of your nostrils.
  15. Draw a line connecting the base of your nose to the cupid's bow of your upper lip with the black pencil. You can also colour in your upper lip with this pencil, but be careful--some eyeliners are not meant to be used near the mouth. I only had this on for a few minutes, but better to err on the side of caution and either use a black lipstick or something clearly marked lip-safe.
  16. Use either a nude lipstick on the bottom lip or concealer. I used both, but only because the nude lipstick I was using was actually too dark, so I lightened it with concealer.
  17. Use a white pencil to draw white spots on your cheeks over the bronzer. You can add additional spots closer to your hairline like I did or skip that entirely.


This sounds a lot more complicated than it actually is--the worst part is the eyeliner, and if you can't tell, that's what I managed to screw up big time in these photos! If anything, I'd advise practising the eyeliner ahead of time. The rest of it will fall right into place. Here's the full list of products.

BROWS
Sephora Nano Eyeliner in 08 Iced Brown

EYES
Entire eye area - NYX Jumbo Eye Pencil in Milk (white) and Sugarpill pressed eyeshadow in Tako (pure matte white)
Lid - Urban Decay eyeshadow in Buck (fawn brown matte) and Naked (nude matte) blended out to the crease
Upper lash line + inner corner + part of lower lash line - Urban Decay 24/7 Glide-On Eye Pencil in Perversion (matte blackest black)
Lower lash line - Urban Decay 24/7 Glide-On Eye Pencil in Yeyo (metallic white)

FACE
Embryolisse Lait-Creme Concentre
Benefit boi-ing concealer in 01
bareMinerals All-Over Face Color in Warmth (healthy/sun-kissed glow - chestnut)
Sephora Nano Eyeliner in 05 Chocolate, 01 Midnight Black, 03 Pure White

LIPS
Benefit boi-ing concealer in 01
NYX Matte lipstick in Butter (toffee nude)
Sephora Nano Eyeliner in 01 Midnight Black


a survey to tide things over + some housekeeping

1. How many times do you wash your face daily?
Once in the morning and once at night. If I'm doing a full face of makeup, I often have to wash my face in the afternoon before I go for a walk in the evening, but then I just splash my face with warm water at night.

2. What skin type do you have? Dry, oily, or combination skin?
Combination skin. I have dry patches all over and my T-zone can get oily, but it's been a lot better as of late. I get the occasional bouts of acne and my skin is sensitive to some skincare products.

3. What is your current facial wash?
I use Alaffia EveryDay Coconut Cleansing Face Wash in the morning, and I switch off between Yes to Tomatoes Acne Control Gel Cleanser and Yes to Grapefruit Daily Facial Scrub.

4. Do you exfoliate? How often?
Like I mentioned previously, I use a daily scrub a few times a week, but I try to remember to use something a little more vigorous at least once every two weeks.

5. What product do you use to exfoliate?
Answered!

6. What moisturizer do you use?
Alaffia EveryDay Coconut Daily Face Lotion, and Aveeno Smart Essentials nighttime moisture infusion before bed. I've also been playing around with Tarte Pure Maracuja Oil because my morning lotion just isn't cutting it in terms of moisture.

7. Do you have freckles/sun spots?
I have freckles, but I don't believe they're from sun exposure.

10. Do you use eye cream?
I use Botanics All Bright Refreshing Eye Roll-On every now and then, but I'm not particularly diligent about it.

11. Do you or did you have acne prone skin?
I don't have excessively acne prone skin, but I do get my fair share of breakouts.

12. Did you ever have to use pro-activ?
Never.

13. What foundation do you use?
I rarely use foundation and if I do, it's either Urban Decay's Naked Skin in 1.0, or I mix concealer with moisturiser as suggested by Wayne Goss. I've been experimenting with samples of pretty much everything, and I recently bought some foundation from Flower Beauty that seems to be lovely, though I haven't done any tests on it yet.

14. How about concealer?
It's a must for me because I have large red patches on my cheeks that could be rosacea, but who knows? I generally use Benefit's boi-ing in 01, but I've been testing out a bunch of other brands. Maybelline's Fit Me concealer has been great for undereyes, too. I'm waiting for rms beauty to come out with their lightest shade 00 for their un cover up, though... I bought 11 which is too dark but I love the formula.

15. Do you know your undertone color?
It's neutral--warm foundations make me look slightly jaundiced but cool foundations make me look too red.

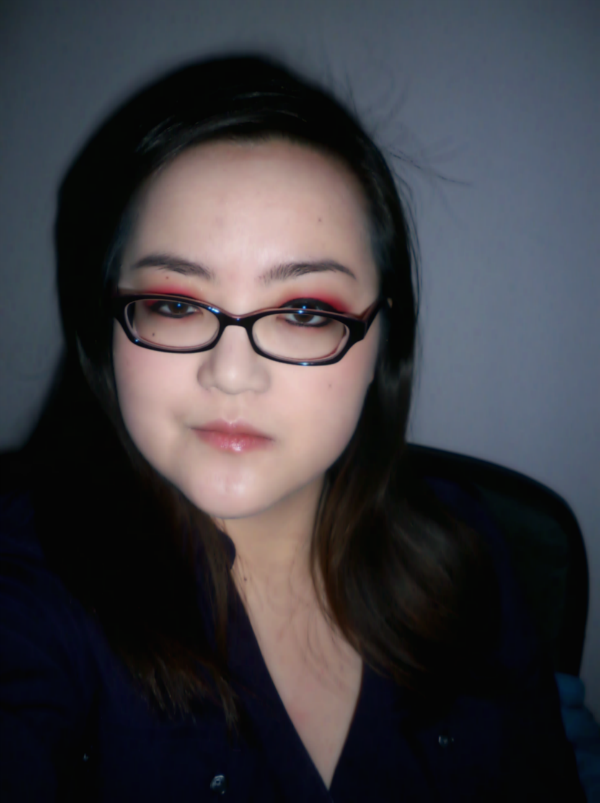
16. What do you think of fake eyelashes?
I think they're fun for a while! I like wearing them for performances or for the occasional photoshoot, but they can be impractical and with my glasses, they're generally a bad idea if I intend to wear them out.

17. Did you know that you’re supposed to change mascara every 3 months?
Yes, but I don't wear my mascara often enough to warrant buying a new one every 3 months, so I cheat that rule a bit.

18. What brand of mascara do you use?
Because it needs to be replaced more often, I stick with drugstore brands, mostly Maybelline.

19. Sephora or Mac?
Sephora. Such a wide range of brands from which to choose! I don't plan on buying Mac makeup unless they reclaim their previous cruelty-free status.

20. Do you have a Mac pro card?
No.

21. What makeup tools do you use in makeup application?
I'm a big fan of just using my fingers for almost everything, but I will almost always use an angled brush/spoolie for my brows and occasionally a liner brush and a blush brush. Urban Decay's optical blurring brush is amazing for foundation and I'm starting to use Ulta's version of the beautyblender.

22. Do you use makeup base or primer for your eyes?
Always. I have oily lids, so eyeshadow will crease very easily on me.

23. For the face?
Very rarely. I know it would help the appearance of foundation, but often the primer will dry my skin or enhance dry spots.

24. What is your favorite eyeshadow shade?
I love love love bright colours like Fyrinnae's Sleepy Hollow, but I also really like Sugarpill's Lumi and Goldilux. In general, I really love all of Sugarpill's eyeshadows.

25. Do you use pencil or liquid liner?
Both! I prefer pencils like Urban Decay's eyeliners, but liquid liner is always so precise. Right now I'm using Maybelline's Line Stiletto but it's running out, so it's about time to get a new one!

26. How often do you poke your eyes with an eyeliner pencil?
I used to do it a lot, but I've gotten much better at not doing so.

27. What do you think of pigment eyeshadows?
I LOVE them. Colour is my area of expertise.

28. Do you use mineral makeup?
Sometimes. Mineral foundations can sometimes cling to patches of my skin and make it look uneven, but sometimes they're really great because there are so many shades.

29. What is your favorite “go-to” lipstick? Why?
If I'm in a hurry, I'll reach for one of my mini fresh sugar lip treatments or Revlon lip butter in Peach Parfait, but I really love OCC's lip tars and would reach for one of those if I had the time.

30. How about lip gloss? Why?
I love Buxom's lip glosses because they smell great and do have a bit of a plumping effect, but lately my glosses have been sitting forgotten in my organiser.

31. What is your favorite blush to use and why?
I generally don't use blush because I'm actually naturally red in the cheeks anyway, but I do like L'oreal's Magicsmooth souffle blush in Celestial and NARS Orgasm or Super Orgasm. I'm vaguely in love with their darker blushes but I can't use them unless I have a very light hand and even then I tend to look a little sunburnt.

32. Do you buy your makeup on ebay/ebay.ph?
No, but I've considered it!

33. Do you like drugstore makeup?
There are some great drugstore brands! I do prefer drugstore mascara as I've mentioned earlier. They're also a great way to test colours that you don't want to break the bank for just yet, although the only drawback is that you can't test them in store, but at least they're cheaper. There are also brands like NYX that are changing the perception of drugstore makeup.

34. Do you go to cosmetic company outlets?
Sometimes, but I've never found anything I need to snag right away.

35. Do you ever consider taking makeup classes?
All the time.

36. Are you clumsy in putting on makeup?
I've gotten a lot better in the past few years. I'm not a perfectionist with my makeup, though--if it looks a little messy, that's fine with me.

37. Name a makeup crime(s) that you hate.
Honestly, I don't think I have one. I'm all about breaking rules and changing expectations. Everyone should experiment with how makeup works best for them--it's an art, a way to express yourself, and you don't need to stick to the expected.

38. Do you like colorful shades of makeup or neutral ones?
Both! I love a good neutral look, but colour just grabs my attention more often.

39. Which celebrity always has great makeup?
Michelle Dockery, Phoebe Tonkin, Sophie Turner, Saoirse Ronan. There are so many others, but I can't really pick one because celebrities often play it safer than I'd ever do!

40. If you could leave the house using just one makeup item, what would you use?
Does sunblock count? I definitely need something with SPF to keep myself from turning into a tomato.

41. Could you ever leave the house without any makeup on?
To be honest, I don't wear makeup at least 50% of the time because usually I'm just too lazy.

42. In your opinion, what is the best makeup line?
I can't pick just one! Urban Decay, Too Faced, Sugarpill, Fyrinnae, OCC, Shiro Cosmetics, there's just so many that I love. I'm a huge fan of indie brands and am more likely to buy from small brands because they often have some of the best shades.

43. What do you think of makeup?
I love it. I love using it as a way to express myself or as a way to make myself feel less exhausted, and it's really an art form. I wish the ingredients were all more well-known because I'd love to know what goes on my skin, but for now I'm just having fun. If you want to wear makeup to enhance your appearance, go for it. If you want to use your face as a canvas, do it. There isn't anything stopping you.

44. What is your favorite “quote” related to makeup?
"Cosmetics are an extension of the will. Why do you think all men paint themselves when they go to fight?" - from Catherynne M. Valente's Deathless

45. If you were a makeup tool/product, what would you be and why?
I'm pretty sure I'd be Urban Decay's eyeliner in Deep End. Very specific, I know, but it's a bright colour (one of my favourites!), eyeliner is one of the makeup items I'd use daily if I was motivated enough, and it's just so fun.


Just a reminder that you can follow this blog via email, or the tumblr account associated with my blog. You can find a link in the about page in the sidebar! You can now follow Achromatic Gold on bloglovin', as well.

I'm always open to suggestions or requests! Since it is October, I'll be experimenting with Halloween makeup and maybe actually making the effort to put on clothes that aren't old t-shirts. Some of the posts you can expect to see in the near future:

  • Sugarpill Cold Chemistry palette review (along with reviews of other Sugarpill products as I get around to them)
  • Werewolf makeup inspired by Jangsara
  • Osmia Organics Spot Treatment review
  • Oslo Cosmetics review (I just placed the order today--very excited!)
I'm currently working on setting up Adsense, so please be patient--there might be advertisements soon, so I apologise in advance for that!

04 October 2013

face of the day - green eyebrows?

Sorry for the delay in posts! I've been swamped with housework because my mother is out of commission, so any attempts at doing makeup are either nonexistent or limited to a half hour's time. But I had a bit more free time today, so I thought I'd do some wacky eyebrows because they seem to be my favourite thing to do to my face these days.


You might notice in these photos that I might be wearing the same shirt for more than one post... Confession: I'm lazy and pretty much wear the same five or six shirts in rotation when I'm at home. The shirt in these pictures is my National Honor Society shirt from my senior year of high school and it's a little big on me... Plus I was probably slouching in this picture. Whoops!


The green eyebrows were the greatest part of this! I considered wearing them around the house, but I knew I was going to be doing chores the rest of the day, so it wasn't practical. (That is me being an adult, and yes, that's the extent of my ability to be an adult. Who decided I was qualified, anyway?) I'm testing out new eyebrow shapes and this one is more rounded than usual. Unfortunately, that also means I overshoot where I usually put the arch, and then the rest of the brow gets a little weird.

This foundation is slightly too yellow for my skin, but you can't tell in these pictures, thankfully. It seems to work well in terms of not clinging to dry patches, but I'll need to do a day-long test run one day. These pictures are making me notice that I have a spot on the left side of my face, right side of these pictures, near my hairline that is technically still part of my face but has hair growing on it, so it looks like I missed a spot whilst putting on my foundation. Um, how do I work with that?

BROWS
Sugarpill Chromalust pigment in Junebug (forest green shimmer)

EYES
Lid - Urban Decay eyeshadow in Chopper (copper shimmer with silver micro-glitter)
Inner lid - Makeup Geek pigment in Birthday Wish (light gold peach shimmer)
Outer lid - Makeup Geek pigment in Utopia (deep brown/antique gold duochrome glitter)

FACE
Flower Beauty About Face foundation in LF2
Benefit boi-ing concealer in 01
Maybelline Fit Me concealer in 15 Fair
Benefit moon beam

LIPS
Revlon Just Bitten Kissable Balm Stain in Smitten (sheer berry)


Hopefully this weekend brings more free time so I can do some more experimenting and maybe do a real review! I did just get the Sugarpill Cold Chemistry palette...

02 October 2013

face of the day - quick cut crease

Today was a day of errands and chores for me: taking my mom to the podiatrist, getting groceries, cleaning, doing laundry, picking up medicine, and cooking dinner among other tasks. Unfortunately this means I didn't get my hour I usually set aside for doing my makeup, but I did manage to quickly put something together in about a half hour. Mind you, I didn't even get a lot of time to take pictures because right after I did, I wiped off the most of my eye makeup and ran downstairs to cook.


I wish I had more time to do this because I really wanted to experiment with a cut crease! Although it's probably lucky that I didn't get to take a close-up because the brush I used to blend the black out was not working in my favour. But hey, I did get to use one of the new Fyrinnae eyeshadows I bought, aptly named Sleepy Hollow. Is anyone else watching that show? New on FOX this fall and holy shit, is it nightmare-worthy.

BROWS
Anastasia Beauty Express brow kit in Brunette

EYES
Inner lid - Fyrinnae loose eyeshadow in Sleepy Hollow (deep ocean blue with sage green and gold shimmer)
Outer lid - Shiro Cosmetics loose eyeshadow in TARDIS (royal blue with bright purple and green sparkles)
Crease - Urban Decay 24/7 Glide-On Eye Pencil in Perversion (matte blackest black) blended out with Sugarpill pressed eyeshadow in Bulletproof (deep matte black)

FACE
Maybelline Dream Fresh BB Cream in Light 100
Benefit boi-ing concealer in 01
Maybelline Fit Me concealer in 15 Fair

LIPS
Maybelline Color Whisper in Rose of Attraction


Hopefully I'll get more time tomorrow to come up with something, but if not, I've got an FAQ that's in the works, so maybe that will be my seventh post!

01 October 2013

my favourites for autumn!

Sorry about going quiet for a few days! My sister came home from university for the weekend, which is usually means a hectic weekend anyway, but then my mom broke her toe whilst we were closing up our pool for the year. I've been busy running errands the past few days, but I wanted to make a post of my current favourite products for fall. (Note: all colours listed next to the full product names are the ones more or less provided by the brands themselves! This is how I'll be listing colours for all of my posts.)

Swatches taken with flash.

(If you notice the marks on my wrist to the left of the first swatch, they're from hair ties! I always have at least two and they tend to leave dents.) I'm the sort of person who changes her favourite products often, and while the following products all seem to be very in for fall, I make no guarantees that that trend will continue! It was really hard not to swatch a nice teal eyeshadow because those tend to be my favourites. One day I'll swatch my Fyrinnae eyeshadows and you'll see just how many teal blues I have just from that brand.

Swatches under natural light.

First the eyeshadows! These are rich neutrals or jewel tones that are commonly associated with the season and they're all perfect for a smoky eye that isn't your typical black.

From left to right: UD Half Baked, Shiro Nic Cage, Sugarpill Junebug, Sugarpill Weekender, MUG Enchanted, MUG Insomnia.

EYESHADOW
Urban Decay eyeshadow in Half Baked (golden bronze)
Shiro Cosmetics loose eyeshadow in Nic Cage Raking Leaves on a Brisk October Afternoon (coffee brown-black with gold and red sparkles)
Sugarpill Chromalust pigment in Junebug (forest green shimmer)
Sugarpill Chromalust pigment in Weekender (metallic blue-violet)
Makeup Geek pigment in Enchanted (light plum shimmer)
Makeup Geek pigment in Insomnia (dark chocolate brown duochrome with blue/teal reflects)

Urban Decay is well-known for their amazing, shimmery shadows, and Half Baked is no exception. I only own this as a part of the two Naked palettes, but you can purchase this on its own. It's a lovely, true gold that looks good on everyone, whether you use it as a sheer wash over the eyelid or as a part of a darker, more mysterious look.

Shiro Cosmetics is such a good indie brand and I really encourage everyone to check it out because some of my all-time favourite eyeshadows are from this company. The colour I swatched has the most ridiculous name and it was one of the colours of the month from last year that is still available now. It's this luscious, deep brown with the most gorgeous golden sparkle overlay and the photo does it absolutely no justice.

Sugarpill is a brand that everyone is starting to know these days and they deserve it--such richly pigmented eyeshadows that are versatile in so many ways. Junebug is a darkened green that looks absolutely beautiful when it catches the light, while Weekender is a very pretty purple that seems to work on every skintone. These are two jewel tones that everyone should own!

Makeup Geek recently added loose pigments to their product line and they're an absolute godsend, filled to the brim with so much product that I feel like I'll never run out. Enchanted is this reddish plum colour that looks really intimidating in the jar, but it can be applied so sheerly that it looks amazing on everyone. Insomnia is a dupe for MAC's Green Brown pigment and it looks so freaking cool when it catches the light.

Next we have eyeliners. There are only three because I'm partial to using eyeshadows as liners, but maybe I'll include my favourites in a later post.

From left to right: UD Binge, UD Perversion, NYX Glitzy Gold.

EYELINER
Urban Decay 24/7 Glide-On Eye Pencil in Binge (pearly navy blue, discontinued)
Urban Decay 24/7 Glide-On Eye Pencil in Perversion (matte deepest black)
NYX Slide On Liner in Glitzy Gold (pure gold)

UD eyeliners are SPECTACULAR. There is really no other way to describe them--they really do glide on. I have really oily eyes so they don't stay on as long as they claim, but I love them all the same. Binge, the lovely deep denim blue, was unfortunately discontinued but you might still be able to find it at certain retailers. Of the current line of UD eyeliners, I'd say LSD or Sabbath are close, but not quite dupes. NYX's eyeliner in Sunrise Blue is also close, but it's a bit brighter.

Speaking of NYX, the gold eyeliner is amazing and I've used it in so many looks/face charts for others that it's almost ridiculous. I originally bought it because it's a dupe for the UD eyeliner in Honey that was discontinued, but the formula is outstanding on its own.

I considered recommending face products, but I'm pale and use something different almost every time, and I usually forgo blush because I have rosacea. Sooo, here are the lippies!

From left to right: Maybelline Plum Perfect, Sephora Royal Raspberry, NYX Monte Carlo, Revlon Smitten, Dreamworld Hermetica Pride.
LIPS
Maybelline Color Sensational lipstick in Plum Perfect (deep plum red)
Sephora Color Lip Last lipstick in Royal Raspberry (matte fuschia)
NYX Soft Matte Lip Cream in Monte Carlo (deep cranberry red)
Revlon Just Bitten Kissable Balm Stain in Smitten (sheer berry)
Dreamworld Hermetica Magick Lip Wand in Pride (warm light brown)

I've had the Maybelline lipstick for about a year--yes, I do cheat and keep makeup products longer than is recommended, I know it's not the best thing to do, but I'm a packrat!--and I will wear it year-round. As a stain, applied thickly, with gloss over it, I don't care how I put it on, I love the colour of it.

The Sephora lip colour was actually recommended to me by my friend Toni who works at the Sephora near my university campus and damn, is it a beautiful colour. It's basically matte, so you can put a gloss over it for a different finish. But hey, matte lips are in for fall!

NYX is a "drugstore" brand that has high-end quality and the soft matte lip creams are a rave product. I've actually only worn this colour once, but it's such a gorgeous pink-red that it deserves a mention. I'll be wearing it more often this season!

Here's a little confession: I actually don't wear lippies most of the time because I have bad habits of pressing my lips together and I hate getting lipstick or gloss on anything. Revlon's balm stains, however, are quickly changing that. They're semi-glossy and sheer, but they can be layered or built up until they reach a pretty bold colour. I own two, Smitten and Honey. Honey is my My Lips But Better shade, and Smitten is more of a fun, spunky colour. The gloss wears off rather quickly but leaves behind a stain that can last hours.

The final swatch is of a product I actually received in the mail only yesterday. Dreamwold Hermetica had promotional packages available for only $5 and I jumped at the chance. I have a bunch of samples that I'll review later, but the lip gloss that came with the samples was so perfect for fall that I couldn't resist adding it here. The website calls it light brown, but I think it's a nice, slightly deep gold that looks good sheerly on the lips but can also be built up or layered over another colour.


Okay, phew, that was a lot! If you would like a list of possible dupes for these products, please don't hesitate to ask because I can do some digging. I'll be doing a look soon with some of these products just for autumn, so look out for that.