Showing posts with label embryolisse. Show all posts

19 April 2014

orphan black clones series #2 - alison hendrix

It's my 23rd birthday! Last year was absolute shit and I can only hope that this year is better. I've never really felt older on my birthday until this year. I feel like I earned being 23. I spent the entire day getting food and shopping with my family, so I'm exhausted and stuffed.

More importantly, though... Tonight is the premiere of season 2 of Orphan Black! To celebrate, I dressed up as another clone: Alison Hendrix.


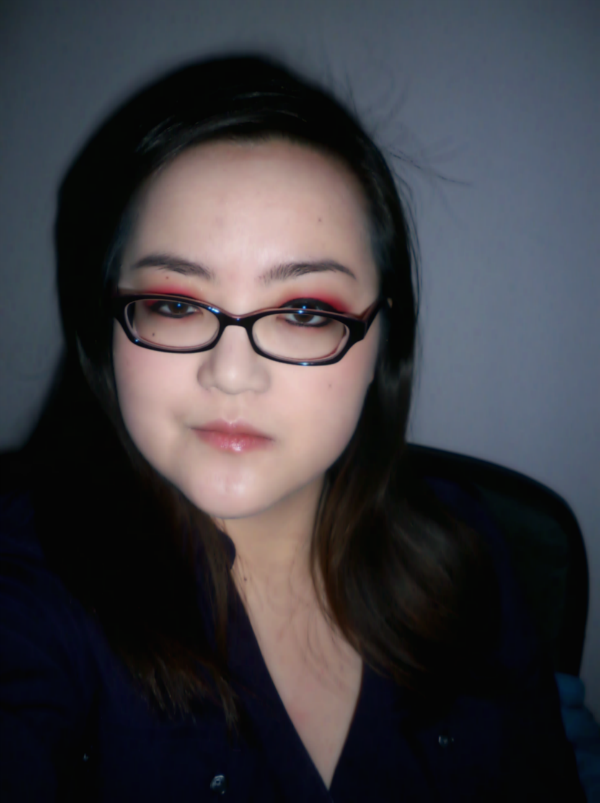
Alison is a soccer mom living in suburbia and she seems to have a more laid-back, simple look because of her hectic schedule. I based this look off of this picture, where she's wearing a little more makeup than I think she usually does. I also don't have bangs that go across my forehead, so I improvised with my side bangs and I put in a headband for good measure.

For the eyes, all you need to do is take a matte brown shadow that is a few shades darker than your skintone and swipe it over your eyelids and under your eyes, and then line your eyes with a dark brown eyeliner. I used a dark taupe liner because it was what was convenient!

For lips, Alison seems to wear a pinky lip colour that is slightly brighter than her natural lip colour, but in this photo it appears a bit darker. I went with a fig shade that applies matte and put on a lipstick with some sheen over it.

I'm not wearing blush here because my cheeks are naturally pink. However, Alison always seems to be wearing some, so I'd suggest something a little on the warm pink side.

Clothing-wise, I don't have much that is as preppy as Alison's wardrobe is, and I don't have pearls. (Would have made a nice touch, no?) So I just went with a graphic tee and a sweater that looks a little more like Alison's workout clothes than her day-to-day wear.

BROWS
Anastasia Beverly Hills Beauty Express brow kit in Brunette
Anastasia Beverly Hills Tinted Brow Gel in Granite

EYES
Too Faced Shadow Insurance
Lid - Saucebox Cosmetics pressed eyeshadow in Almond (cool medium brown matte from the Etude palette)
Upper lash line - Urban Decay 24/7 Glide-On Eye Pencil in Desperation (deep taupe to gray matte)

FACE
Embryolisse Lait-Crème Concentrè + Dr. Jart+ V7 Beauty Balm
Benefit boi-ing concealer in 01

LIPS
Buxom Big & Healthy Lip Stick in Brooklyn (harvest fig)
NYX Cosmetics Butter Lipstick in Pops (mauve)


EDITED: The makeup artist has said that Alison wears purple eyeliner and this was done before I read the articles saying this! That being said, for some reason my eyeshadow here looks a little purple. If you're looking for a good purple eyeliner, try Urban Decay 24/7 Glide-On Eye Pencil in either Vice or Psychedelic Sister (higher-end option) or NYX Slide On Pencil in either Pretty Violet or Purple Blaze (drugstore option).

03 January 2014

hogwarts series - gryffindor (everyday)

So the snow has given us a one-day respite today, but unfortunately there are some absolutely ridiculous winds and so my idea of staying in to do makeup seemed like such a good plan... Until my mother and sister had me drive to the Arboretum so we could take some photos. The wind kind of ruined that for us, as all the snow on the trees was blown off but I got my first experience driving on really terrible streets and parking in a mall lot where no one could see the lines.

This look is super, super simple and doesn't need to have a Gryffindor label attached to it. It's effortless but looks really put together even if it only takes a few swipes of product.


Excuse the haphazard hair happening since I spent most of the car ride wearing a beanie-esque hat to keep it from blowing in my face! There were really only 6 main products used here, and most of them can be left out if you're in a rush. Four products were my BB cream for the face, concealer, brow pencil, and tinted brow gel, and all four of those are optional. What matters most is the gold cream eyeshadow and the red tinted lip product.

No eyeliner is necessary for this look! I picture most Gryffindors to be a little more haphazard and eyeliner can be too finicky. This look is definitely more carefree. You can definitely pile on mascara if you feel weird with no eyeliner--I almost remembered to put some on, but usually I can't be bothered, so I just completely forgot.

You don't have to be precise with the cream eyeshadow. Just a swipe over each lid with your fingers is fine! I used rms beauty's eyeshadow in solar, which is this lovely golden bronze shade, but you could just as easily use something like a Maybelline Color Tattoo. If your lids are oily, you might want to use a primer and set the cream with a powder, but I actually didn't wear the eyeshadow out. It did crease, though, as my lids are insanely oily, ugh. As for the lips, you might need a bit of a steady hand to keep the lines neat, but otherwise it's straightforward.

BROWS
Benefit Instant Brow Pencil in Deep
Anastasia Beverly Hills Tinted Brow Gel in Granite

EYES
rms beauty cream eyeshadow in solar (warm, golden bronze)

FACE
Embryolisse Lait-Crème Concentrè + Dr. Jart+ V7 Beauty Balm
Under eyes - Benefit Fake Up concealer in 01 Light

LIPS
Clinique Chubby Stick Intense Moisturising Lip Colour Balm in 03 Mightiest Maraschino (classic red)


02 January 2014

hogwarts series - gryffindor (dramatic)

It's no secret that I'm a huge Harry Potter fan. I've been obsessed since the third grade when my parents gave me a check for Sorcerer's Stone at the book fair even though I wanted another book. (... Do they even have book fairs anymore? I'm feeling so old even though I'm only 22.) I'm a fan of doing series of looks, and I think one based on Hogwarts houses was only natural. Each house is getting a dramatic look and a look that you can wear out of the house. First up, Gryffindor!


From this picture, it looks rather tame, but the close-up will show the dramatic part of it. I mimicked the Gryffindor house crest (the book version, as the movie versions of the crests make me angry) and divided my eyelid into four quarters, colouring two quadrants red and two quadrants gold. Because there was so much colour involved, I didn't bother with eyeliner as it would have made the look a little too much. Instead, I used two coats of mascara and blended out the crease with a deeper gold shadow to even the look out.

I originally considered making my brows bright red like I did last month at some point, but I thought it would detract too much from the eyes so I went with a deeper red instead. Top it all off with a red lip and the look is complete! No need for blush as you've already got so much red going on, but then again, I've never been a blush sort of person. If you think a look of this level might wash you out, definitely consider using a red-toned blush and a light hand in application to give your face some life.

I slept with my hair in four French braids to give it that wild look as I think it suits the Gryffindor spirit. (I personally hate it because it means I have to bother with product in my hair.)

BROWS
Saucebox Midnight Blossoms eyeshadow palette (top right deep red shimmer shade)

EYES
Lid - Sugarpill Chromalust pigment in Asylum (red shimmer) + Goldilux (highly-reflective metallic gold)
Crease- Shiro Cosmetics loose eyeshadow in Butts (smooth golden yellow-khaki with soft velvety shimmer)
Lashes - Maybelline Volum' Express the Mega Plush mascara in Blackest Black

FACE
Embryolisse Lait-Crème Concentrè
Dr. Jart+ V7 Beauty Balm
Benefit boi-ing concealer in 01
Under eyes - Benefit Fake Up concealer in 01 Light

LIPS
Bite Beauty Cashmere Lip Cream in Port (deep wine)


LOOK AT THAT LID SPACE. I had to apply the eyeshadow with a thin detailer brush. Since they were loose eyeshadows, I used a mix of 50/50 water/glycerin as a homemade mixing medium because I really don't want to spend an excess amount of money for something that works just the same but has a brand name slapped on. The mixing medium definitely helped to keep the lines between the quadrants neat and it gave the loose eyeshadows a beautiful foiled effect.

Tomorrow, I'll be posting the everyday Gryffindor look!

24 December 2013

look of the day - holiday cheer

It's been a rough couple of weeks for me, but it's the holiday season so I've brightened up a bit. My sister is home from university, as are the rest of my friends so I'll finally be able to see people! My cousin was over this past weekend but she jetted off to Florida for the week and now my godparents are here for the night.

My go-to look for the past few days, if I've even bothered with makeup, is just some BB cream and concealer, a defined brow, and my rms beauty Lip2Cheek in Diabolique applied as a lip stain and blush so I don't look like a total zombie. That was what I wore to pick up my sister from campus and I took a look at myself in a mirror and nearly shrieked at how dead I looked last week, whoops.

Today was a decent day so far and the sun was out despite it being obscenely cold. I didn't have to leave the house, though, so that was nice. I love the theory behind the holidays, but the practicality of trying to get around town makes me really frustrated. People seem to forgo the rules of the road and how to be civil and courteous, but it's just that time of year, I suppose.


I won't be leaving the house on Christmas since we've having our traditional big lunch at home, but if you have a party to attend, this is a great look! Since it's the holiday season, you can pull off bold eyes and a bold lip, and shimmer absolutely everywhere. This look is actually a bit toned down for what I'd wear to go to a Christmas party, but this way it can be tweaked for day or night. The eyes are very much focused on gold tones and a glitter/shimmer finish, while the lips are matte and very red. If you're going to be eating at the party, I'd definitely recommend either wearing a simpler lip or bringing lipstick to touch up through the night. I'm lazy and hate bringing my makeup with me anywhere, so I'd just go with a stain and call it a night.

BROWS
Anastasia Beverly Hills Beauty Express brow kit in Brunette
Anastasia Beverly Hills Tinted Brow Gel in Granite

EYES
theBalm Put a Lid On It! eyeshadow primer
Lid - Maybelline Color Tattoo Metal 24hr Cream Gel Shadow in Gold Rush 65 (yellow gold shimmer)
Inner corner - Urban Decay eyeshadow in Maui Wowie (metallic golden beige with silver glitter)
Outer corner + crease - Urban Decay eyeshadow in Smog (deep coppery bronze)
Waterlines - Urban Decay 24/7 Glide-On Eye Pencil in Zero (black)
Upper lash line - Hello Kitty Charmmy Kohl Eyeliner in Chocolate Milk (brown shimmer)
Lower lash line - Hello Kitty Charmmy Kohl Eyeliner in Bicycle (teal green shimmer)

FACE
Embryolisse Lait-Crème Concentrè + Dr. Jart+ V7 Beauty Balm
Under eyes - Benefit Fake Up concealer in 01 light
Benefit boi-ing concealer in 01
L'Oréal Paris Magic Smooth Soufflé Blush in Celestial (muted rosy pink)

LIPS
Bite Beauty Cashmere Lip Cream in Port (deep wine)


Happy holidays, my darling readers! Happy Christmas if you celebrate it and if you don't, I hope you have a wonderful few days.

20 November 2013

j.r.r. tolkien's the hobbit series #1 - hobbits

Today's weather took a complete 180 degrees because it was sunny earlier today and then just a few minutes ago, it was raining and even hailing a little bit. Weird!

This look was requested by my friend Meg, who asked for something inspired by The Hobbit since the second movie is coming out soon. I have to confess that I didn't watch the Lord of the Rings movies until two years ago at the constant pestering of my friend Erica and after I did, I have to say that I LOVE them. I have every intention of going to see the second Hobbit film--after all, I went to see the first and thought it was brilliant.

When I think of J.R.R. Tolkien's world, I always come up with primarily gold, brown, and green hues, especially in relation to the hobbits. Those were the colours I focused on here.


This turned out to be a bit of a smokey look that relied on golds near the inner corner and green at the outer corner with a deep bronze to transition between the two, and I quite like how it turned out! It's meant to be a slightly softer look, so I went for a brown liner instead of black, though I did use a bit of black to tightline the lashes. It's not a challenging look to accomplish, though I did spend more time on it than I expected--there's a reason why I didn't end up getting any good close-ups! You don't need to apply your eyeshadow in any particular shape, but just keep the outer corner from dipping down.

Because this look was so focused on the eyes, I just applied a gloss to my lips. The next picture, I used a nude lipstick and I think I like that combination a little better.


  1. Apply foundation/tinted moisturiser/BB cream as needed. I used a BB cream here because it's a little lower maintenance but anything goes.
  2. Apply an eyeshadow primer so everything stays put and wait one minute before applying eyeshadow. Before I put any colour on, I put a dusting of loose powder on my lids so it would be easier to blend the colours, but that's also optional.
  3. Starting at the inner corner, take a gold eyeshadow and pat it onto the lid, bringing it about a third of the way onto the lid. You want this to pop! I tend to use my finger to pack on colour because I find that the brushes I reach for tend to sheer out the pigment too much.
  4. Take a green-olive eyeshadow and pack on the colour at the outer corner of the lid, bringing it a third of the way toward the center of the lid.
  5. Using a brush, take a bronze/medium brown eyeshadow to blend the gold and green shadows together.
  6. THIS STEP IS COMPLETELY OPTIONAL! I used a dark blue-green eyeshadow and placed a light layer of it into the crease of my eyelid.
  7. Line your upper lid with a brown eyeliner. You can also tightline your lashes with a black liner here and line your waterline with a white liner, but it's not necessary. (Especially if you're going to wear this to the movie theatre to see The Hobbit: Desolation of Smaug. You might risk eyeliner running down your face from tears! Don't be ashamed--I've cried in most of the movies I've seen in theatres over the past two years.)
  8. Apply two coats of mascara. The first coat I applied was a non-waterproof mascara, and the second was a waterproof mascara. This way, you get the stay-put benefits of the waterproof mascara but it's easier to remove at the end of the day.
  9. Using a thin brush, take some of the green eyeshadow and trace below your lower lash line.
  10. Clean up any loose eyeshadow! Apply concealer around your eyes and wherever else you need it.
  11. Pat a bit of peach-pink blush onto the apples of the cheek.
  12. Apply a coat of lip gloss to the lips and you're all set.


BROWS
Anastasia Beverly Hills Beauty Express brow kit in Brunette
Anastasia Beverly Hills Tinted Brow Gel in Granite

EYES
theBalm Put a Lid On It eyeshadow primer
bareMinerals mineral veil
Inner corner - Urban Decay eyeshadow in Sin (champagne shimmer)
Inner lid - Urban Decay eyeshadow in Half Baked (golden bronze)
Center of lid - Urban Decay eyeshadow in Smog (deep coppery bronze)
Outer corner and lower lash line - Urban Decay eyeshadow in Mildew (mossy green shimmer with gold shift)
Crease - Shiro Cosmetics loose eyeshadow in Lingered in Twilight (blackened blue-green with slightly metallic shimmer)
Upper lid liner - Hello Kitty Charmmy eye pencil in Chocolate Milk (shimmery brown) + Fyrinnae loose eyeshadow in Arcane Magic: Evocation (neutral taupe with pale rose/coral and mint green reflect)
Upper lash line - Urban Decay 24/7 Glide-On Eye Pencil in Perversion (deepest matte black)
Lower waterline - Urban Decay 24/7 Glide-On Eye Pencil in Yeyo (metallic white)
Lashes - Maybelline Volum' Express the Mega Plush mascara in Blackest Black + Maybelline Volum’ Express The Rocket waterproof mascara in Blackest Black

FACE
Embryolisse Lait-Crème Concentrè
Dr. Jart+ V7 Beauty Balm
Under eyes - PIXI Beauty Correction Concentrate + Benefit Fake-Up Concealer in 01 Light
Benefit boi-ing concealer in 01
L'Oréal Paris Magic Smooth Soufflé Blush in Celestial (muted rosy pink)

LIPS
Smashbox O-Gloss Gold

19 October 2013

looks of the day - two looks inspired by lisa eldridge's videos!

So, after posting the last look inspired by one of Lisa Eldridge's looks, I saw her post about how she loved all of the photos that were being tagged #mylisalook and she set up a bit of a contest. (Look, my face is on her post!) It's been a few days but I just wasn't feeling like putting on makeup, especially with the cloudy weather over the past few days. But today, she posted a new video and I really wanted to try it! There's also a red eyeshadow video here that I just had to try because I'm all about the bright colours.


This look is very subtle but gorgeous for daily wear. I've been looking for every excuse to use the rms beauty lip2cheek in diabolique because I'm absolutely obsessed with it, and luckily it can be applied very sheerly for a nice berry tint to the lips. (Also, look at how I took this photo--I'm apparently in denial about my height despite the fact that I've been 5'3" for almost 8 years of my life...)

BROWS
Benefit Instant Brow Pencil in Deep
Anastasia Beverly Hills Tinted Brow Gel in Granite

EYES
Lid - Urban Decay eyeshadow in Half Baked (golden bronze)
Inner corner - thebalm eyeshadow in Snobby (yellow with gold shimmer)
Lash lines - Urban Decay 24/7 Glide-On Eye Pencil in Zero (black)
Lashes - Maybelline Volum' Express the Mega Plush mascara in Blackest Black

FACE
Embryolisse Lait-Crème Concentrè + Dr. Jart+ V7 Beauty Balm
Under eyes- Maybelline Fit Me concealer in 15 Fair
Benefit Fake Up concealer in 01 light
COVER FX Cream Concealer in N Extra Light
Contour - Maybelline Fit Me stick foundation in 235
Highlight - Benefit high beam
bareMinerals blush in t.t.y.l. (sheer poppy pink)

LIPS
rms beauty lip2cheek in diabolique (dark burgundy)

Since this was subtle, I was able to take it off with relative ease and put on the next look. Red eyeshadow is possibly one of my favourite things in the world but wearing it on a normal basis tends to earn you strange looks. Believe me, I've worn it a few times to class and people don't know what to say most of the time.


My glasses just make my eyes look even more misshapen. I've come to realise that I actually like a strong eye with a strong lip on me. I tend to think that with a nude lip, I actually look quite washed out because I'm so pale. So here's the look with some pink-red lips!

BROWS
Anastasia Beverly Hills Tinted Brow Gel in Granite

EYES
Sugarpill pressed eyeshadow in @#$%! (vampy pearl red with silver metallic sheen)
Liner - Urban Decay 24/7 Glide-On Eye Pencil in Perversion (matte blackest black), Maybelline Line Stiletto Ultimate Precision Liquid Eyeliner in Blackest Black
Lashes - Maybelline Volum' Express the Mega Plush mascara in Blackest Black

FACE
Urban Decay Naked Skin liquid foundation in 1.0
Benefit Fake Up concealer in 01 Light
NYX powder blush in Desert Rose (matte burgundy-pink)

LIPS
fresh Sugar Lip Treatment SPF 15
Sephora Rouge Cream Lipstick in The Red 04 (classic bright red)


I was going to do a third look, probably something for Halloween, but my eyeliner and my makeup remover wipe got into a catastrophic fight and I almost lost my eyeballs because of it. The skin around my eyes? Already a casualty. There was a great burning sensation as I was trying to take off all the black liner so I decided it was best to not do anything else!

06 October 2013

halloween looks - do, a deer, a female deer

The weekend is high time to experiment with Halloween makeup, and I found some inspiration whilst Googling around. Sometimes painting your face to resemble an animal is really entertaining and it's a great potential costume. All you need to add is some brown clothing if you don't want to go all out.


 Interestingly enough, I'm wearing a shirt with a stag on it. It's actually a Harry Potter shirt with Harry with his patronus in red on the front, and Voldemort with his snake patronus in green on the back. You may also notice that my hair looks different here--hello, massive forehead!--I always wear a headband to keep my hair back whilst doing makeup that requires more than a quick fill of the brow and some lip balm. My bangs happen to fall directly in front of my forehead and have started to cover my right eye.


This is a rare post where you'll get a photo I originally posted on Tumblr. I quite like this picture, actually! I didn't take any pictures with my awful camera where I was wearing my glasses because I wanted the makeup to be the focal point, but usually I take Tumblr pictures with my glasses because I'm basically blind.

I actually wrote up a step-by-step instruction guide to getting this look. Obviously this would have been better if I had pictures of each step, but I'm really hasty with my makeup application sometimes and I have no idea how to take photos of myself whilst I'm putting makeup on. It's something I'm trying to teach myself!


  1. Apply concealer to cover dark circles and redness. I forgot to cover my dark circles (whoops!) but I have very large red patches on my cheeks that I covered.
  2. Put on eyeshadow primer so the eyeshadow stays in place.
  3. Use a white pencil to colour the area around the eyes and blend. You can use a brush, but I just used my finger because I have more control over where I spread the product. Place a layer of matte white eyeshadow over this area. I used my NYX Milk pencil and Sugarpill eyeshadow in Tako.
  4. Apply matte brown eyeshadow on the lid. I used my finger to do this, but if you have better brushes/aren't as finnicky, go ahead and use a brush. The shadow I used was Urban Decay's Buck and I blended it out with UD's Naked, but you don't have to use a second shade to blend it out if you're using a brush--my fingers just skipped a little so I needed a little give.
  5. Line your waterline and lower lashline with a white pencil, and add a line under your lashes. I used UD's Yeyo liner.
  6. Line your upper lashline with a black pencil. You want to extend the eyeliner into your inner corner and downward, and to the outer edge of your eye. When you reach the outer edge, you want to make a straight line from the eyeliner that angles upward.
  7. Line under the white liner with the black liner. You want to make your eyes look bigger, so don't line the entire lower lashline. Also, bring the line that you extended past the inner corner back toward your lash line so it forms a point.
  8. Using bronzer or a matte brown eyeshadow/blush, begin to contour your face. Focus on the hollows of your cheeks and bring that up to just under where your white circles were drawn. Aim for a soft triangle that points downward.
  9. Bring bronzer up toward your temples and around your hairline. Put a little bronzer around your jawline, as well.
  10. Fill in your eyebrows. My usual brow shape is too arched for this softer look, so I used an old eyeliner and made my brows a little straighter and fuller. (You can probably add mascara somewhere around this point, but it's not necessary.)
  11. Brush bronzer down the sides of your nose. Use a white pencil to highlight just between your brows and down the bridge of your nose to contour it.
  12. Using a brown pencil, sketch a line that connects the inner end of your eyebrow to the tip of your nose, making sure that you draw a straight line. Blend this out with your finger and repeat on the other side.
  13. Use a brown matte shadow to blend out the line where it's closest to your eyebrow. This way it makes the line look a little more natural.
  14. Take a black pencil and start to colour in the base of your nose. Aim to have two peaks that reach toward the brown lines you drew earlier, and then slope those points down toward the edges of your nostrils.
  15. Draw a line connecting the base of your nose to the cupid's bow of your upper lip with the black pencil. You can also colour in your upper lip with this pencil, but be careful--some eyeliners are not meant to be used near the mouth. I only had this on for a few minutes, but better to err on the side of caution and either use a black lipstick or something clearly marked lip-safe.
  16. Use either a nude lipstick on the bottom lip or concealer. I used both, but only because the nude lipstick I was using was actually too dark, so I lightened it with concealer.
  17. Use a white pencil to draw white spots on your cheeks over the bronzer. You can add additional spots closer to your hairline like I did or skip that entirely.


This sounds a lot more complicated than it actually is--the worst part is the eyeliner, and if you can't tell, that's what I managed to screw up big time in these photos! If anything, I'd advise practising the eyeliner ahead of time. The rest of it will fall right into place. Here's the full list of products.

BROWS
Sephora Nano Eyeliner in 08 Iced Brown

EYES
Entire eye area - NYX Jumbo Eye Pencil in Milk (white) and Sugarpill pressed eyeshadow in Tako (pure matte white)
Lid - Urban Decay eyeshadow in Buck (fawn brown matte) and Naked (nude matte) blended out to the crease
Upper lash line + inner corner + part of lower lash line - Urban Decay 24/7 Glide-On Eye Pencil in Perversion (matte blackest black)
Lower lash line - Urban Decay 24/7 Glide-On Eye Pencil in Yeyo (metallic white)

FACE
Embryolisse Lait-Creme Concentre
Benefit boi-ing concealer in 01
bareMinerals All-Over Face Color in Warmth (healthy/sun-kissed glow - chestnut)
Sephora Nano Eyeliner in 05 Chocolate, 01 Midnight Black, 03 Pure White

LIPS
Benefit boi-ing concealer in 01
NYX Matte lipstick in Butter (toffee nude)
Sephora Nano Eyeliner in 01 Midnight Black


26 September 2013

mermaid series #2 - ocean siren

The second look in this series is more focused on the mermaid who stays in the ocean without surfacing, who resides where a great deal of marine wildlife swims. She lives in a world that is permanently tinted blue and it's a little darker than the girls who surface.


Here's a little secret: my room gets next to no natural light because I'm a vampire, plus I usually wake up when the sun is no longer shining directly in my window, which is hardly a surprise--my window faces east, so the morning light doesn't usually enter my room. I take my natural light photos standing in front of my parents' bedroom windows. (It also makes for a nicer background because their room isn't the Bermuda triangle.)


Photos taken against a wall like this one are most likely ones taken in my bedroom. The blue eyebrows in this look are surprisingly wearable, although I think it's time to trim my eyebrows because as soon as I raise them, you can see the hairs clearly not within the confines of blue liner!

BROWS
Urban Decay 24/7 Glide-On Eye Pencil in Binge (pearly navy blue, discontinued)
Sugarpill Chromalust pigment in Starling (metallic turquoise)

EYES
Inner lid - Sugarpill Chromalust pigment in Darling (teal with turquoise shimmer)
Outer lid - Fyrinnae loose eyeshadow in Digital Faerie (deep sky blue with green shimmer)
Inner corner + center of lid - Sugarpill Chromalust pigment in Lumi (white with turquoise, blue, and green shimmer)
Outer crease - Sugarpill Chromalust pigment in Royal Sugar (bright blue shimmer)
Inner crease - Fyrinnae loose eyeshadow in Arcane Magic: Futuristic Glamrock (pale translucent aqua-blue with pink iridescence, discontinued)
Upper lash line - Urban Decay 24/7 Glide-On Eye Pencil in Perversion (matte blackest black)
Lower lash line - Sephora Collection colorful eyeshadow in N° 7 Picnic In The Park (grass green shimmer)

FACE
Embryolisse Lait-Crème Concentrè + Dr. Jart+ V7 Beauty Balm
BECCA Satin Finish Foundation in Porcelain
Benefit boi-ing concealer in 01
Benefit high beam

LIPS
NYX matte lipstick in Tea Rose (mauve-pink)


25 September 2013

mermaid series #1 - beach dweller

My friend Courtney on Tumblr suggested that I do mermaid inspired makeup and instead of just doing one look, I've decided to turn this into a mini-series of looks! So here's the first look. This mermaid spends more time out in the sun (although you could never tell from my skin, even if I put on enough bronzer to make me orange) and prefers to swim in shallow waters or near the surface of the ocean. Since they're around sunlight, they're more likely to get a bit of a sunburn.


The blue eyebrows are what will connect the series until I branch out into more specific areas of the ocean. Let me tell you, it was definitely weird walking around my house with bright blue eyebrows and it was even more difficult to get the glitter off!


BROWS
Fyrinnae Pixie Epoxy
Fyrinnae loose eyeshadow in Gender Bent (shimmery teal with bold orange sparkle)
Lit Cosmetics glitter in Cayman S2 (small cut pure sea turquoise glitter)

EYES
Lid - Urban Decay eyeshadow in Sin (champagne shimmer)
Upper lash line - NYX Slide On liner in Glitzy Gold (pure gold)
Lashes - Maybelline Volum' Express the Mega Plush mascara in Blackest Black, Fyrinnae loose eyeshadow in Digital Faerie (deep sky blue with green shimmer)

FACE
Embryolisse Lait-Crème Concentrè + Dr. Jart+ V7 Beauty Balm
Benefit boi-ing concealer in 01
Too Faced Milk Chocolate Soleil bronzer
Josie Maran Coconut Watercolor Cheek Gelée in Poppy Paradise

LIPS
Smashbox O-Gloss Gold