Showing posts with label benefit. Show all posts

26 October 2014

look of the day - A HAIRCUT, FINALLY

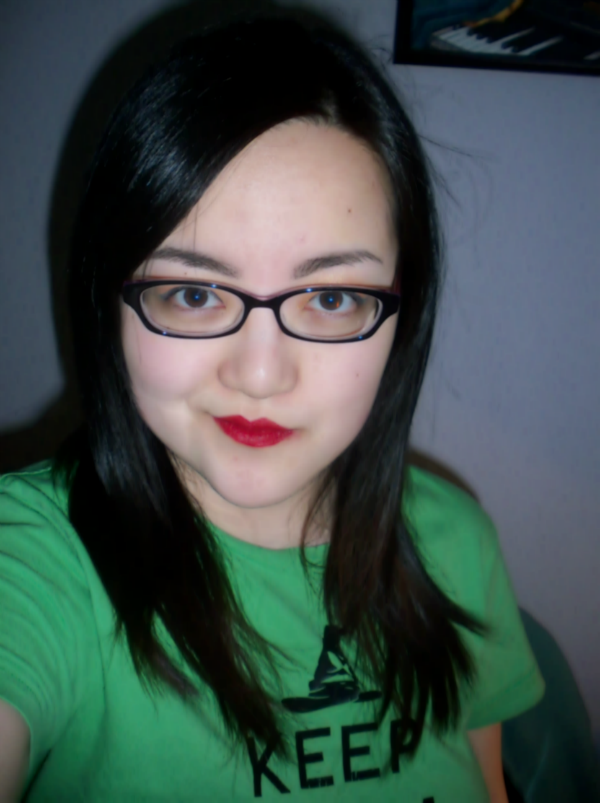
I haven't had an actual haircut in at least 8 months, likely more, and I finally went to the salon today.


Some things to note!
a) My bangs are doing weird things because my hair dried in a part too close to the center.
b) Obviously, there's a bit of a curl in my hair, but the actual length is at least two inches shorter.
c) I took this on my phone camera because it's a ton better than my point-and-shoot camera.

Kate requested a simple look for a regular high school day, so I've tried my best to replicate something and will provide cheaper dupes for products if I know of any.

For face products, start out with a BB cream if you need coverage all over your face. Generally, BB creams tend to be multipurpose, blurring imperfections while covering redness. I've used a Dr. Jart+ BB cream, but Maybelline makes two formulations (depending on skin type) that seem to work well. Take a concealer and cover up anything else you'd like to cover that the BB cream didn't. Maybelline Fit Me concealer is one that I quite like. For cheeks, a cream blush is quick and easy and can be applied with your fingers. Try one of Revlon's cream blushes or L'oreal's mousse blushes.

For eyes, take a shimmery pinky-nude eyeshadow and use it over the eyelid. This gives a wash of colour without complicating the process. If you want to take the extra step, use a taupe or purple-toned eyeshadow in the outer corner of the lid. Eyeshadow can actually be skipped if you're feeling lazy or you don't have that much time to get ready. The brown eyeliner is the most important--draw a line across your upper lid. Brown is softer and more forgiving than black. (If you have oily eyelids, consider using an eyeshadow primer and a translucent powder to make sure your eyeliner doesn't smudge.) Finish with a coat of mascara--brown for lighter eyelashes, black for darker.

For the lips, use a pinky-nude lipstick. There are so many good ones out there--Lipstick Queen makes a universally flatter shade but it's definitely pricey. Revlon lip butters are a good place to start, but their balm stains are really good if you don't want to keep touching up throughout the day. The glossy part of the product might fade but it leaves a stain behind that will last several hours. Honey is a really good colour.


BROWS
Anastasia Beverly Hills Beauty Express brow kit in Brunette
Anastasia Beverly Hills Tinted Brow Gel in Granite

EYES
Too Faced Shadow Insurance
Inner half of lid - Laura Mercier eyeshadow in Guava
Outer half of lid - Laura Mercier eyeshadow in Kir Royal
Upper lash line - marc jacobs highliner gel crayon in brown(out)
Lashes - ck one mascara in 800 black

FACE
Korres Quercetin & Oak Antiageing Primer
Dr. Jart+ V7 Beauty Balm
Benefit boi-ing concealer in 01
stila convertible color dual lip & cheek cream in peony (I THINK. This was a sample and I can't find the shade name on it.)

LIPS
Lipstick Queen Jean Queen lipstick

12 October 2014

sailor moon series #1 - sailor chibi moon

Wow, where did the weekend go?

After spending Friday night and Saturday visiting my sister and my best friend at my alma mater, I came home late last night so I could catch a movie and a zombie makeup artist at a nearby theatre, and now it's the end of the weekend and it's weird.

This marks the start of a new series of looks! I've loved Sailor Moon for the majority of my life, ever since the dub first aired on television when I was a child. I started doing makeup looks for each sailor scout over on my Tumblr about 2-3 years ago, but I'd like to think my makeup skills have improved and maybe I'll actually finish it this time.

I'm aiming for matching my hair to each sailor scout, so this series is going to take a while, but hopefully it's worth it. Since my hair is currently pink, the natural first character is Chibi-Usa, or Sailor Chibi Moon.


Okay, so the eye makeup is not immediately noticeable in this photo, but it's really not that important. I used a white eyeshadow in the inner corners, a light pink in the center of my lids, and a slightly more vibrant blue-toned pink in the outer corners and under the lower lash line. Taupe eyeliner finished all the eye makeup and then I curled my lashes and put on some falsies. If I were to do this look again, I'd line my lower waterline with a white eyeliner to give the wide-eyed, shoujo look.

My eyebrows are lighter than I've worn them in some time because I went with powder rather than the Dipbrow since Chibi-Usa is young, and I wanted to emulate that somewhat.

I used a light gold-pink eyeshadow in place of blush and a blue-toned pink lip colour topped with a multi-dimensional white shimmer gloss.

My hair is in pigtails to further emphasise the youthfulness of this look and the character. I'm still debating wearing clothing in the character's colour scheme, but I went with it and apparently all I have that's pink is this old sundress.


BROWS
Anastasia Beverly Hills Beauty Express brow kit in Brunette
Anastasia Beverly Hills Tinted Brow Gel in Granite

EYES
Too Faced Shadow Insurance
Inner corner - Urban Decay eyeshadow in Bobby Dazzle (metallic white/pale gold micro-glitter)
Center of lid - Geek Chic Cosmetics eyeshadow in Pretty Guardian + Urban Decay eyeshadow in Alien (pink-peach/golden shift)
Outer corner + lower lash line - Sugarpill Chromalust pigment in Birthday Girl (princess pink with fuchsia sparkles)
Crease - Sugarpill pressed eyeshadow in @#$%! (vampy pearl red with silver metallic sheen)
Liner - Urban Decay 24/7 Glide-On Eye Pencil in Desperation (deep taupe to gray matte)
False lashes - Ardell Fairies Black lashes

FACE
Urban Decay Naked Skin liquid foundation in 1.0
Benefit boi-ing concealer in 01
Under eyes - It Cosmetics Bye Bye Under Eye Corrector Concentrate Cream in Light
Urban Decay eyeshadow in Scratch (rose gold shimmer)

LIPS
NYX Soft Matte Lip Cream in Milan (mid-tone blue-toned pink)
Shiro Cosmetics Lip Gloss in Moon Prism Power


23 August 2014

(belated) look of the day - curls and red lipstick

This look was actually from last Sunday, 17 August, but I forgot to post it.


This isn't any different from this previous look in terms of makeup, although I used a lip liner for the lips in addition to the lipstick. I wanted to post this partially to say that I bought the new Urban Decay Pulp Fiction lip liner and lipstick and they're FANTASTIC, and partially to say that I also bought the Sultra the Bombshell 1-inch curling rod and even though it was a bit pricey, it took a fourth of the time it usually takes to curl my hair.


BROWS
Anastasia Beverly Hills Dipbrow pomade in Dark Brown

EYES
Too Faced Shadow Insurance
Lid - Urban Decay eyeshadow in Foxy (very light yellow/white matte)
Outer corner - Urban Decay eyeshadow in Naked2 (taupe matte)
Crease - Urban Decay eyeshadow in Faint (warm, dusty brown matte)
Waterline - Urban Decay 24/7 Glide-On Eye Pencil in Perversion (matte blackest black)
Liner - Sephora Colorful Waterproof Eyeliner 24 HR Wear in 01 Black Lace (matte black)
Lashes - Maybelline Volum' Express the Mega Plush mascara in Blackest Black
Under eyes - Maybelline Fit Me Concealer in 15 Fair

FACE
Urban Decay Naked Skin liquid foundation in 1.0
Benefit boi-ing concealer in 01
NYX Cosmetics blush in Desert Rose
Highlight - Benefit Watt's Up
Contour - Maybelline Fit Me foundation stick in 235

LIPS
Urban Decay Pulp Fiction™ 24/7 Glide On Lip Pencil in Mrs. Mia Wallace (deep blood red)
Urban Decay Pulp Fiction™ Revolution Lipstick in Mrs. Mia Wallace (deep blood red)

10 August 2014

look of the day - purple vamp

My hair is looking sad and so is my bank account, so I won't be re-dyeing it until I get my hands on some new Manic Panic. To cheer myself up, I did a vampy makeup look, which is really what I gravitate toward most days but I can't really get away with it at work.


For the eyes, it's a bit of a typical smoky eye where the darkest colour is closest to the lashes. I used a midtoned plum shimmer from the lash line up to between the brow bone and the crease, and a dark, blackened purple with iridescent glitter from the lash line to the crease. The most important part of smoky eyes is blending! Make sure to blend each colour into the next so you get a nice gradient. Blend with a clean brush each time. Use a matte purple eyeshadow to blend in some colour on your lower lids.

Take a black pencil eyeliner and line your waterlines, top and bottom. (Feel free to skip this step if you're not comfortable with this!) Take a black cream or gel eyeliner and draw out serious wings at the outer corners of your eyes. Feel free to go a little crazy since you've got such dark eyeshadow on anyway. Line your lower lash lines, too, and extend the line past the corner of your eye. Finish with a few coats of mascara.

For the lips, take a dark burgundy lipstick and fill in most of your lips with it. Then, using a black lipstick and a lip brush, line your lips and blend the two colours together. Because my lips are naturally quite pigmented, I had to cover them with some foundation so my lip line wasn't obvious.

Most people would want to balance this with a tad of blush or some contouring. I skipped both because I was bored and really wanted to get all the black eyeliner off in less than a half hour, but if I didn't get so impatient, I would've done some contouring around my cheeks and the perimeter of my face.

BROWS
Anastasia Beverly Hills Dipbrow pomade in Dark Brown

EYES
Too Faced Shadow Insurance
Inner corner - Urban Decay eyeshadow in Sin (champagne shimmer)
Lid up to below brow bone - Makeup Geek pigment in Enchanted (light plum shimmer)
Lid up to crease - Sephora eyeshadow in N° 22 Fireworks (black purple with iridescent glitter)
Liner - Inglot Cosmetics AMC Eyeliner Gel in 77 (matte jet black)
Lower lid - Sigma Beauty Flare palette: Gossip (plum matte) + Allure (warm bright purple matte)
Waterline - Urban Decay 24/7 Glide-On Eye Pencil in Perversion (matte blackest black)
Lashes - Maybelline Volum' Express the Mega Plush mascara in Blackest Black
Under eyes - Maybelline Fit Me Concealer in 15 Fair

FACE
Urban Decay Naked Skin liquid foundation in 1.0
Highlight - Benefit Watt's Up

LIPS
Wet N' Wild Fantasy Makers lipstick in Black
Geek Chic Cosmetics JoyStick in Stay Classy (velvet burgundy)


26 July 2014

celebrity-inspired looks #3 - elizabeth henstridge at the guardians of the galaxy l.a. premiere

I swear, I'll do a celebrity look that isn't Elizabeth Henstridge. Eventually. But I had to attempt the seriously awesome smoky eye and red lip pairing she wore to this premiere--you can find pictures here. I'll take suggestions for other celebrity looks anyone wants to see!


(This is the last post I'll be making with my blonde hair! Good thing, too, since it's misbehaving a lot today.)

Okay, let's get lipstick out of the way. From what I could tell in the pictures I've seen, she was wearing more of a sheer red lipstick, though some pictures made it look more pigmented. I suggest going the sheer route especially with a strong smoky eye like this, but if you want to go full red, go for it. Lipstick Queen's most popular lipstick is a tinted treatment that fit so well. And one day, I'll have a camera that doesn't desaturate reds!

Elizabeth has some amazing eyebrows but they looked a little lighter than usual, so fill in your brows with a light hand, and set the hairs in place with a tinted brow gel. The secret to lightening your brows a bit is to run some powder through your brows while the gel isn't fully dry--translucent or tinted powder would probably work best, but I wanted to be fancy and used a gold eyeshadow.

For the eyes, take a gold shimmer to the inner corner of your eyelids, blending carefully. Next, use a deeper bronze-brown shade on the center of the lid. I added a glittery deep brown shade on top of the original colour just to give it some more dimension. Take a dark brown to the outer corners of your eyelids, and then blend all three of these together.

Blending with a brush would be ideal, but I'm a rulebreaker and just use my fingers. That won't work for everyone, so choose a method that works best for you. I suggest blending the lighter shade into the darker shade so you don't risk darkening your entire lid.

Tap a matte deep brown shade into your crease and blend that toward the inner corner of your eyelid. For your lower lid, take a bit of the gold eyeshadow and some of the dark brown shade and blend that into your lash line. Line your upper waterline and lash line with a matte black eyeliner, and your lower waterline with a brown eyeliner. (Since my eyes water a lot, I set the lower waterline with a matte brown eyeshadow. Totally optional.) Swipe on a few coats of mascara, and if you'd like, put on some false eyelashes. Elizabeth seems to have really long eyelashes and mine are stubby, so I put on some partial falsies that only cover half of my lash line. Make sure you glue these on correctly because I 100% messed mine up!

For the face, take a foundation a few shades deeper than your skin tone and blend it just underneath your cheeks for a little contouring, and then dust on a peachy-pink blush to give some colour to your cheeks. Because the eyes are so intense and you have a bit of a noticeable lip competing, you need to have a little blush on your cheeks to keep you from looking washed out.

BROWS
Anastasia Beverly Hills Dipbrow pomade in Dark Brown
Anastasia Beverly Hills Tinted Brow Gel in Granite
Urban Decay eyeshadow in Half-Baked (bronze)

EYES
Too Faced Shadow Insurance
Inner corner - Urban Decay eyeshadow in Half-Baked (bronze)
Center of lid - Urban Decay eyeshadow in Smog (golden brown shimmer) + Shiro Cosmetics loose eyeshadow in Nic Cage Raking Leaves on a Brisk October Afternoon (coffee brown-black with gold and red sparkles)
Outer lid - Urban Decay eyeshadow in Darkhorse (bronze-plum shimmer)
Crease - Paula's Choice eyeshadow in Coffee, Urban Decay eyeshadow in Buck (brown matte)
Lower lid - Urban Decay eyeshadow in Half-Baked (bronze) + Darkhorse (bronze-plum shimmer)
Upper lash line + waterline - Urban Decay 24/7 Glide-On Eye Pencil in Perversion (matte blackest black)
Lower waterline -  Hello Kitty Charmmy Kohl Eyeliner in Chocolate Milk (shimmery brown) + Paula's Choice eyeshadow in Coffee
Lashes - Maybelline Volum' Express the Mega Plush mascara in Blackest Black
Falsies - ecotools Naturally Beautiful Lash System in Barely There

FACE
Urban Decay Naked Skin liquid foundation in 1.0
Benefit boi-ing concealer in 01
Under eyes - It Cosmetics Bye Bye Under Eye Corrector Concentrate Cream in Light + Bye Bye Under Eye concealer in Light
Contour - Maybelline Fit Me foundation stick in 235
Blush - NARS Blush in Orgasm (peachy pink with shimmer)

LIPS
Lipstick Queen Medieval Tinted Treatment (sheer red)


16 June 2014

(belated) look of the day - BEST EYESHADOW POSSIBLY EVER

Disclaimer 1: This look was from Saturday. I took the pictures and rushed out of the house and just completely forgot to write this post.
Disclaimer 2: The title is misleading, probably. I'm just kind of obsessed with this colour and want to use it in everything.

Disclaimer 3: I just wanted a third disclaimer.

Saturday was my best friend Katina's graduation/birthday party, so naturally, I was later than intended because I had to do my makeup. I ordered a package from Beautylish on Wednesday at about 10PM and it was at my front door on Friday around 5PM. Their customer service is PHENOMENAL. On two separate occasions, I had something happen to my packages (a lipstick in the wrong shade was mailed and a face oil had leaked) and on both occasions, they were so nice about it that they just gave me replacements free of charge. Seriously, go check it out.

Anyway, so I took the advice of Phyrra who advised everyone to get this eye shadow and I just have to say that I wholeheartedly agree, even if my greasy lids made it crease after some undetermined time. (I wasn't close to a mirror to check it until right before I left Katina's house around 10:30PM and I did my makeup about 12 hours prior.)


I should have taken better pictures but I was already running late.

Anyway, this look was actually quite simple. Take a copper cream eyeshadow and tap that into your inner corner and blend it toward the center of your eyelid, then take the Inglot pigment in 81, the most gorgeous copper-pink metallic shade, and press that on top and toward the outer corner of your lids. Next, take a darker matte taupe shade and blend that into the outer corner of your lids. I used several shadows to achieve the effect I wanted, but if you have a trusty darker taupe, just use the one and save yourself some trouble. Create whatever shape suits you--I just blended it out without really caring what the shape was and that worked out just fine, but if you want to be more precise, go for it. Blend the matte taupe shade into the metallic shade and please, do a better job than I did.

I didn't bother with mascara because it was going to be warm outside, but I did use a thin flat liner brush to tightline my upper lash line. The gold eyeliner on the lower lash line is optional, but I thought it rounded out the look a bit.

My eyebrows are actually purple here, but the flash makes them look a bit more brown. I also didn't put on blush, but the lip colour is lighter to balance out the slightly heavier eye.

BROWS
Inner half - Laura Mercier eyeshadow in Plum Smoke (matte smoky amethyst)
Outer half - Sephora eyeshadow in Blueberry Muffin No 30 (black plum matte)
Anastasia Beverly Hills Tinted Brow Gel in Granite

EYES
Too Faced Shadow Insurance
Inner half - LUSH Cream Eyeshadow in Happiness (sunset copper shimmer) + Inglot Cosmetics AMC Pure Pigment Eye Shadow in 81 (metallic copper-pink)
Outer half - Sigma Beauty eyeshadow in Hitch (matte medium-dark ash-brown) and Snoop (matte dove grey)
Upper lash line - Urban Decay 24/7 Glide-On Eye Pencil in Perversion (matte blackest black)
Lower lash line - NYX Slide On Liner in Glitzy Gold (pure gold)
Under eyes - Maybelline Fit Me Concealer in 15 Fair

FACE
Urban Decay Naked Skin liquid foundation in 1.0
Benefit boi-ing concealer in 01

LIPS
Geek Chic Cosmetics JoyStick in The Last Cetra (metallic purple-toned light pink)


07 June 2014

celebrity-inspired looks #1 - elizabeth henstridge at the 2014 ctv upfronts

Hello! It's been a while and somehow I logged in to find that I've gotten 70 pageviews today. You're all popping out of the woodwork, what happened?!

Anyway, so if you follow me on Tumblr, you'll notice that Agents of S.H.I.E.L.D. is sort of taking over my life. (And by sort of taking over, I mean has 300% taken over.) I also have a habit of loving casts and their dynamic even more than the show itself, and this show is no different. The ladies of AoS are phenomenal and after I saw this picture of Elizabeth Henstridge, I knew I had to try to copy her look.


(I tried to take a picture with my teeth showing and I just looked so awkward. And yes, I'm wearing a lazy t-shirt because it was disgusting in my room and I didn't want to change!)

What made me want to try this look was the lip colour. I currently don't own anything of the sort, as slightly purple-leaning cool pinks aren't entirely my style. But it looked amazing on Elizabeth, so hey, why not?

I didn't have much of a close-up on her eye makeup, but she seems to favour neutral eyes with a bit of a flick on the eyeliner, so that's what I tried to do. Dot a shimmery, light eyeshadow in the inner corners of your eyes. (Alternatively, you can wait until the end so you can adjust the pigmentation as necessary.) Take a matte eyeshadow close to your natural skin tone and swipe it across your entire lid. This acts as more of a base than a part of the look, as it will make blending the other eyeshadows much easier. Use a gold eyeshadow and pat it onto the centers of your lids, and tap a medium-dark brown eyeshadow into the outer corner. Blend the dark eyeshadow into the lighter shades with a tapered brush.

(By the way, you should all be proud of me: I didn't finger paint my eyeshadows like I usually do!)

Take what's left on your eyeshadow brush and blend it into your lower lash line to give some definition. Use a black gel eyeliner and a small push liner brush (I used Wayne Goss' No. 8 brush, which is sort of a godsend) and press liner into the base of your lashes. Use a normal angled eyeliner brush to line your upper lash line and create a small flick at the outer corners. I completely forgot to use mascara, but you can layer some on after curling your lashes. Falsies are totally optional, but I think Lil is wearing some in that picture so I just went for it.

For the lip colour, I blended two different shades together to achieve a similar look and then added a layer of the lighter colour on top. I think the final colour looks pretty similar, although I can't say for sure as most of the pictures I've seen of her were edited.

Also, might I mention the miracle of layers? My hair is a lot longer than it looks in this picture but my front layers are noticeably shorter. Huzzah!

BROWS
Anastasia Beverly Hills Beauty Express brow kit in Brunette
Anastasia Beverly Hills Tinted Brow Gel in Granite

EYES
Too Faced Shadow Insurance
(All eyeshadows from the Sigma Beauty Bare palette)
Inner corner - Approach (pale, warm beige shimmer)
Entire lid - Elope (matte cool beige)
Center of lid - Command (light gold shimmer)
Outer corner - Hitch (matte medium-dark ash-brown)
Liner - Inglot Cosmetics AMC Eyeliner Gel in 77 (matte jet black)
False lashes - Ardell 109 lashes
Maybelline Fit Me Concealer in 15 Fair

FACE
Urban Decay Naked Skin liquid foundation in 1.0
Benefit boi-ing concealer in 01
Josie Maran Coconut Watercolor Cheek Gelée in Poppy Paradise

LIPS
Obsessive Compulsive Cosmetics Matte Lip Tar in Pretty Boy (super-rich fuchsia) + Stained Gloss in Hedonist (neon pastel pink)


17 May 2014

orphan black clones series #4 - cosima niehaus

Wow, it's been a while, hasn't it?

I have excuses that you don't care to hear for all of it, but I do have to say that I did this look before a graduation party I'm going to shortly and holy hell does it take a long time to try to finagle my hair into "dreads". And by dreads, I mean I did a few crappy twists around the top of my head and gathered the rest of my hair into a ponytail because my hair is impervious to styling unless I fry it.

Cosima has the coolest look, in my opinion, although my personal look leans more toward Sarah. (You'll see that once I link my post-Cosima makeover picture.) Obviously I don't have dreadlocks, but her eyeliner is amazing.


The dumb thing is that you can't even see my hair! Well, Cosima's makeup is actually rather straightforward. Take a liquid liner (black is the most common, of course, but if you have a navy liner, that's what the makeup artists on the show use!) and line your upper and lower lash lines. Then extend the line on the upper lid outward to create a wing, and extend the line on the lower lid toward your nose. Now, I know that for Cosima's makeup, the eyeliner on both lids is connected in both the outer and inner corners, but since my eyelids are hooded everywhere except the inner corner, where they're more monolid-like, I didn't connect the inner corners. If you don't have this issue, you can connect the lines easily.

I used a black liquid liner, so after the shape was created, I used a navy pencil liner and a thin liner brush to outline the shape and give it the correct colour. It doesn't seem like Cosima wears much other makeup, but I did use a bit of a nude lip colour to lighten up my natural lip colour. (I put on a layer of a light OCC lip tar and then dabbed on a nude/mauve Bite lipstick over that.)

BROWS
Anastasia Beverly Hills Beauty Express brow kit in Brunette
Anastasia Beverly Hills Tinted Brow Gel in Granite

EYES
Too Faced Shadow Insurance
bareMinerals mineral veil
Liner - Sephora Collection Long-Lasting 12HR Wear Eye Liner in 01 Black (matte black) + Urban Decay 24/7 Glide-On Eye Pencil in Binge (pearly navy blue, discontinued)

FACE
Missha Perfect Cover BB Cream in No. 13 Bright Beige
Benefit boi-ing concealer in 01

LIPS
Obsessive Compulsive Cosmetics Lip Tar in Interlace (palest crème peach)
Bite Beauty Lipstick in Pepper (dusty rose)


After I took my hair down and changed (and put a tiny Dutch braid where my part normally is), this is what happened. I went from Cosima to Sarah-as-Cosima!

26 April 2014

orphan black clones series #3 - rachel duncan

Time for a third clone! So, I have to admit that Rachel fascinates me a lot, as she seems to be a bit of a red herring villain at the moment. That being said, I think her motives are rather unexplained and I can't wait to see what her real story is.


This look is based on this picture. I really tried to give a withering look but it just looks like I'm tired. Which is pretty close to the constant, pervasive truth! Obviously, I don't have blonde hair, nor is my hair short enough for a bob, so I improvised. I couldn't replicate the blonde, of course, but I put my hair into a faux-bob using this tutorial. My hair is incredibly thick so if I do this again, I'm going to leave less hair for the braid that is tucked underneath the rest of the hair, but otherwise it seemed to work well enough. (It looked so much better in person than in all of my photos...)

Rachel is very polished and since she's got blonde hair, her eyebrows seem to be a bit lighter than the other clones'. She's also got a bit of a tan in comparison with everyone else, and that might be more noticeable because of her hair colour. I had to apply bronzer all over my face, which looked HILARIOUS in natural lighting but didn't seem to do too much in flash photography.

For the eyes, take a very pale grey-brown shimmer shade and tap that into the inner corners of your eyes, drawing the colour out toward the center of your lids. Take a darker grey-brown shade to the rest of your lid. Using a matte brown shade, blend the colour into your crease and take the excess to your lower lids along the lash lines.

Take a flat liner brush (I used Wayne Goss' Brush 08, which is a ridiculously tiny push liner brush and I think I'm in love with it) and load it with a black cream liner, then tightline your upper lash line and line your lids. I used a pencil liner instead of a cream because I didn't want to open one up and have it dry out. Use a few coats of mascara on your upper lashes.

I spent a good ten minutes trying to find a lip colour that would mimic the one Rachel used and I think I got close, though hers appears to be more red-brown than mine, which leans more warm pink.


BROWS
Anastasia Beverly Hills Beauty Express brow kit in Brunette
Anastasia Beverly Hills Tinted Brow Gel in Granite

EYES
Too Faced Shadow Insurance
bareMinerals mineral veil
Inner corner - Urban Decay eyeshadow in Verve (oyster shimmer)
Outer lid - Urban Decay eyeshadow in Pistol (light gray-brown shimmer)
Crease - Urban Decay eyeshadow in Tease (pale brown matte)
Under eye - Urban Decay eyeshadow in Tease (pale brown matte) + Paula's Choice eyeshadow in Cafe Au Lait
Liner + waterlines - Urban Decay 24/7 Glide-On Eye Pencil in Perversion (matte blackest black)
Lashes - Maybelline Volum' Express the Mega Plush mascara in Blackest Black

FACE
Urban Decay Naked Skin liquid foundation in 1.0
Benefit boi-ing concealer in 01
Under eyes - Benefit Fake Up Concealer in 01 Light
Too Faced Milk Chocolate Soleil bronzer

LIPS
rms beauty lip2cheek in promise (warm salmon pink with golden shimmer)


19 April 2014

orphan black clones series #2 - alison hendrix

It's my 23rd birthday! Last year was absolute shit and I can only hope that this year is better. I've never really felt older on my birthday until this year. I feel like I earned being 23. I spent the entire day getting food and shopping with my family, so I'm exhausted and stuffed.

More importantly, though... Tonight is the premiere of season 2 of Orphan Black! To celebrate, I dressed up as another clone: Alison Hendrix.


Alison is a soccer mom living in suburbia and she seems to have a more laid-back, simple look because of her hectic schedule. I based this look off of this picture, where she's wearing a little more makeup than I think she usually does. I also don't have bangs that go across my forehead, so I improvised with my side bangs and I put in a headband for good measure.

For the eyes, all you need to do is take a matte brown shadow that is a few shades darker than your skintone and swipe it over your eyelids and under your eyes, and then line your eyes with a dark brown eyeliner. I used a dark taupe liner because it was what was convenient!

For lips, Alison seems to wear a pinky lip colour that is slightly brighter than her natural lip colour, but in this photo it appears a bit darker. I went with a fig shade that applies matte and put on a lipstick with some sheen over it.

I'm not wearing blush here because my cheeks are naturally pink. However, Alison always seems to be wearing some, so I'd suggest something a little on the warm pink side.

Clothing-wise, I don't have much that is as preppy as Alison's wardrobe is, and I don't have pearls. (Would have made a nice touch, no?) So I just went with a graphic tee and a sweater that looks a little more like Alison's workout clothes than her day-to-day wear.

BROWS
Anastasia Beverly Hills Beauty Express brow kit in Brunette
Anastasia Beverly Hills Tinted Brow Gel in Granite

EYES
Too Faced Shadow Insurance
Lid - Saucebox Cosmetics pressed eyeshadow in Almond (cool medium brown matte from the Etude palette)
Upper lash line - Urban Decay 24/7 Glide-On Eye Pencil in Desperation (deep taupe to gray matte)

FACE
Embryolisse Lait-Crème Concentrè + Dr. Jart+ V7 Beauty Balm
Benefit boi-ing concealer in 01

LIPS
Buxom Big & Healthy Lip Stick in Brooklyn (harvest fig)
NYX Cosmetics Butter Lipstick in Pops (mauve)


EDITED: The makeup artist has said that Alison wears purple eyeliner and this was done before I read the articles saying this! That being said, for some reason my eyeshadow here looks a little purple. If you're looking for a good purple eyeliner, try Urban Decay 24/7 Glide-On Eye Pencil in either Vice or Psychedelic Sister (higher-end option) or NYX Slide On Pencil in either Pretty Violet or Purple Blaze (drugstore option).

06 April 2014

look of the day - game of thrones!!!

GAME OF THRONES IS TONIGHT AND I CAN'T HANDLE MY EMOTIONS.

(I also went to see Captain America: The Winter Soldier this afternoon, so basically I'm a mess of fandom feelings.)

Confession: I don't really care for Daenerys Targaryen. She doesn't interest me in the slightest when compared with the other characters or the unexplored members of House Targaryen. There's an interesting history that goes back for centuries, but I'd rather invest myself in the likes of Sansa Stark.

And if you don't like Sansa Stark, we need to have a serious conversation.

Despite my general apathy/mild dislike for Daenerys, the Targaryen colours are the most violently contrasting, at least for the great houses of Westeros and since I got a shirt from Akira, I wanted to go with the Fire and Blood theme.


DUMB GLASSES ARE ALWAYS CROOKED. Obviously, this is not a look for the faint of heart. Also, I went a little overboard--a shirt with scales, Targaryen makeup, and a dragon earcuff, but hey, what's life without living in a little excess from time to time?

(I was totally going to do braids, but since this was rushed already, I nixed that idea.)


I love this earcuff, but it's really tough to get it on my ear. I managed to snap the post right off within ten minutes of having it home and luckily my dad managed to super-glue it back on, but I'm a little wary of trying to adjust the cuff part because of that.


Also, can we talk about this shirt? This is the weirdest angle and it makes my chest look weird, but I'm in love. Yes, it's a turtleneck so it looks a little strange in selfies and yes, it's a wee bit tight in the neck. But I don't care because it's wonderful.

I'm not going to go into great detail for this look unless someone has a serious hankering to try this, but I will say that the red-black ombre brows are totally fun, and I used black eyeliner to etch out the shape of the black eyeshadow on the outer lid. There aren't any close-ups because this look was actually sort of slapped together since I was rushing trying to finish it and eat dinner before going for a walk, but if anyone wants to see a look where there's a defined line between two colours on the lid, I'd be glad to do something and take the time to do it!

The red eyeliner, by the way? Still in love with it. It was also in my Scar look--I drew three curved lines in homage to the Targaryen dragon but I only did it on one eye.

BROWS
Sugarpill pressed eyeshadow in Love+ (bright red with semi-pearl sheen) and Bulletproof (deep matte black)

EYES
Too Faced Shadow Insurance
bareMinerals mineral veil
Sugarpill pressed eyeshadow in @#$%! (vampy pearl red with silver metallic sheen)
Victorian Disco Cosmetics loose eyeshadow in Lightspeed (deep black with strong silver sparkle)
Urban Decay 24/7 Glide-On Eye Pencil in Zero (black)
Liner - Urban Decay 24/7 Glide-On Eye Pencil in Perversion (matte blackest black)
Makeup Geek Gel Liner in Poison (matte rusty red)

FACE
Urban Decay Naked Skin liquid foundation in 1.0
Benefit boi-ing concealer in 01

LIPS
Urban Decay Revolution Lipstick in F-Bomb (classic red)


WHO ELSE IS READY FOR SEASON FOUR?!

29 March 2014

look of the day - dark lips + defined brows/review - nyx soft matte lip creams

I really need to start doing makeup on the weekends so I have things to post here, yeah?

Last weekend, my sister came home for her first university spring break, so I didn't get a chance to sit down at my desk to paint my face, but this weekend I finally got some time for myself. I was inspired by the fall runway looks with dark, vampy lips, clean eyes, and defined brows. (Yes, I'm still stuck in fall makeup and that's perfectly up my alley.)

Mostly, I just wanted to use the darkest NYX lip cream that I own...


 Yes, dark lips are a year-round thing for me, but rarely do I go this dark. This colour would have been perfect for my Wednesday Addams costume and it's 100% fitting for Lorde!

Nothing too complicated was involved in this look. Put a little concealer on where it's needed--for me, that's around my mouth, chin, between my eyebrows, over my red patches on my cheeks, and under my eyes--and that was it for the face. Fill in your brows using a brow powder duo. The lighter shade goes on the inner half of the eyebrow and the darker shade on the outer half, and then brush out your brows to make them look less harsh, and finish them off with a swipe of brow gel.

For the eyes, take a black liner and tightline your lashes. (If you don't know what tightlining means, check out this article!) Curl your lashes and then put on a coat of mascara.

The lips are key here. With a dark lip like this, I would suggest filling in your lips with a matching lip liner to give you full coverage since once a dark lip colour is smudged, it's very noticeable. I didn't use lip liner because I wanted to see what this colour looked like on its own.

BROWS
Anastasia Beverly Hills Beauty Express brow kit in Brunette
Anastasia Beverly Hills Tinted Brow Gel in Granite

EYES
Upper lash line - Liner - Urban Decay 24/7 Glide-On Eye Pencil in Perversion (matte blackest black)
Lashes - Maybelline Volum' Express the Mega Plush mascara in Blackest Black

FACE
Benefit Fake Up Concealer in 01 Light
Under eyes - Maybelline Fit Me Concealer in 15 Fair

LIPS
NYX Cosmetics Soft Matte Lip Cream in Transylvania (matte deep violet)


Since I just bought the NYX lip creams that I don't own, I thought I would do a review on them.

(Credit: ULTA.com)

Availability: Most ULTA stores and some Target stores, as well as nyxcosmetics.com.
Shades: These come in 22 shades and to my knowledge, all of them are permanent.
Price: $6 each, although ULTA often has buy one, get one 50% off deals.

All shades. TOP ROW: Cairo, Athens, Stockholm, London, Abu Dhabi, Zurich, Cannes. MIDDLE ROW: San Paulo, Antwerp, Buenos Aires, Istanbul, Tokyo, Sydney, Milan, Prague. BOTTOM ROW: Morocco, Ibiza, Addis Ababa, Amsterdam, Monte Carlo, Copenhagen, Transylvania.


About:
Neither lipstick nor lip gloss, this matte lip cream is a new kind of lip color that goes on silky smooth and sets to a matte finish. Soft Matte Lip Cream is surprisingly durable and, unlike some matte lipstick formulas, also moisturizing.

Ingredients:
Pentaerythrityl Tetraisostearate, Dimethicone, Beeswax, Glyceryl Behenate/Eicosadioate, Phenoxyethanol, Dimethicone/Dimethicone Crosspolymer, Talc, Methyl Methacrylate Crosspolymer, Silica, Aluminum Starch Octennylsuccinate, Isohexadecane, Disteardimonium Hectorite, Propylene Carbonate, Parfum. MAY CONTAIN: Ci 77019 (Mica) / CI 77891 (Titanium Dioxide), CI 15850 (D&C Red 6 Na Salt), CI 15850 (D& C Red 7 Ca Lake), CI 15985:1 (FD&C Yellow 6 Al Lake), CI 19140:1 (FD&C Yellow 5 Al Lake), CI 45410 (D&C Red 28 Al Lake), CI 77491 (Iron Oxide Red), CI 77492 (Iron Oxide Yellow), CI 77499 (Iron Oxide Black), CI 77742 (Manganese Violet), CI 77891 (Titanium Dioxide).

Disclaimer: Do not apply these right after putting on lip balm! They will be streaky and uneven and difficult with which to work.

I really like these! I own all 22 shades and haven't had the chance to try all of them, but generally, I find that they apply nicely and dry down to actually give you a matte look rather than a satin one like many matte lipsticks end up doing. They have a bit of a vanilla/cupcake scent that lingers for a while after application. It doesn't bother me as I love most gourmand smells, but it might be a selling point for you or something that turns you off.

As long as I don't furiously press my lips against water bottles or cups, I've never had too much of an issue with transfer. However, if you accidentally bring a tissue near your mouth, you can bet that it will come off. They won't last through a meal since they're oil-based (organic solvent-based, if you're a science person like me) and will dissolve quickly, but water doesn't make the colour budge.

I recently just bought the 13 that I didn't own previously and with work going on, I haven't had a chance to test them all out. The ones that I've used more than once are Cannes (matte muted mauve), Antwerp (mid-tone yellow-toned pink), Ibiza (matte deep rose pink), Monte Carlo (deep cranberry red), and Copenhagen (matte rich plum). Cannes is a MLBB shade for me and Copenhagen might be one of my all-time favourite lip colours.

Since my lips are rather pigmented, some of these shades might not have the coverage to appear true to their actual colour. Transylvania is sheerer than the other colours I've tried, so I do recommend using a lip liner underneath it. The next time I wear it, I definitely will.

If there is a shade you'd like to see swatched on my lips, please let me know and I'll get that done ASAP.

Tomorrow is my first VIB Rouge event at Sephora. I've been one for a while now (... whoops, spending) but this is the first time that I've been able to attend something so I'm pretty excited. I'm currently sitting here writing this post whilst I try to tint my hair purple. I know you're supposed to bleach your hair before you put in semi-permanent dyes like Manic Panic, Beyond the Zone Color Jamz, Ion Color Brilliance, and Special Effects, but I don't want the bright colour. So my hair is dark burgundy (really just dark brown with a tint of red) but hopefully it'll deposit something.

18 February 2014

(belated) look of the day - red lips and blue liner

Pretend this was posted yesterday because someone was a little caught up in trying to figure out what she needs to do for her new job. WHOOPS.

Anyway, yesterday I was just playing around with my makeup because I was bored but didn't feel like doing something else. Typical, right? Well, I had to sharpen up my eyeliners because they were getting dull and scratching the hell out of my eyelids, so I dug out my Urban Decay Grindhouse sharpener. I swear, this is the best sharpener I've ever used because it doesn't just leave the points of my pencils dull--it actually sharpens instead of just whittling away at the wood!


Per usual, the way my glasses sit on my face is irritating and covers up my eyeliner, but I wanted to show you all that my usual expression is really not smiling. I make weird faces in 97% of all pictures I take that aren't for this blog, so it's so weird that I've been making myself smile for pictures. This is even relatively tame! Usually I'd be pursing my lips to one side and raising my eyebrows, if nothing more extreme. Anyway, all I did was fill in my brows, take a dark blue eyeliner and draw on a super thick line that ended in a squared-off edge toward the outer corner, topped off the rest of my lid with a copper cream shadow, and put on some red lipstick.

The liner doesn't have to be perfect, but I was also being excessively haphazard since I knew I wasn't going out and no one was even going to see me in this unless I posted it to my blog. Lo and behold! Don't be afraid to make mistakes or not have your makeup be perfectly symmetrical. Often times, your eyeliner might need adjustment because your eyes are most likely not complete mirror images of each other. This is the one thing I see people fretting about the most when it comes to makeup. Just own it!

Maybe I've been drawn to red this month because Wear Red Day was almost two weeks ago or (less likely) because of Valentine's day, but red lips are seriously a very fun way to perk up any look or if you're not wearing any other makeup at all.

BROWS
Benefit Instant Brow Pencil in Deep
Anastasia Beverly Hills Tinted Brow Gel in Granite

EYES
LUSH Cream Eyeshadow in Happiness (sunset copper shimmer)
Liner - Urban Decay 24/7 Glide-On Eye Pencil in Binge (pearly navy blue, discontinued)

FACE
NOTHING!

LIPS
Bite Beauty Cashmere Lip Cream in Port (deep wine)


14 February 2014

look of the day - happy valentine's day!

EDITED TO ADD 02/15/2014: The mini-tutorial has been added!

Okay, let's face it: I really don't care for Valentine's day. I loved it as a kid because you gave valentines to everyone and got them in return. As I got older, I hated the holiday for a while because I didn't like the commercialisation of holidays. (Yes, I was that teenager.) And now I just don't care for it, mostly because I don't see why we need one designated day where you're supposed to appreciate your loved ones. Aren't you supposed to do that every day?

Regardless of my feelings on the subject, there is something overly cute about doing a look based on red and pink, and since I spent most of my day trying to get bread dough to rise, I thought I'd give in.


It wouldn't be a makeup look from me if I didn't try something a little different, so there's the heart on my lip. It seems that smiling makes it a little strange, plus I probably drew it in sloppily. This isn't the most practical of looks, as if you're anything like me and smack your lips together constantly, that heart will be ruined really quickly.


Whoo, crazy hair! Here's the look with the heart blended out because I was getting sick of trying to keep my lips from being normal.

For the eyes, start with a peach-gold shade and pat that into the inner third of your lids. Blend a rosy-gold shade in the center third of your lid, and take a hot pink eyeshadow to the outer third of your lid and blend that into the crease. Finding peach-gold and rose-gold shades is probably relatively easy on both the drugstore and high-end levels--I used X and Scratch, respectively, both from Urban Decay, but drugstore brands should have similar colours. As for the hot pink eyeshadow, it can be a little more difficult to find, especially at the drugstore level. Wet n Wild and Hard Candy are good places to start! If you're not opposed to online shopping, Fyrinnae's eyeshadow in Superstar and Sugarpill's Chromalust pigment in Decora are good alternatives to the Sugarpill Smitten pigment I've used. If you want to hit up a Sephora, try Urban Decay's eyeshadow in Woodstock, Obsessive Compulsive Cosmetics' loose colour concentrate in Cherry Bomb, or Make Up For Ever's eyeshadow in Neon Pink 75.

Also, don't forget to consider cream formulas or even blush if you can't find a hot pink eyeshadow! You're very likely to find vibrant pink blush that can double as eyeshadow, whether it's powder or cream.

To anchor this look, line your upper waterline with a black eyeliner, curl your lashes, and add a few coats of mascara. (I hate mascara, so this was relatively monumental for me.) I also put some copper cream eyeshadow along my lower lash line, but this is optional.

The hearts were done with red and neon pink eyeshadows on a small detailer brush. All you really need to do is to create a thick v-shape for them, but if you want to get more detailed, try applying the shadows wet or with a mixing medium (i.e.: e.l.f.'s Mist & Set, MAC Fix+, Illamasqua Sealing Drops, or make your own with a ratio of 3:1 water to glycerin) and they'll not only apply more cleanly but they'll probably not fade as easily. I've also cut a little heart shape out of the sticky part of a post-it note and used that as a guide, first applying a thin layer of eyeshadow primer and then dusting eyeshadow over that. Do whatever works for you!

I took a light pink eyeshadow with a touch of glitter in it and used that as blush, but you can use any light pink blush that you have. For the lips, use a pink lipstick over your entire mouth, then take a red lipstick and a lip brush and paint in a heart on your lips. (xoVain posted an article yesterday about this and they have great pictures to follow!) If you're not into the whole high-maintenance lip thing--which, let's face it, I'm on board with you--you can just apply a pink, berry, or red lipstick and call it a day.

BROWS
Anastasia Beverly Hills Beauty Express brow kit in Brunette
Anastasia Beverly Hills Tinted Brow Gel in Granite

EYES
theBalm Put a Lid On It! eyeshadow primer
Inner corner - Urban Decay eyeshadow in X (peach shimmer with gold shift)
Center of lid - Urban Decay eyeshadow in Scratch (rose gold shimmer)
Outer lid + crease - Sugarpill Chromalust pigment in Smitten (hot magenta shimmer with reflective sparkles)
Upper lash line - Urban Decay 24/7 Glide-On Eye Pencil in Perversion (matte blackest black)
Lower lash line - LUSH Cream Eyeshadow in Happiness (sunset copper shimmer)
Lashes - Maybelline Volum' Express the Mega Plush mascara in Blackest Black
Decoration - Sugarpill Chromalust pigment in Asylum (red shimmer) + Sugarpill ElektroCute neon pigment in Love Buzz (neon hot pink with yellow/orange/red sparkles)

FACE
Benefit boi-ing concealer in 01
Blush - Sugarpill Chromalust pigment in Birthday Girl (princess pink with fuchsia sparkles)

LIPS
NYX Matte Lipstick in Tea Rose (mauve-pink)
Heart - NYX Slim Lip Liner in Plush Red (cool red) + Obsessive Compulsive Cosmetics Lip Tar in Stalker (true blue-based red)

12 February 2014

look of the day - cream + gold + green

This morning, I went to get a physical because I have a big girl job (!!!) and my arms are currently quite sore because I had to get a vaccine in each arm. I'm also piloting the Crimson Typhoon so no matter how much I try with my makeup, all of my photos make me look exceptionally ill. How is it possible for me to look any more pale?!

Now that I've given you too much information about my life, onto the look for today! My darling friend Livy requested a look with gold, green, and cream eyeshadow. I'll admit that I skipped the cream eyeshadow because every colour I had close to that was invisible on my skin, but I'll let you all know how to incorporate it into the look.


I was experimenting with overdrawing my lips here, too, so that's why my mouth looks different. (Note to self: don't try overdrawing with lip tar again.) Obviously, red lipstick is not a requirement for this look! I'm just sort of obsessed with the colour, plus Valentine's Day is coming up and even though I personally have no interest for the holiday, a red lip is suitable for any day.

Time for a mini-tutorial! After priming the lid, take a gold eyeshadow from the inner corner to about 1/3 to 1/2 across the lid. You can use a brush/sponge applicator to do this, or use your fingers like I did. I have a particular distrust of brushes for some reason, but I'm working on it. Take a medium green eyeshadow and pack it next to your gold eyeshadow, keeping the colour a bit further back from the outer corner of your eyelid. I used an olive green colour (aptly named Up All Night to Get Loki, as Livy is obsessed with Tom Hiddleston) but any green will do.

Take a black eyeliner or eye crayon and colour in the outer corner of your lid. Blend this like crazy--you're not getting a close-up of the look because I forgot to do this and it looks terrible. Whoops! After you blend this really well, take your green eyeshadow and pat it lightly onto the black base to give the shadow some depth. I happened to use a darker green eyeshadow than the Loki one, but I happened to have one on hand.

Go wild with black eyeliner. I chose to do winged liner with a liquid liner that has somehow yet to die, but you can just use a simple pencil and smudge that around your eyes. The sky is the limit! I also took a green liquid liner to my lower lash line, but that was me being ~fancy~.

You should use blush with this look so you're not washed out, especially if you do red lipstick! Somehow, even with blush I still look like Casper's ghost friend who learned how to paint her face, so um... Yeah, watch how you balance your look. I think a nude pink lipstick would look great, or if your lips are naturally quite pigmented like mine are, you can get away with some lip balm and call it a day.

If you have a cream eyeshadow and you're not a ghost like I am, you can place some in the inner corner of your eyelid to open up the eye, or blend it into the crease of your eye up to your browbone for a sick highlight.

Other possible combinations of cream + gold + green:
  • Cream over the lid, gold on the outer corner + crease, green along your lash lines
  • Green all over the lid with gold patted smack dab in the center of your upper lid
  • Cream into the inner corner, green all over your lid, gold along the lower lash line
  • Smokey eye! Green along the lash line brought up halfway on the lid, gold from there to the crease, and cream from the crease to your browbone


Since these colours are rather different from each other, make sure to blend like crazy, whatever you choose to do.

BROWS
Benefit Instant Brow Pencil in Deep
Anastasia Beverly Hills Tinted Brow Gel in Granite

EYES
theBalm Put a Lid On It! eyeshadow primer
Inner lid - Urban Decay eyeshadow in Half Baked (golden bronze)
Outer lid - Shiro Cosmetics loose eyeshadow in Up All Night to Get Loki (olive green with gunmetal shimmer)
Outer corner - Ulta Eye Crayon in Black Tie + Sugarpill Chromalust pigment in Junebug (forest green shimmer)
Upper lash line - Maybelline Line Stiletto Ultimate Precision Liquid Eyeliner in Blackest Black
Lower lash line - Stila Stay All Day® Waterproof Liquid Eye Liner in Moss (forest green)

FACE
Urban Decay Naked Skin liquid foundation in 1.0
Benefit boi-ing concealer in 01
rms beauty lip2cheek in diabolique (dark burgundy)
LUSH Cream Eyeshadow in Happiness (sunset copper shimmer)

LIPS
Obsessive Compulsive Cosmetics Lip Tar in Vintage (deep burgundy)

28 January 2014

wicked series - elphaba, the wicked witch of the west

Still too cold to function... I got up earlier than usual (and by earlier, I mean I woke up at 9:30AM. I think I'm possibly turning into a bum) and still managed to get nothing done today except this makeup look and some cleaning. WELL OVERDUE CLEANING, BY THE WAY. I moved back home from university last May and I tried to clean when I was fully moved out of my apartment in August, but by then my allergies started kicking in and now it's the end of January and I totally had it coming. Chinese New Year is in two days and I'm supposed to have my room cleaned by then, but something tells me it'll only look clean from the surface just to reveal the same old mess underneath.

Anyway, back on-topic. Elphaba is obviously known for her verdigris, but I wasn't about to paint my face green. Not that I wouldn't do it--come on, I walk around with multi-coloured eyebrows on a regular basis--but the only face paint I have is probably close to 8 years old and I should probably throw it out. Cream makeup is really the only way to go if you want to paint your whole face (and maybe your body, too) but as I had none, I chose to do something that pays more subtle homage to the misunderstood witch.


Green eyeshadow? You betcha. The colour and placement of colour is pretty self-explanatory: a lighter green on the inner half of the lid and a darker green on the outer half and blended into the crease. But the key here is to start with your eye makeup before you do anything else because once you're done placing colour on your upper lid, you want to take a Q-tip dipped in makeup remover and create a blunt edge on the outer corner. Most people go for a pointed wing shape, but I wanted to give this look a little more originality by making the outer edge squared off.

Line the lower lash line with a green eyeshadow, take black eyeliner to the waterlines and your upper lash line, and that's all you need to do with your eyes. Mascara is optional, but if you feel naked without it, you can definitely add it here. I don't usually bother and honestly tend to forget mascara because my lashes are short and straight and the way my eyes are shaped tends to leave mascara all over my bottom lid.

I filled in my eyebrows with a slightly darker shade of brow powder and used concealer above and below my brows to highlight them and give them a clean, crisp look.

Idina Menzel has some killer cheekbones, but a lot of the other actresses who played Elphaba don't, and I decided to put a very minimal amount of contouring and highlighting around my cheekbones and temples.

I outlined my lips with lip liner and actually slightly rounded out my naturally pointed Cupid's bow. Then I filled in my lips with the Bite Beauty lip cream and I thought it was a little light, so I topped off the colour with a lip tar that leaned more toward the brown side and it darkened it just enough to my taste. If you prefer a lighter lip, stick with your usual red lipstick.

BROWS
Anastasia Beverly Hills Beauty Express brow kit in Brunette
Anastasia Beverly Hills Tinted Brow Gel in Granite

EYES
theBalm Put a Lid On It! eyeshadow primer
Inner lid - Wet n' Wild Fantasy Makers glitter palette from the Hauntingly Hip Stencil Kit - Enchanted Angel (green shade) + Sugarpill Chromalust pigment in Absinthe (lime green shimmer)
Outer lid - Saucebox Cosmetics Midnight Blossoms palette (lighter green shade)
Lower lash line - Saucebox Cosmetics Midnight Blossoms palette (darker green shade)
Waterlines + upper lash line - Urban Decay 24/7 Glide-On Eye Pencil in Zero (black)

FACE
Embryolisse Lait-Crème Concentrè
MAKE UP FOR EVER HD Microperfecting Primer
Urban Decay Naked Skin liquid foundation in 1.0
Urban Decay 24/7 Concealer Pencil in CIA
Under eyes - It Cosmetics Bye Bye Under Eye concealer in Light
Highlight - Benefit high beam
Contour - Too Faced Milk Chocolate Soleil Bronzer
L'Oréal Paris Magic Smooth Soufflé Blush in Celestial (muted rosy pink)

LIPS
NYX Slim Lip Liner in Deep Red
Bite Beauty Cashmere Lip Cream in Port (deep wine)
Obsessive Compulsive Cosmetics Lip Tar in Anita (browned burgundy)


27 January 2014

wicked series - glinda the good

Chicago, seriously, can we tone it down with the weather? I love snow far more than the average person (judging off of the Facebook posts I've seen filled with complaints) but this is a little much. And then there's the cold.

Today is colder than the polar vortex days that came through the area two weeks ago, and it's supposed to continue tomorrow. Hopefully, it'll warm up soon because I think I'm going crazy being cooped up in my house, but at least that means I have no excuse to not clean, right? Ahem.

This look was also requested by Meg, who asked for looks based off of the two main characters in Wicked. I happen to have a long standing love for this musical since the 8th grade. I listened to the soundtrack continuously for over a year with almost no variation. It was just always on repeat, and when my then 48-year-old Chinese father started dancing around behind me singing the words to Popular, I knew I had gone too far. I went to see the musical on Broadway with my high school music department and if I hadn't been bone tired from the 3 hours of sleep a night we were averaging, I would have been the most irritating human being that entire day. Trust me.


I slept with my hair in 11 (!!!) little French braids last night and not only did it take forever, but my arms were so sore and I kept missing pieces of hair. So frustrating! But it was worth the trouble because I woke up, took them out minus the one I did around my hairline, and I was left with something akin to crimped hair without the frizz. Well, sort of--you can see the left side of my hair being hilarious.

Anyway! Not that you can entirely see it in the above photo, but the eyeshadow was really fun. Because Glinda's colour scheme in the musical is so varied but always bright and mostly pastel, I focused on her sparkling blue dress when she's travelling by bubble and her pink dress during Popular. (Sidenote: how many of you knew that her dress from the dance into the Popular scene was originally blue?) The original Glinda was also known for her famous pale pink dress.

I started with a light blue matte shadow into the inner third of my lid. Next, I took a pale pink shimmery eyeshadow over the rest of the lid, and then blended the two colours together with a lavender shadow. I blended a deep pink eyeshadow into the crease and tapped on a shimmery, iridescent white eyeshadow up toward the browbone. Taking a shimmery blue-toned iridescent eyeshadow, I traced the colour along my lower lash line.

For eyeliner, I took a white liner to my lower waterline, and a black liner to my upper waterline and lash line. The black eyeliner was mostly to anchor the false lashes so there wasn't a gap between them and my natural lashes.

With a pale pink blush on my cheeks and a slightly shimmery pink gloss on my lips, the look is complete! I mixed a NYX lip cream with a shimmery lip gloss for this because I didn't think a single product would produce the effect I wanted, and I used a bit more of the lip cream along the insides of my lips to give it a bit of a gradient effect.

Glinda is a very whimsical character, so that's the overall effect for which I aimed here. She's cheery and colourful, and you can definitely switch out the blues and pinks for other colours. Maybe the yellow she wore to the Emerald City?

BROWS
Anastasia Beverly Hills Beauty Express brow kit in Brunette
Anastasia Beverly Hills Tinted Brow Gel in Granite

EYES
theBalm Put a Lid On It! eyeshadow primer
Inner lid - Sigma Beauty Crème de Couture eyeshadow in Blue Chocolat (light aqua matte) and Blueberry Cream (milky blue velvet matte)
Center lid - Sugarpill Chromalust pigment in Paperdoll (lavender shimmer)
Outer lid - Sugarpill Chromalust pigment in Birthday Girl (princess pink with fuchsia sparkles)
Crease - Urban Decay eyeshadow in Woodstock (saturated deep pink shimmer) + Shiro Cosmetics loose eyeshadow in Moon Prism Power (pale pink-cream shimmer with opalescent green shift and golden sparkle)
Inner corner + lower lash line - Sugarpill Chromalust pigment in Lumi (snow white with turquoise sheen)
Lower waterline - Urban Decay 24/7 Glide-On Eye Pencil in Yeyo (metallic white)
Upper lash line - Urban Decay 24/7 Glide-On Eye Pencil in Zero (black)
False lashes - Ardell Double Up Lashes in 201 Black

FACE
Urban Decay Naked Skin liquid foundation in 1.0
Urban Decay 24/7 Concealer Pencil in DEA
Under eyes - Benefit Fake Up Concealer in 01 Light
Sigma Beauty Crème de Couture Blush in Strawberry Ambrosia

LIPS
NYX Xtreme Lip Cream in Strawberry Jam (geranium pink) + Shiro Cosmetics lip gloss in Moon Prism Power